# Google Login
> This page is about FlutterFlow Studio (the visual builder), not FlutterFlow (the app builder you use by describing your app).
URL: https://docs.flutterflow.io/integrations/authentication/firebase/google-oauth-login
Learn how to add Google OAuth login in your FlutterFlow Studio app.
Google Sign-In allows users to authenticate using their Google Accounts.
:::note[Prerequisites]
Before getting started with this section:
- Complete [**Firebase Setup**](https://docs.flutterflow.io/integrations/firebase/connect-to-firebase)
- Complete [**Initial Setup**](https://docs.flutterflow.io/integrations/authentication/firebase/initial-setup)
- Added **SHA-1 key** and regenerated **Config Keys**.
:::
## Enable Google Sign-in Provider in Firebase
Open the **Firebase Console**, click on **Authentication** and then follow the steps below to enable Google Sign in for your Firebase project.
## Add a Login Screen with Google Login Action
### Create a Login Screen
To allow users to authenticate, you need a Login or Sign-in Page with a button.
You can create your own or use the one from page templates.
### Add Login Action
1. On your Google Login button, select **Actions** from the properties panel (the
right menu) and select **Add Action**.
2. Search and select the Log In (under **Backend/Database > Firebase
Authentication**) action.
3. Set **Auth Provider** to **Google**.
4. Enable **Create User Document** and set the **Collection** to **users**. After successful login, this will insert the user's details, such as email, name, and photo, into the *users* collection. **Note** that, if a user exists already, it won't add the details again.
If you haven’t already, see how to [create *users* collection](https://docs.flutterflow.io/integrations/authentication/firebase/initial-setup#creating-the-users-collection).
:::tip
To let users log out of your app, you can use the [**Logout**](https://docs.flutterflow.io/integrations/authentication/firebase/auth-actions#logout-action) action.
:::
## Test Google Login
### Running on Device
To test during development, you can run your app locally using FlutterFlow Studio’s Local Run. Follow the [Local Run documentation](https://docs.flutterflow.io/testing/local-run) and see [how to set up a physical device](https://docs.flutterflow.io/testing/local-run#setup-physical-device) to start testing.
### Running on Test Mode/Run Mode
1. To test Google sign-in in Test or Run mode, you must add the authorized
domain in the Firebase console and Google cloud console.
- **For Test mode**, you can open the browser console, try logging in, and
get the domain from the browser console. It should look like `ff-debug-service-frontend-ygxkweukma-uc.a.run.app`. For *Pro* users, the above URL will also include `-pro`, such as `ff-debug-service-frontend-pro-ygxkweukma-uc.a.run.app`.
- **For Run mode**, you can simply use 'app.flutterflow.io'.
2. To add in Firebase console:
1. Open the Firebase console and click on Authentication and select the
Setting tab.
2. Select **Authorized domains** from the left side menu.
3. Click **Add domain**.
3. To add in Google cloud console:
1. Head over to
your [Project Credentials](https://console.cloud.google.com/apis/credentials?project=_) page.
2. Ensure you are on the correct project. In our case, we are using the
[EcommerceFlow demo project](https://bit.ly/ff-docs-demo-v2), it will be different for you.

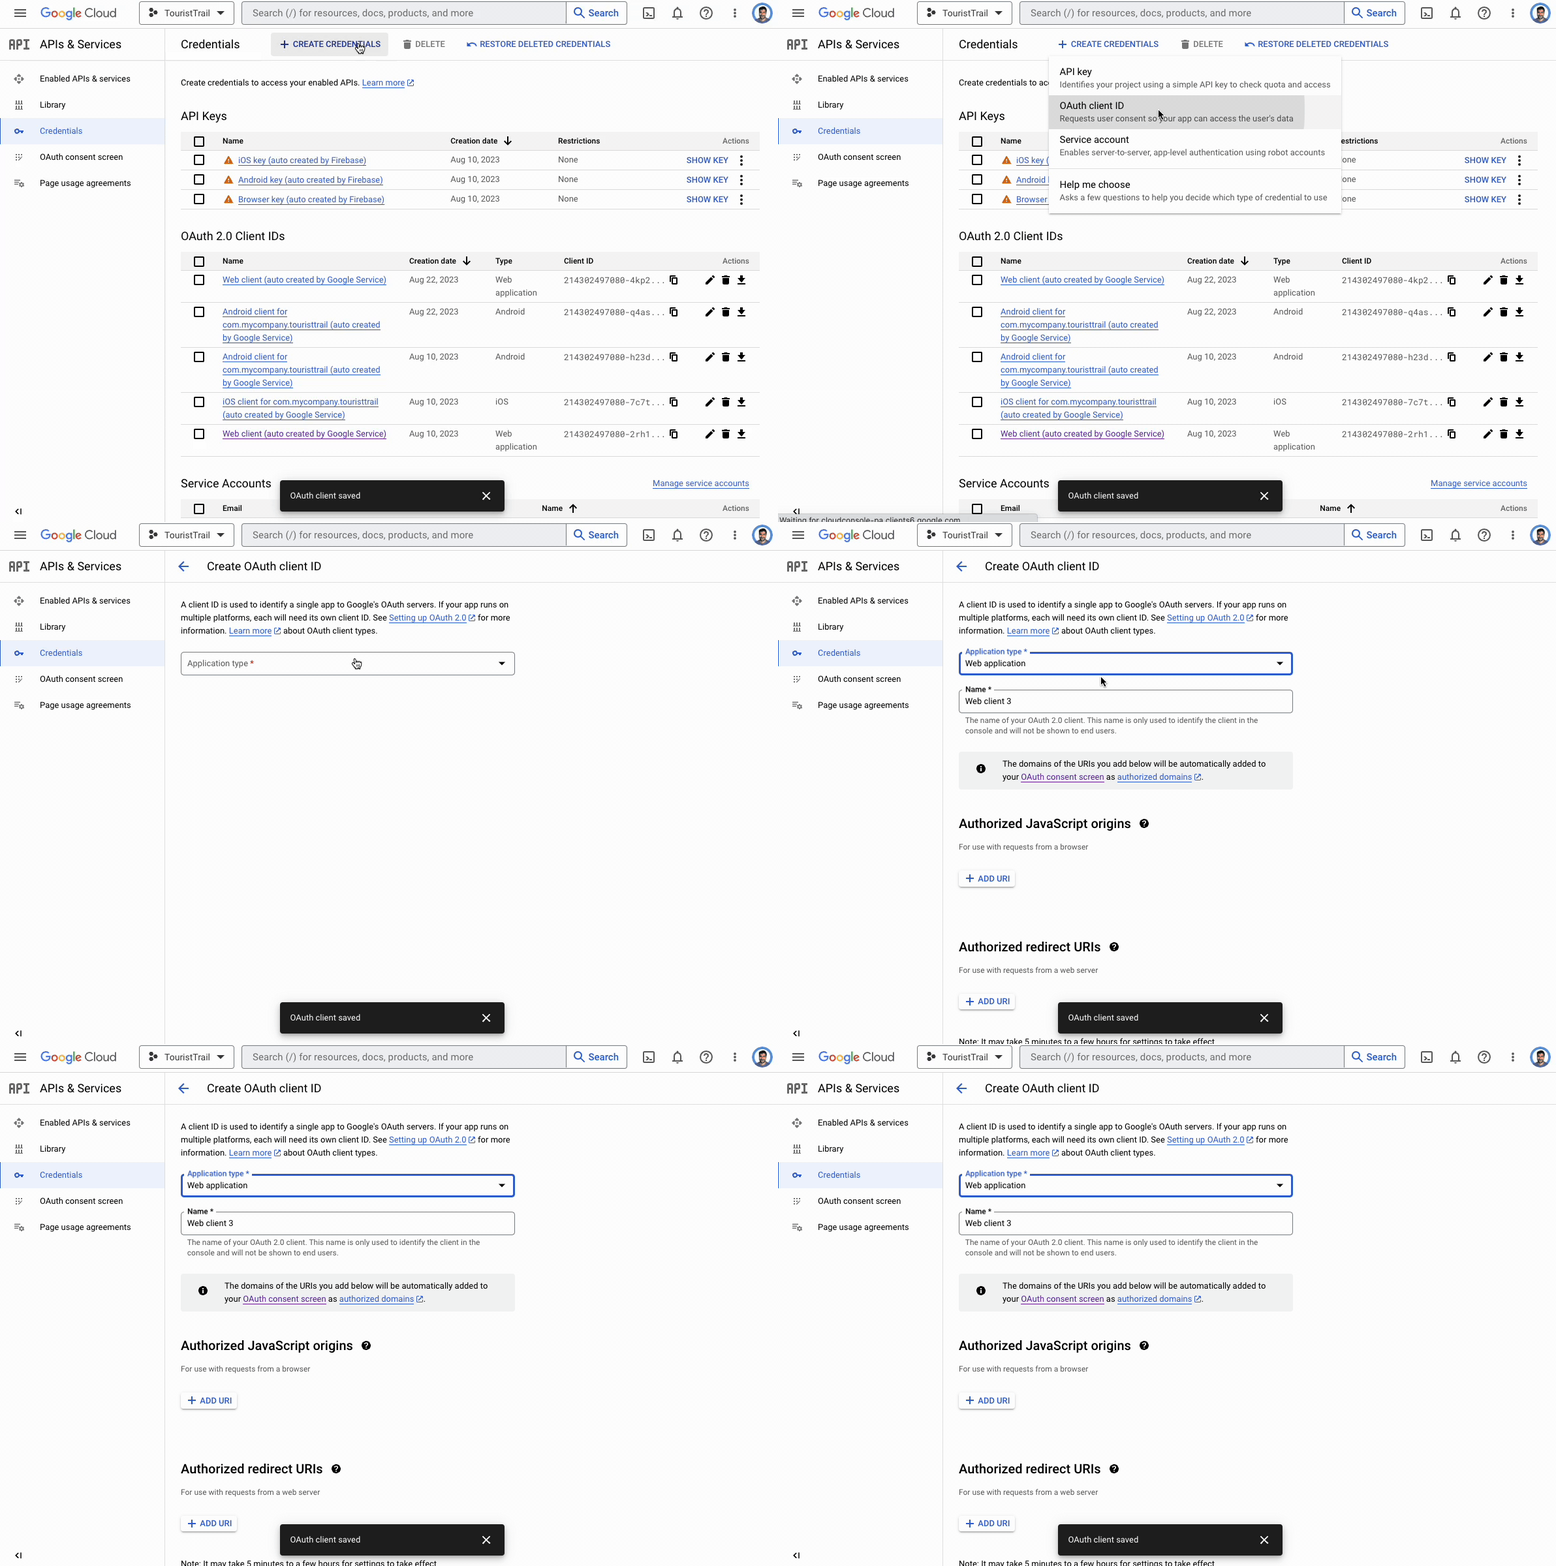
3. Under the '**OAuth 2.0 Client IDs**', select '**Web client** (auto created by
Google Service)'.
4. Under the '**Authorized JavaScript origins**', click ADD URI and add both the
URL.
5. Similarly, under the '**Authorized redirect URIs**', click ADD URI, add both
the URL and append '/__/auth/handler' at the end.
4. If you don't see the Web client created yet, you can create new one by
clicking **+ CREATE CREDENTIALS**, selecting OAuth client ID and then select
Application type to Web application.
### Verify user created in Firebase Dashboard
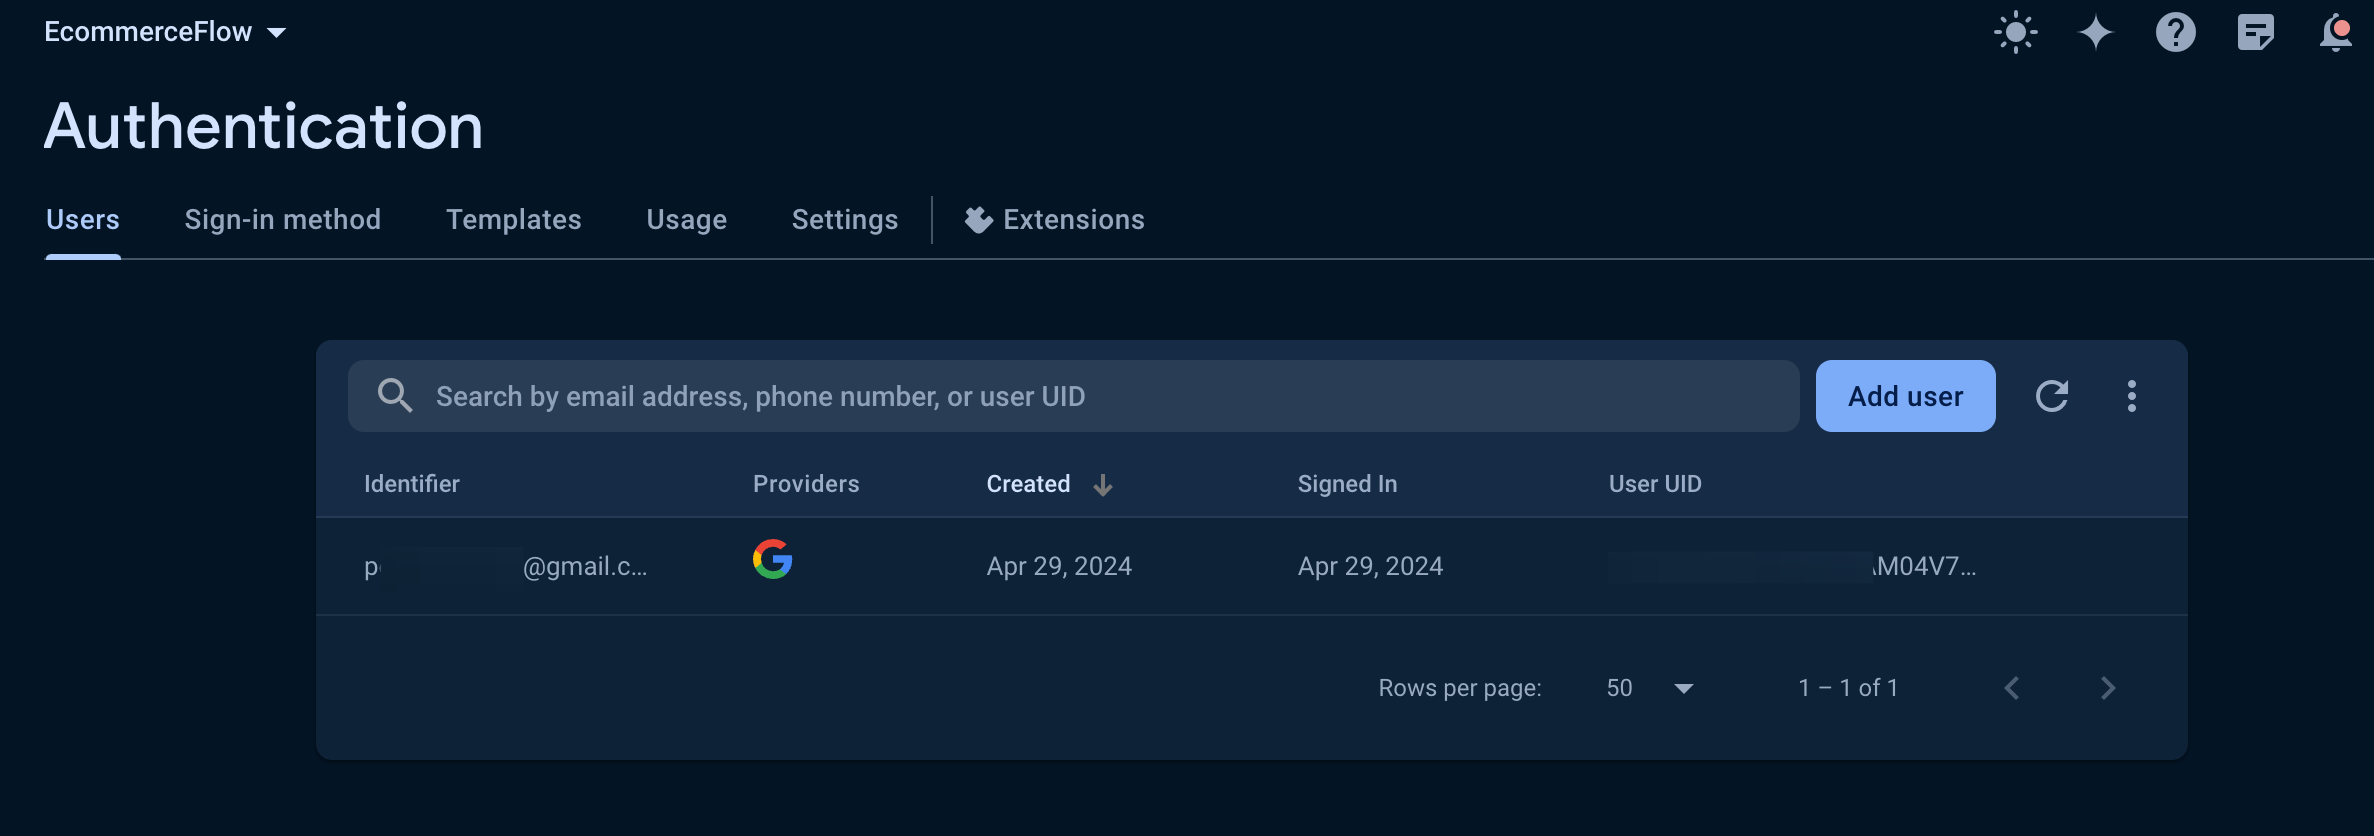
To confirm the successful integration of Google authentication and the creation of users, navigate
to your **Firebase project > Authentication > Users** and check the entries.
:::note
To ensure that your Android release will authenticate to Google, make sure to use Google Play Console's SHA keys - see how to [**Get SHA keys for release mode**](https://docs.flutterflow.io/integrations/authentication/firebase/initial-setup#getting-sha-keys-for-release-mode).
:::