# Google Analytics
> This page is about FlutterFlow Studio (the visual builder), not FlutterFlow (the app builder you use by describing your app).
URL: https://docs.flutterflow.io/integrations/google-analytics
Learn how to setup Google Analytics in FluterFlow
Integrating Google Analytics into your FlutterFlow Studio project enables you to monitor user interactions, track app performance, and gain valuable insights to enhance user experience. Here's a comprehensive guide on setting up and utilizing Google Analytics within FlutterFlow Studio.
:::tip
Google Analytics is integrated into Firebase. This means you must [**set up Firebase**](https://docs.flutterflow.io/integrations/firebase/connect-to-firebase) to enable analytics tracking and log events from your FlutterFlow Studio app.
:::
## Enable Google Analytics in Firebase
To enable Google Analytics in Firebase, open the [Firebase Console](https://console.firebase.google.com/) and select your project. From the left-side menu, navigate to **Analytics > Dashboard** and click **Enable Google Analytics**. Choose an existing Google Analytics account or create a new one, then **Finish** the setup.
## Enable Google Analytics in FlutterFlow Studio
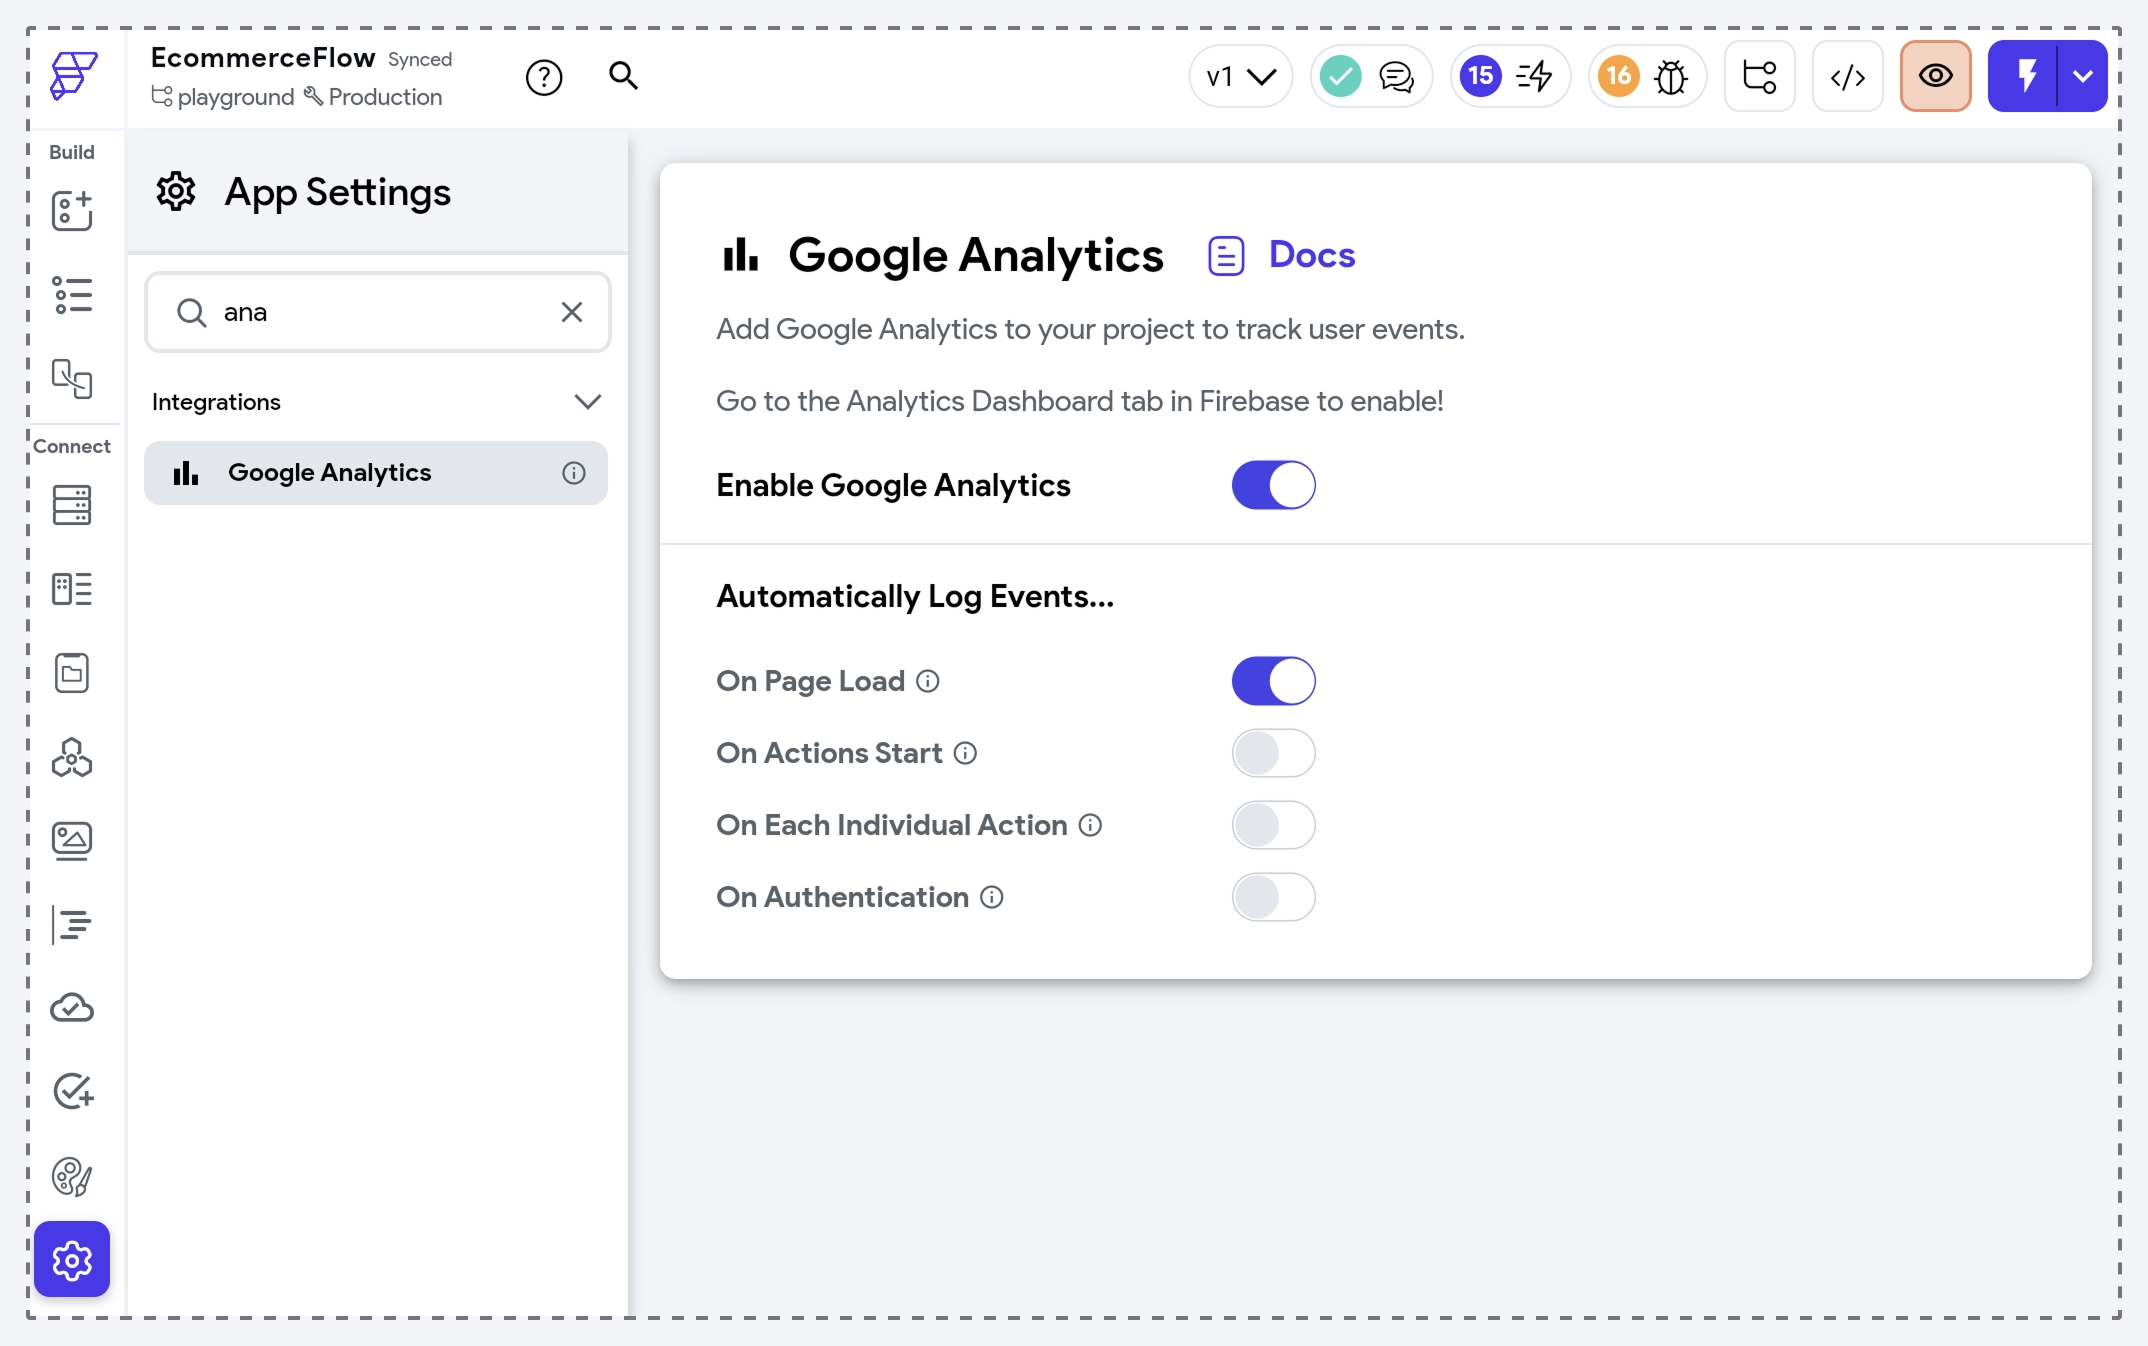
To begin collecting analytics data, navigate to **Settings and Integrations > Integrations > Google Analytics** within your FlutterFlow Studio project and toggle on the **Enable Google Analytics** option.
Once enabled, you can set the [Predefined Events](#predefined-events). You can selectively toggle these options to log specific user interactions automatically.
### Predefined Events
You can enable automatic logging for the following events:
- **On Page Load**: Logs an event when a user opens a page, recorded with the Firebase-recommended name `screen_view`. The actual screen name is accessible within the `screen_name` parameter.
- **On Action Start**: Captures events when users interact with widgets that trigger actions. Events are logged in the format `{WIDGET_NAME}_{TRIGGER_TYPE}`. For instance, if a user taps a button that navigates to another page, the event is logged as `Button_navigate_to`.
- **On Each Individual Action**: This logs an event for every individual action or action chain for a given widget. It will be logged as `{WIDGET_NAME}_{TRIGGER_TYPE}` For example, when the user taps on a button and adds the *Upload Media* action followed by the *Update App State* action, the event will be logged as `Button_upload_media` and `Button_update_local_state`.
- **On Authentication**: Logs events for authentication-related actions such as sign-up, login, logout, password reset, or account deletion. Events are logged using the action type, e.g., `sign_up` or `login`.
:::tip
To easily identify widgets in the analytics dashboard, consider giving them recognizable names, such as `BuyButton` instead of just `Button`.
:::
## Google Analytics Event [Action]
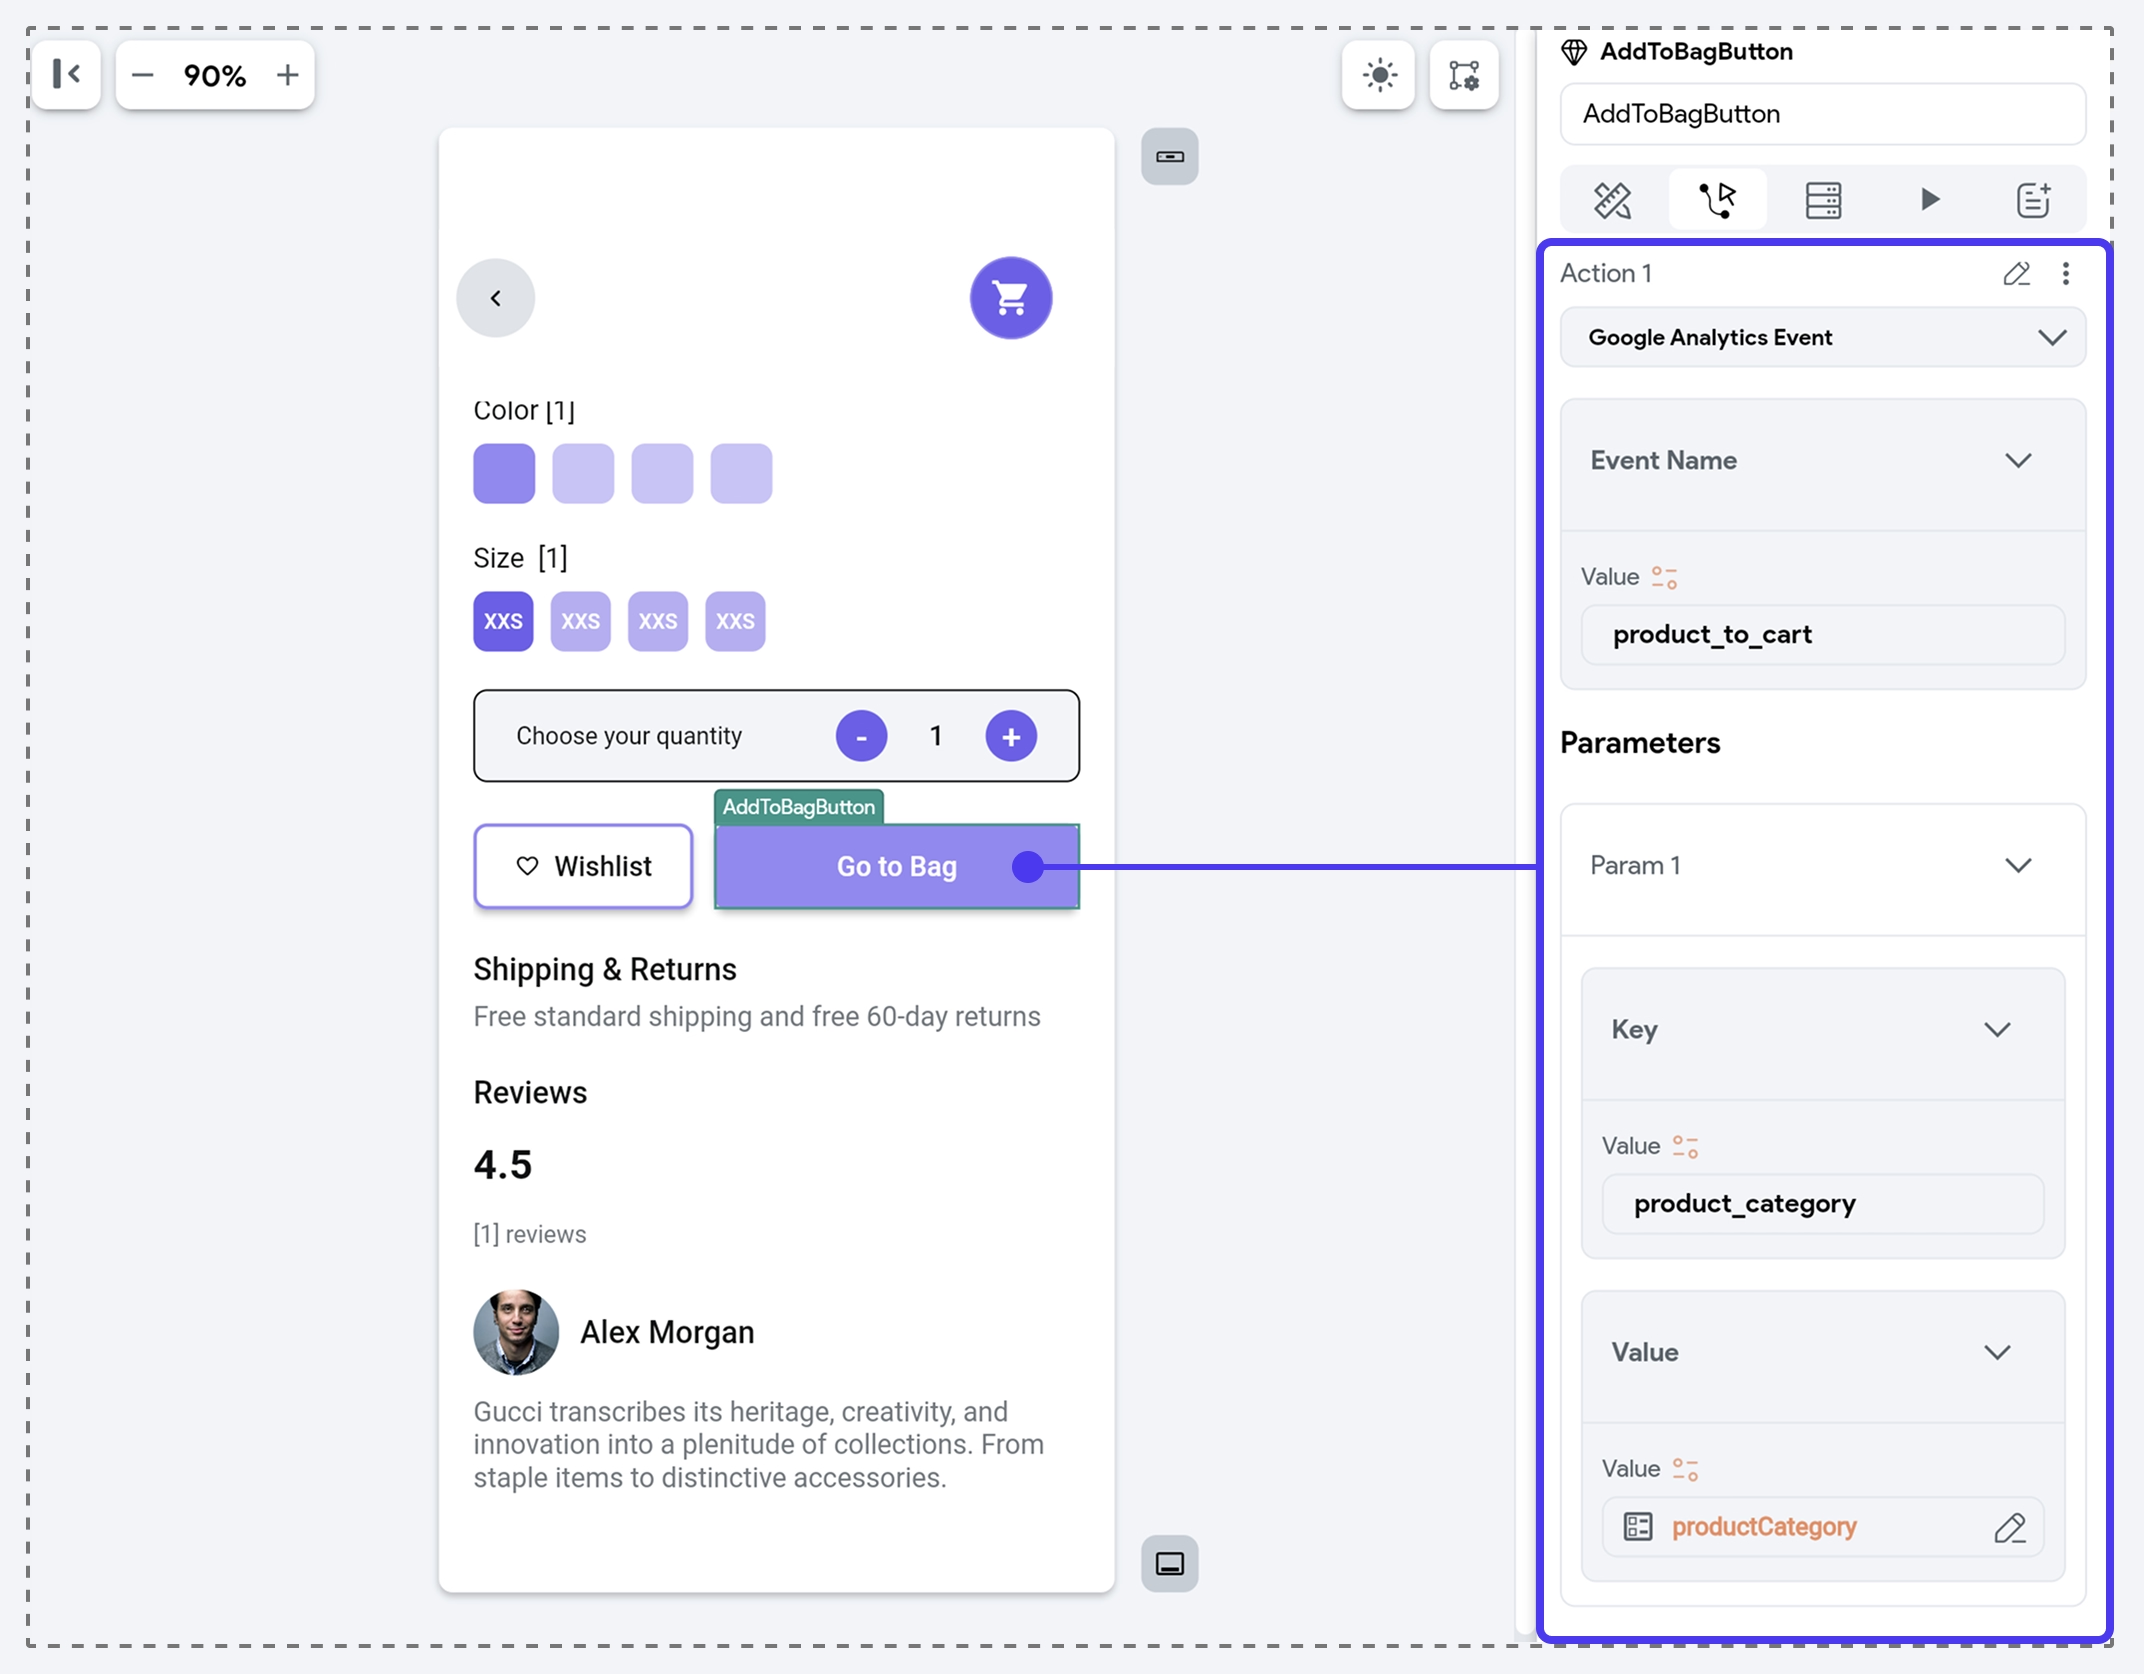
In addition to predefined events, you can track specific user actions relevant to your app’s goals. This action allows you to log custom events and record additional information through parameters.
For example, in an e-commerce app, you might log product purchases with parameters such as `product_category: electronics` to track item categories and `user_role: premium` vs. `user_role: guest` to differentiate user types.
To log a custom event, add the **Google Analytics Event** action and enter a clear, descriptive **Event Name**. You can add parameters for extra context by clicking **+ Add Parameter** and providing **Key**-**Value** pairs (e.g., `product_category` as the Key and `electronics` as the Value).
## Viewing Analytics Data
To see all tracked events, both automatic and custom, open the [Firebase Console](https://console.firebase.google.com/) and select your project. From the left-side menu, navigate to **Analytics > Dashboard** to access detailed event reports.
Use this data to gain insights into app screens, which funnels convert best, and where churn or drop-offs occur. In the long run, these metrics help you make data-driven improvements that enhance the user experience and maximize the impact of your FlutterFlow Studio app.
## FAQs
Why don’t I see any Analytics data yet?
Event data may not appear instantly, which can be frustrating during development. Firebase may take up to **24 hours** to display event data in the main dashboards. Ensure your device has internet access and you’ve used the app at least once since enabling Analytics.