# Custom Data Types
> This page is about FlutterFlow Studio (the visual builder), not FlutterFlow (the app builder you use by describing your app).
URL: https://docs.flutterflow.io/resources/data-representation/custom-data-types
Learn how to create and utilize custom data types in FlutterFlow Studio to handle complex data structures that predefined types can't cover.
In FlutterFlow Studio, custom data types allow you to define structured data models that enhance data management and consistency across applications. These data types serve as blueprints for organizing related data attributes.
For instance, you can define a custom data type "Book" that combines predefined data types, such as a string for the title, an integer for the year of publication, and a list of strings for the authors.
Custom data types have several key advantages:
- **Reusable**: Define once, use everywhere.
- **Easy to Update**: Change data structure in one place, and see it reflected throughout your app.
- **Consistent**: Keeps data format uniform across the application.
- **Efficient**: Simplifies complex data handling, reducing errors and redundant code.
:::note
- Use custom data type when predefined data types, such as _integer_ and _string_ may not be enough to store certain kinds of information.
- FlutterFlow Studio also supports some [**Built-in Data Types**](https://docs.flutterflow.io/resources/data-representation/data-types#built-in-data-types).
:::
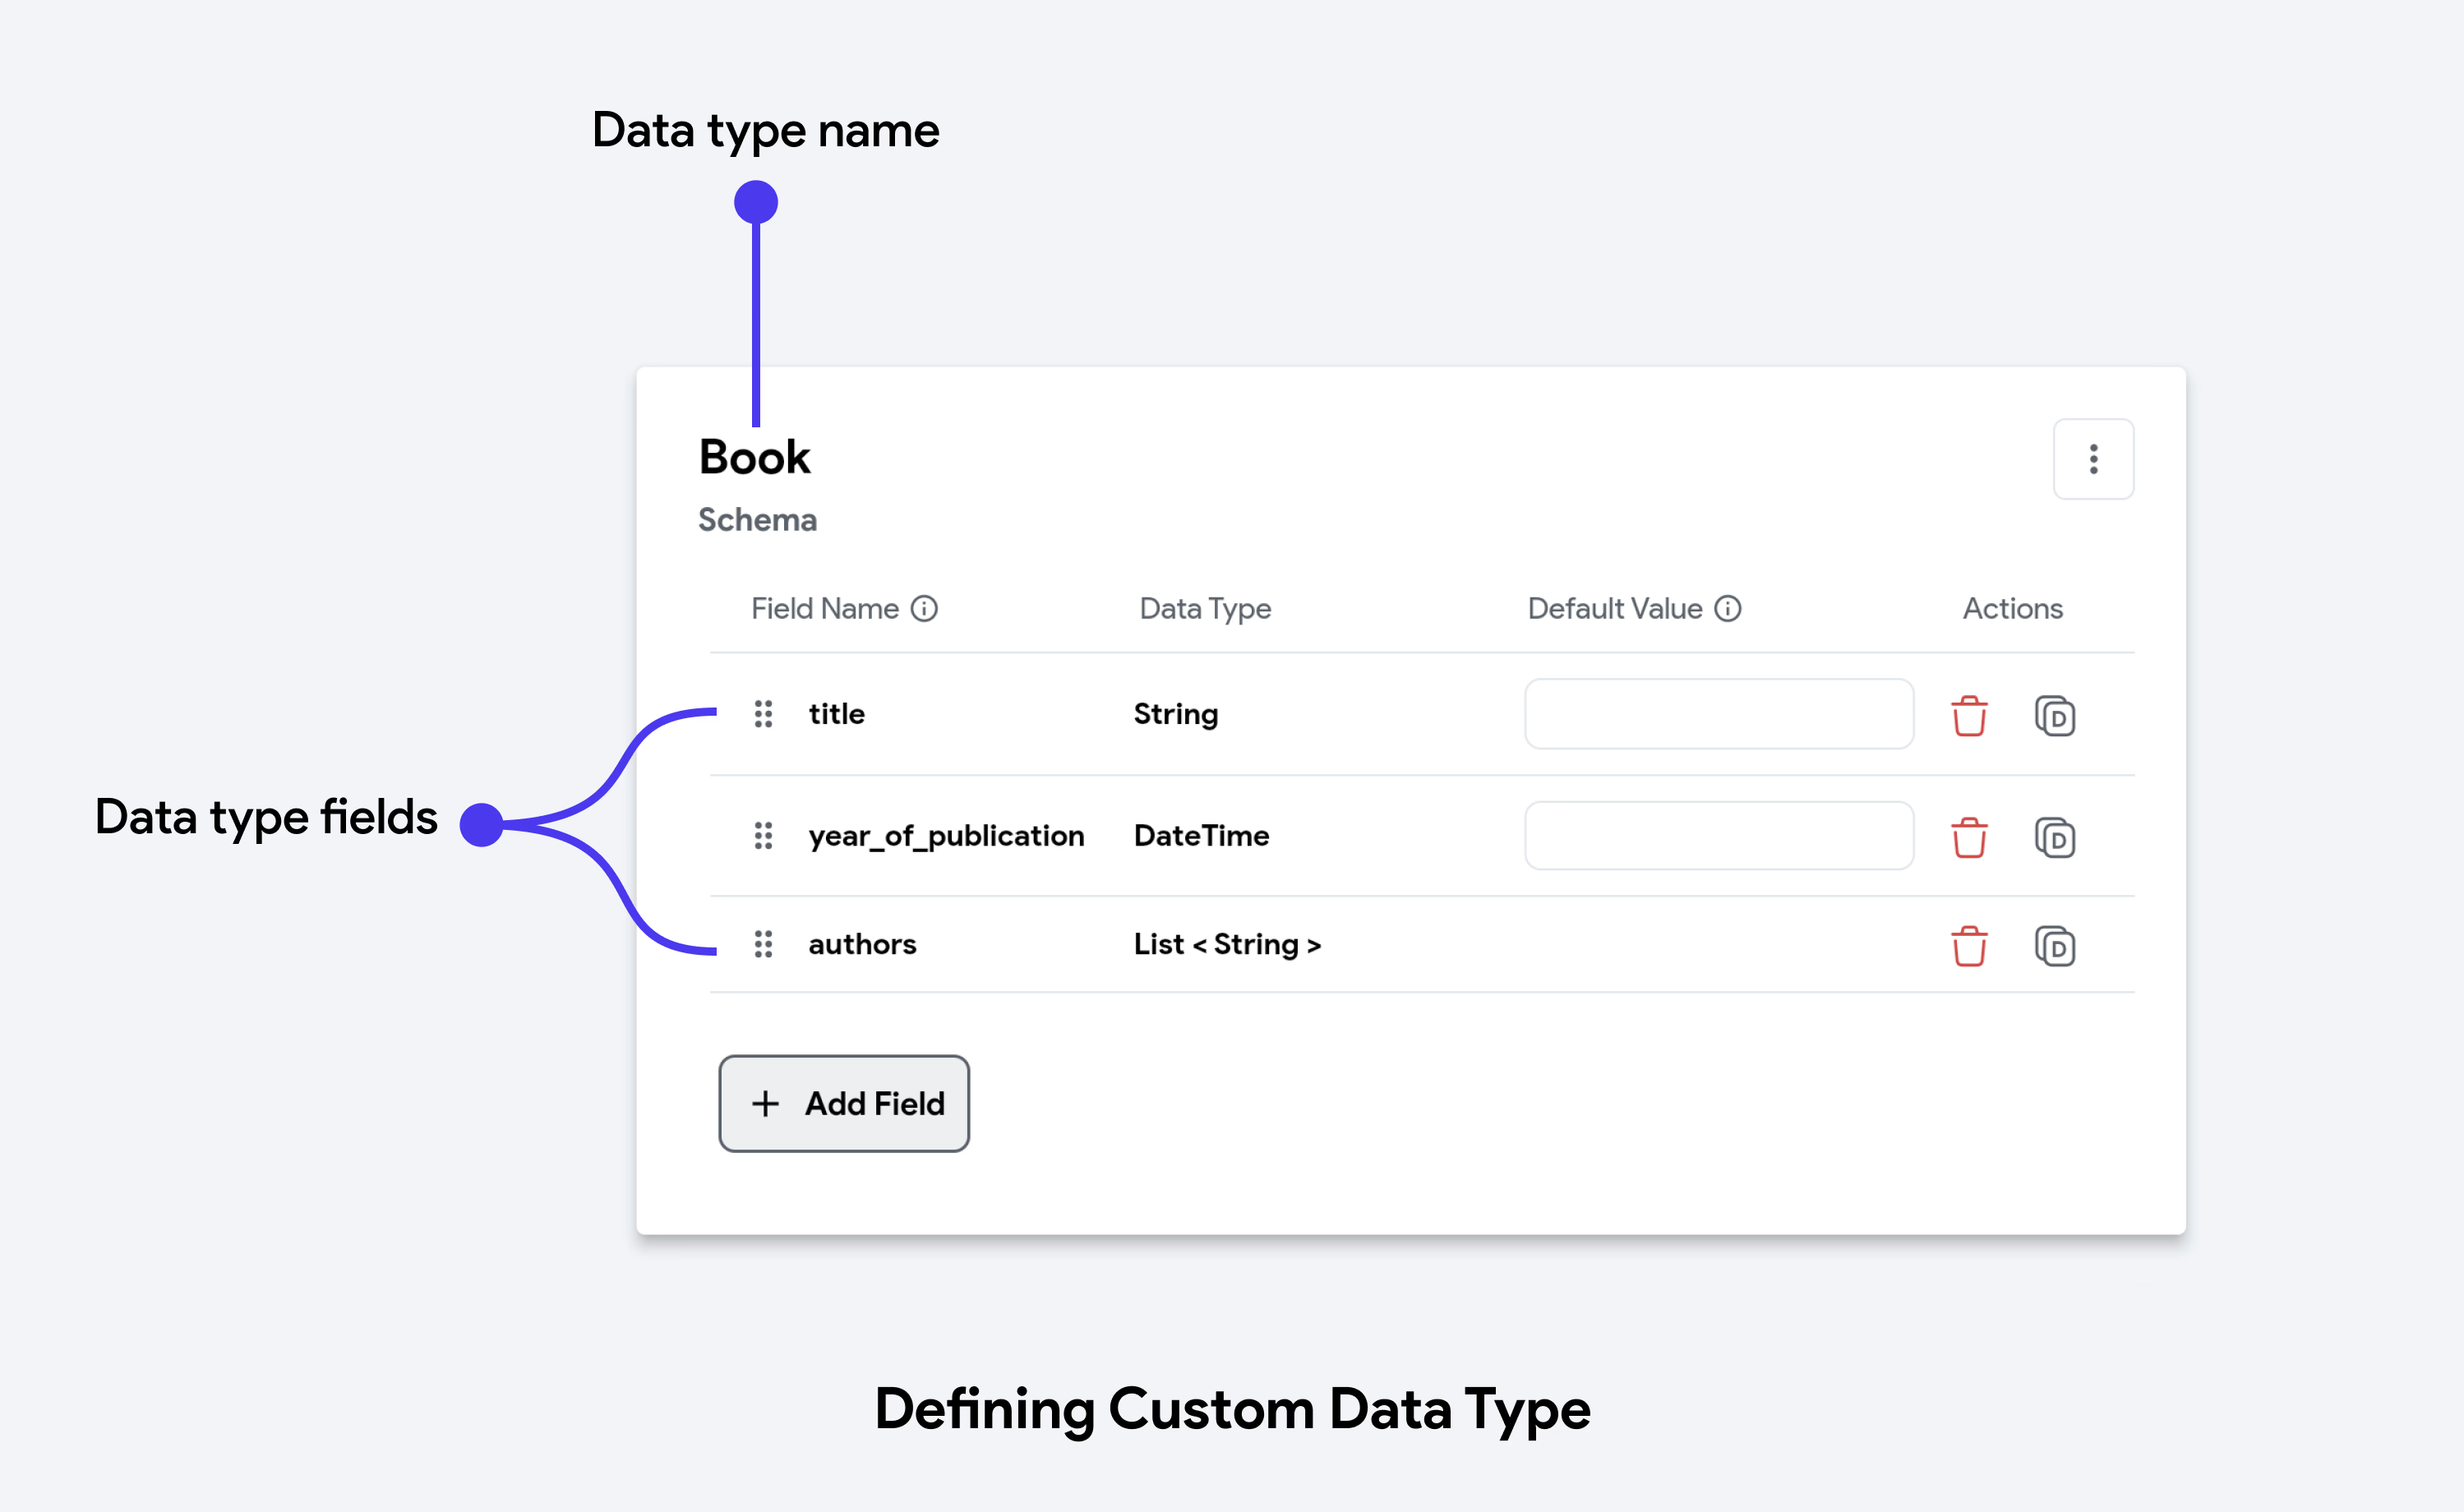
When you create a custom data type, it internally creates a Struct. A struct, or structure, is a composite data type that lets you combine fields of different data types to construct a data structure to suit your specific needs.
:::note
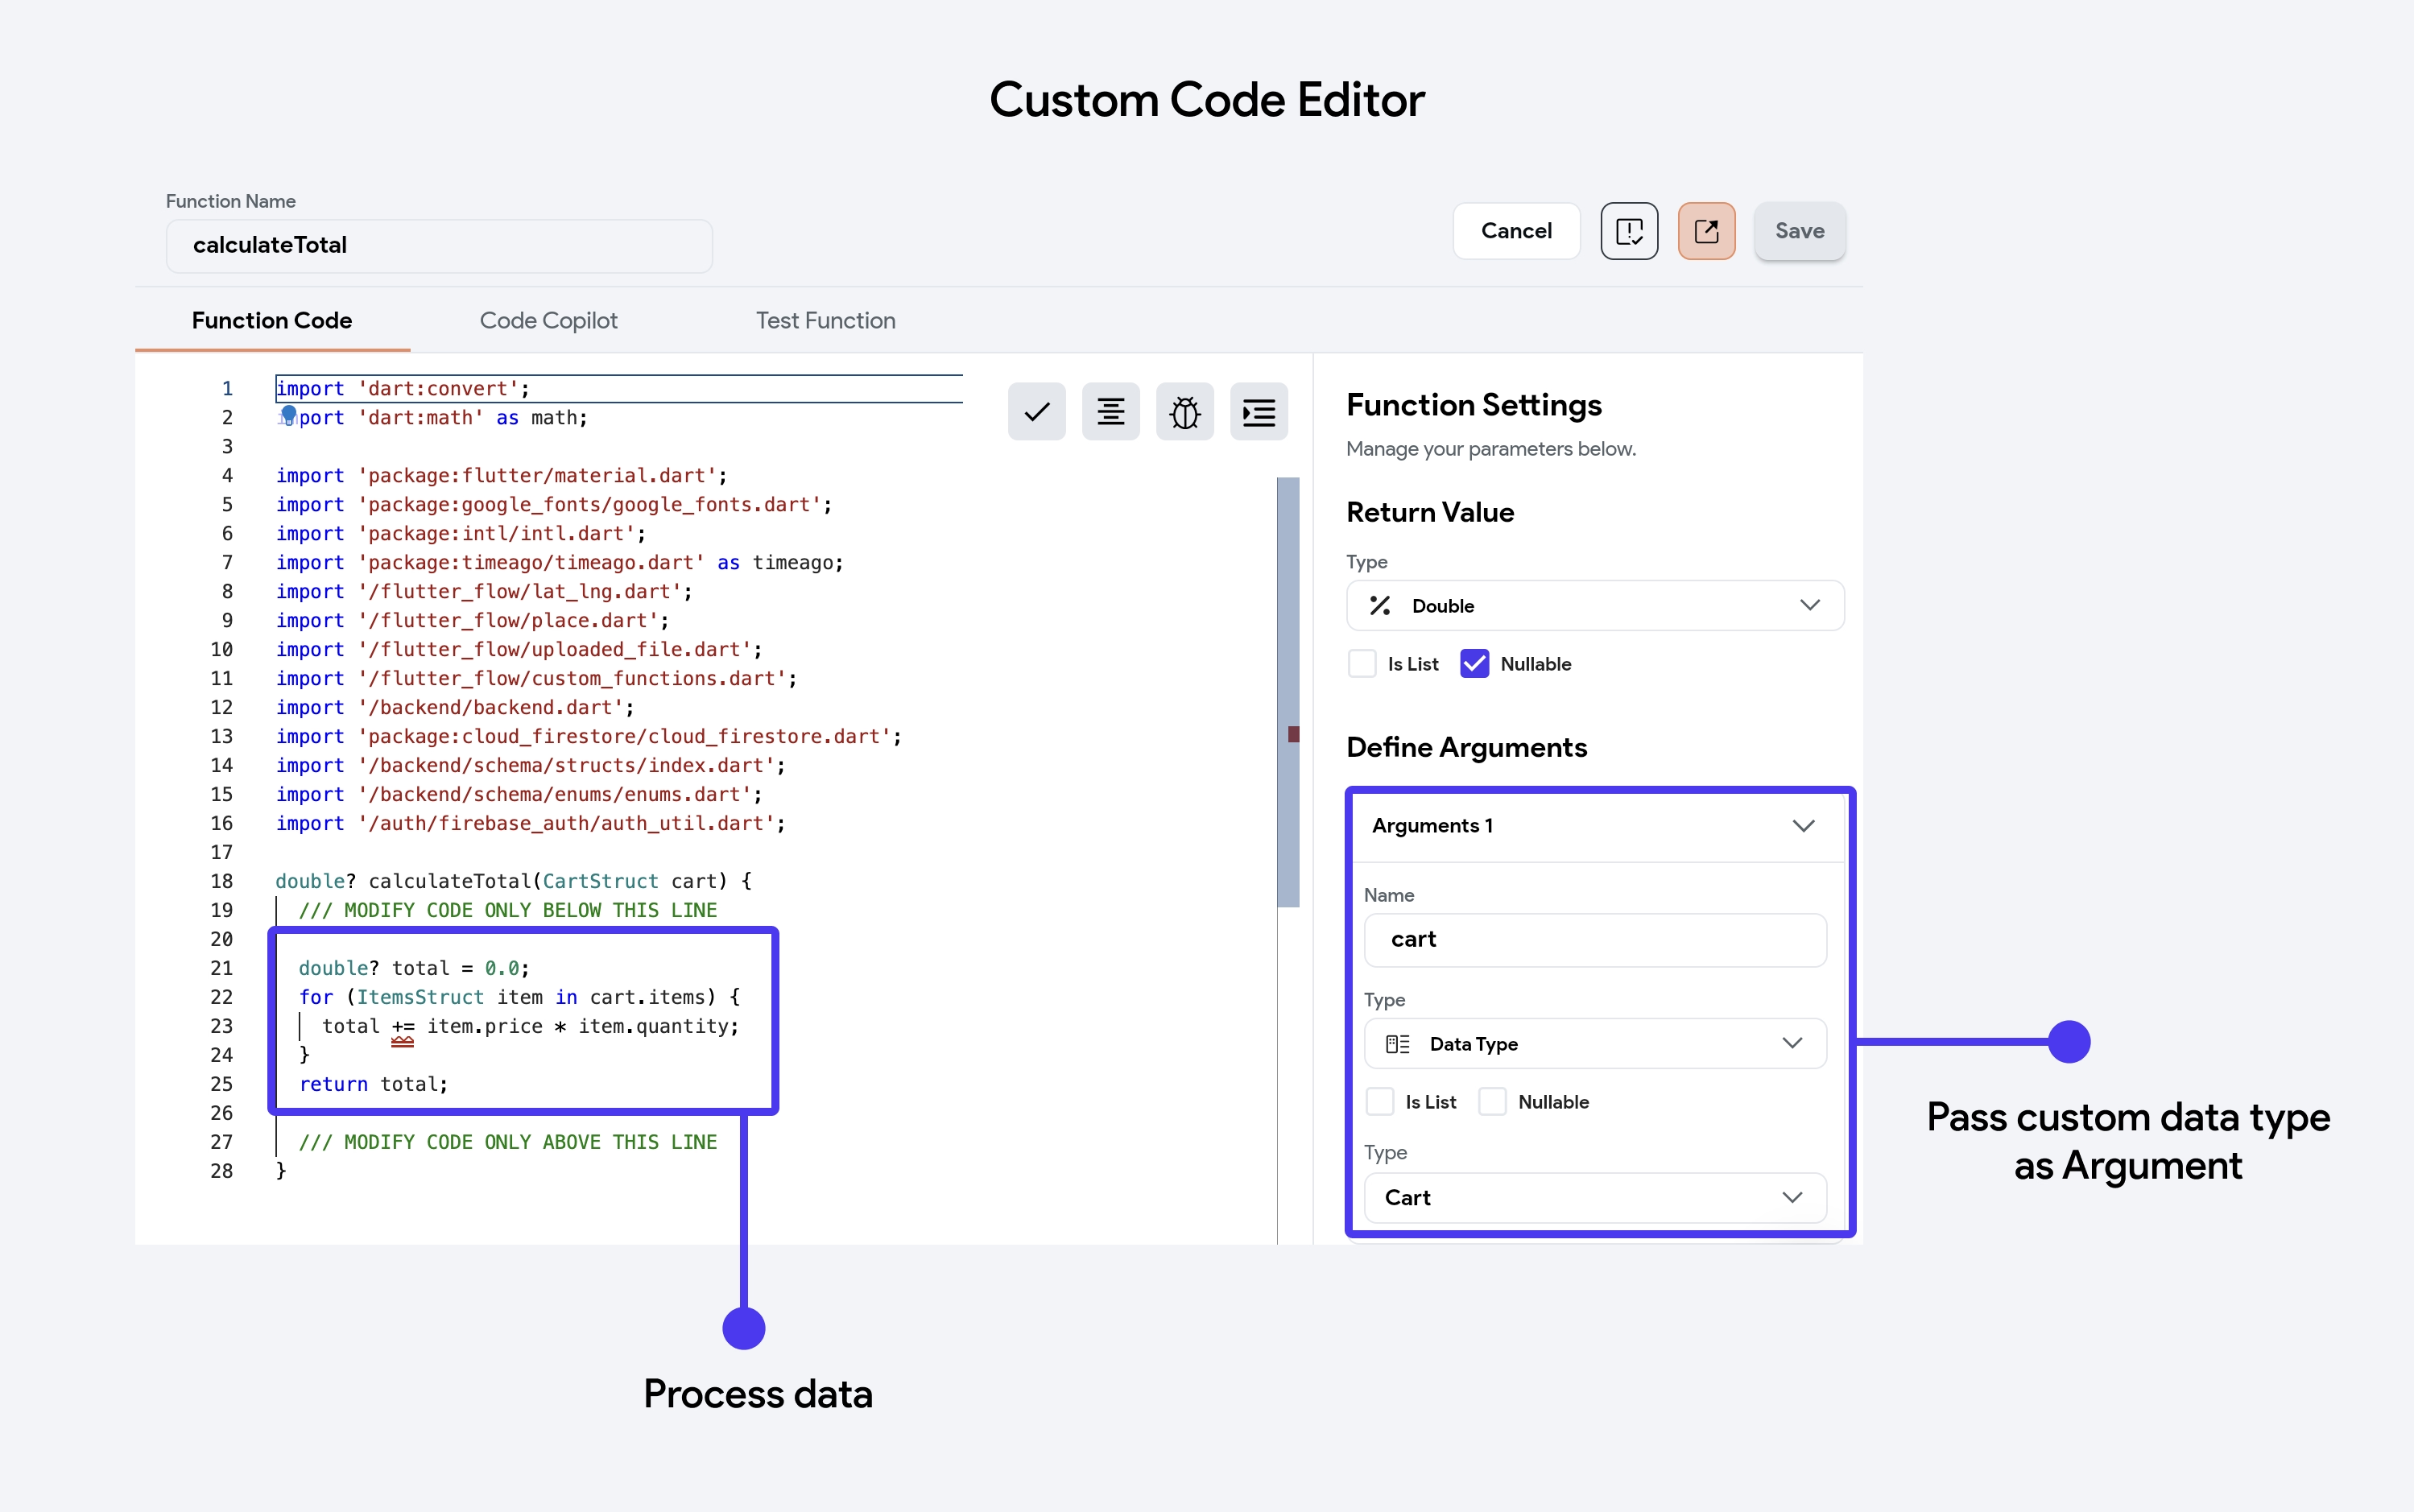
The class name for such data types is generated by appending "Struct" to the name of the data type. For example, if you create a custom data type called "Cart", the corresponding class would be named "CartStruct".
:::
## Creating Custom Data Type
To create a custom data type, specify its name and the corresponding fields. Each field can have a distinct data type. You can also specify if a field should allow multiple entries using the **Is List** toggle.
:::tip[Naming Convention]
When naming custom data types, always use **UpperCamelCase**, as recommended by the Dart Style Guide. To learn more, refer to the guide on **[Naming Variables & Functions](https://docs.flutterflow.io/resources/style-guide)**.
:::
## Organizing Data Types and Enums in Folders
The **Data Schema** panel lists your custom data types on the **Data Types** tab and your [Enums](https://docs.flutterflow.io/resources/data-representation/enums) on the **Enums** tab. Both tabs support folders, so you can group related items.
To add items and folders, click the **+** button at the top of the panel. The menu offers the following actions:
- **Add Data Type** (or **Add Enum** on the **Enums** tab).
- **Create Data Type from JSON** (on the **Data Types** tab only).
- **Add Folder**. Enter a name in the **Folder Name** dialog, and then click **Create Folder**. Folder names can contain letters, numbers, underscores, and spaces. A folder name must be unique within its parent folder.
To open the menu for an item or folder, hover over its row and click the three-dot menu button, or right-click the row. You can also navigate menus with the keyboard:
- Use the arrow keys to move between menu options.
- Press **Right Arrow** or **Enter** to open a submenu.
- Press **Left Arrow** or **Esc** to close a submenu.
- Press **Enter** or **Space** to select an option.
For a data type or an enum, the menu can include these actions:
- **Move to Folder**: Opens a submenu that lists your folders, nested to show the folder hierarchy. This action appears when there's a folder the item can move to.
- **Move to New Folder**: Prompts for a folder name, creates the folder, and moves the item into it.
- **Move Out of Folder**: Returns the item to the top level. This action appears when the item is in a folder.
For a folder, the menu can include the following actions:
- **Add Data Type** (or **Add Enum**).
- **Create Data Type from JSON**.
- **New Subfolder**.
- **Rename Folder**.
- **Delete Folder**.
Items you create from a folder menu are placed in that folder. To rename a folder, you can also double-click it. When you delete a folder, its contents move to the parent folder.
:::tip
Drag an item or folder onto another folder to move it there. To move it to the top level, drag it onto empty space in the panel.
:::
To find an item, enter text in the search field at the top of the panel. Search ignores case and spaces and keeps matching results within their folder structure:
- Matching items remain in their folders.
- Folders with no matching items are hidden.
- If a folder name matches, the folder shows all of its contents.
- Folders expand while you search.
:::note
Folders on the **Enums** tab affect only how enums are organized in the panel. Enums remain in a single file in the generated code.
:::
## Accessing Custom Data Type
After creating a custom data type, it’s treated internally as a [Dart class](https://dart.dev/language/classes). However, just defining the custom data type doesn’t hold any real data. To work with actual data, such as storing a user profile or a review, you need to create an **instance** of custom data type.
Creating an instance allows you to:
- Assign specific values to each field in your custom data type.
- Store the instance in app state, page state, or pass it between widgets.
- Access individual fields wherever needed.
To create an instance of a custom data type, first you need to [create a state variable](https://docs.flutterflow.io/concepts/state-management#creating-state-variables) (of type **Data Type**) that will hold the instance. Then, to create and add the instance to the state variable, open the **Set from Variable** dialog and select **Create Data Type Object > Project Data Type**. Choose the data type you want to use. After that, set values for each of the required fields.
### Custom Data Type in Custom Code
Sometimes, you might want to access the custom data type in your custom code. Our custom code editor allows you to receive and pass data into a variable of a custom data type. For example, you could manipulate or analyze the data as needed, and then return the modified result in the custom data type.
## Use case: mapping JSON responses from API calls
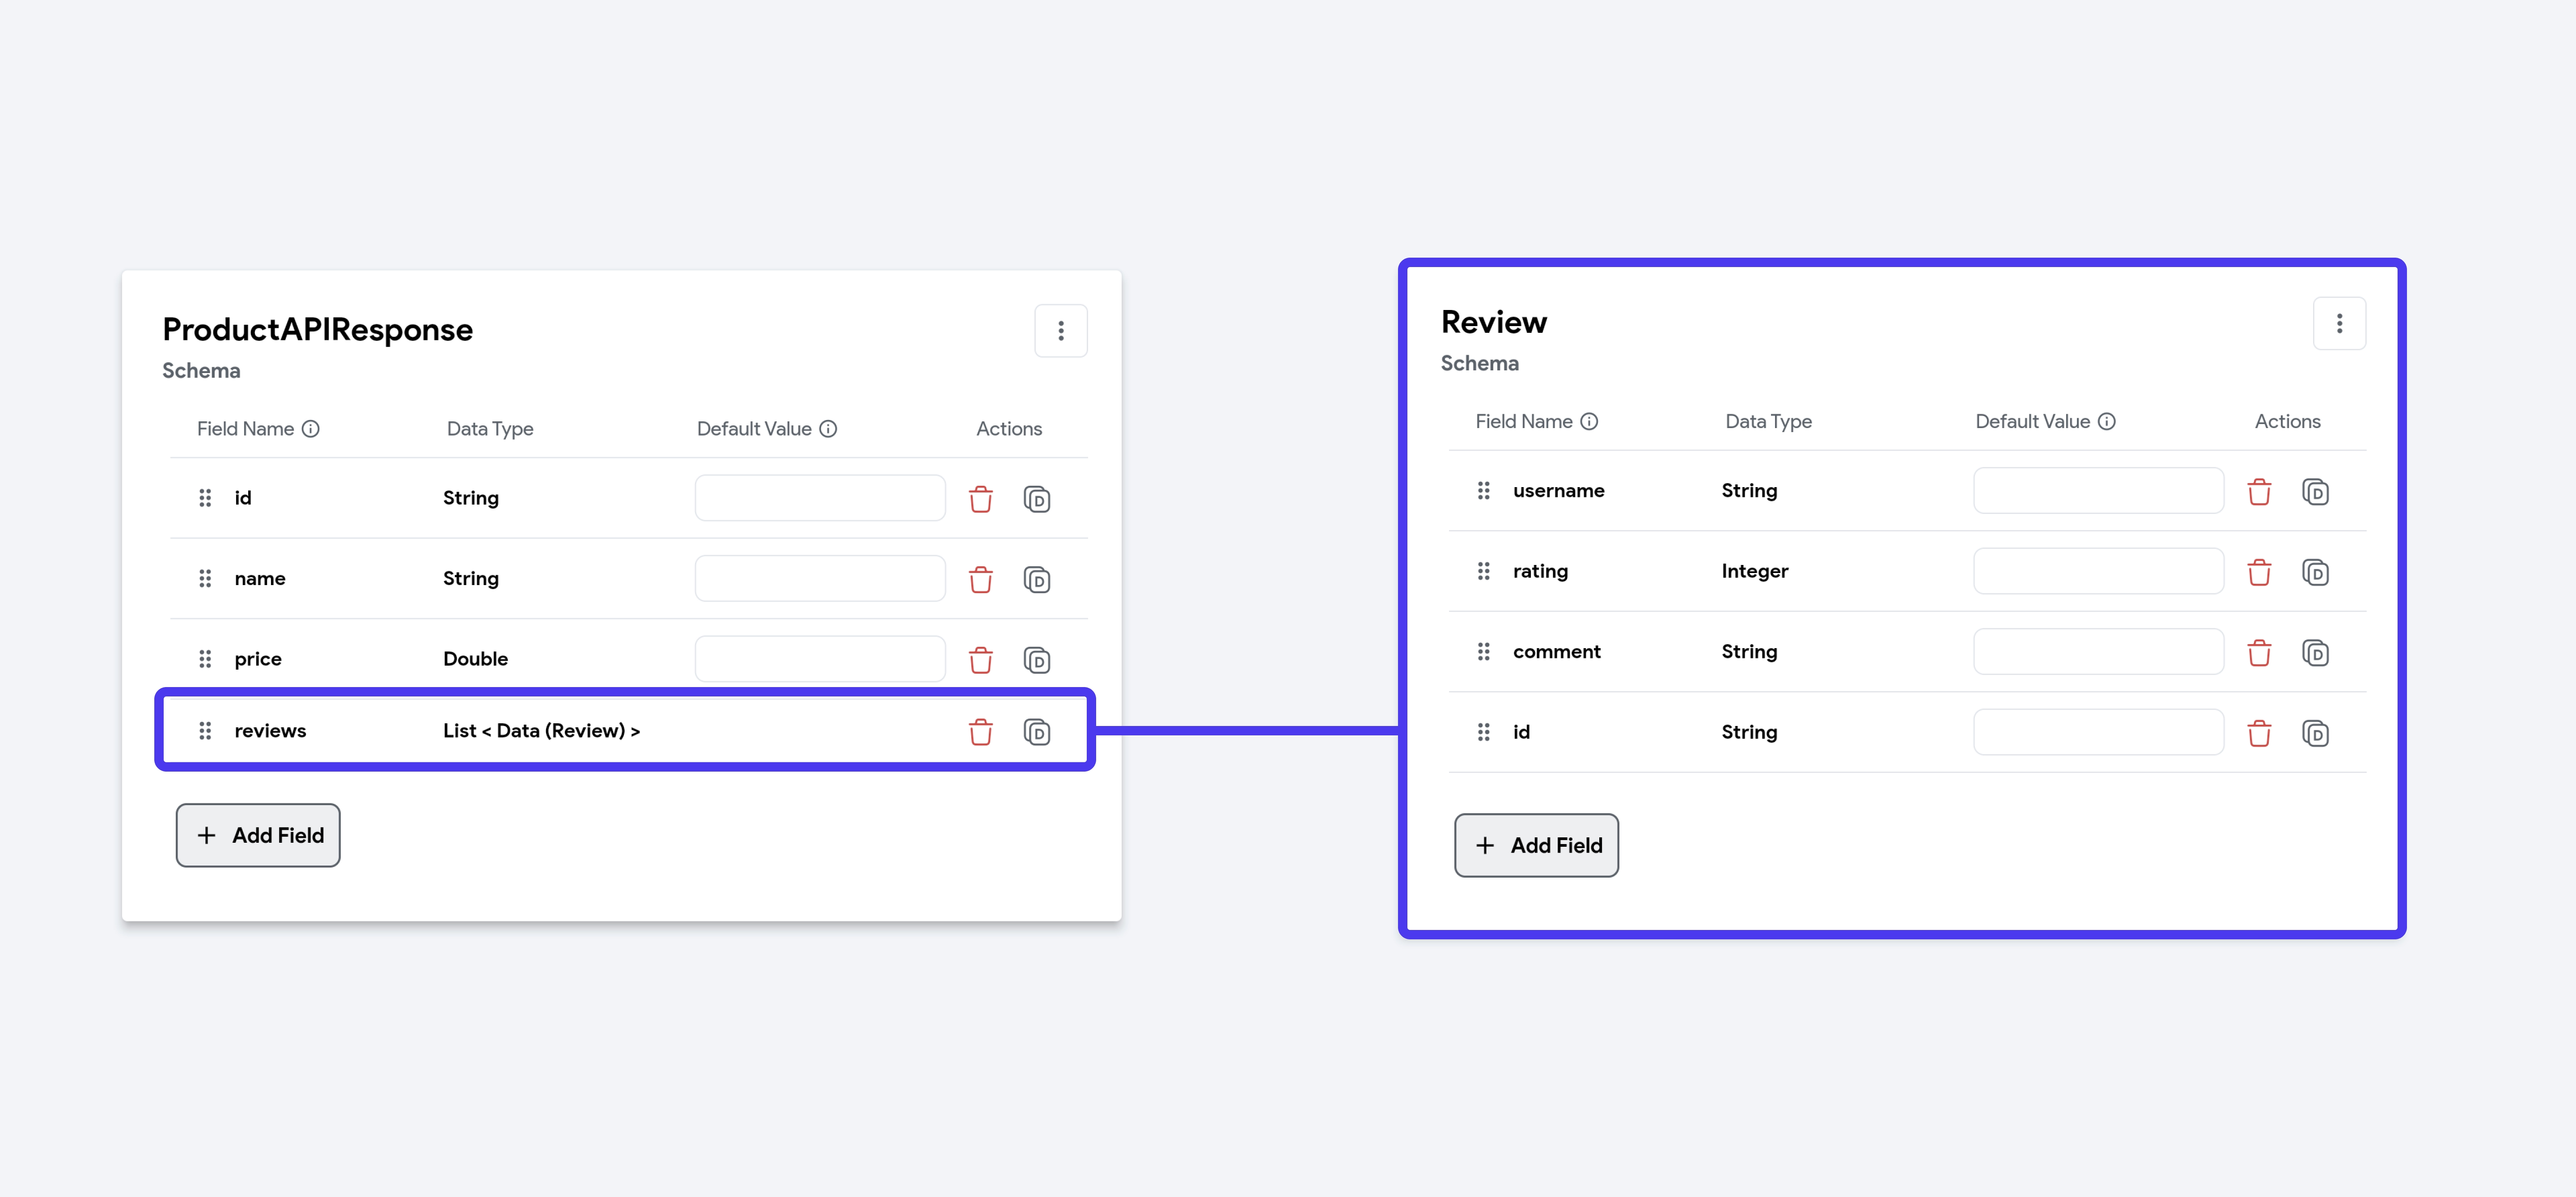
Consider a case where you're calling an API that returns product details. You could create a custom data type 'Product' representing the JSON structure and then map the JSON values to the custom data type field.
So, if the JSON response looks like this:
```json
{
"id": "a1b2c3d4e5f678901234567",
"name": "Jacket",
"price": 199.99,
"reviews": [
{
"id": "rev101",
"username": "mike",
"rating": 4,
"comment": "This product exceeded my expectations in every way. Highly recommended!",
},
{
"id": "rev102",
"username": "kera",
"rating": 2,
"comment": "Great quality, but the color was not as shown in the picture.",
}
],
}
```
Here’s how you map into a custom data type: