# Draggable and DragTarget
> This page is about FlutterFlow Studio (the visual builder), not FlutterFlow (the app builder you use by describing your app).
URL: https://docs.flutterflow.io/resources/ui/widgets/built-in-widgets/draggable
Learn how to build drag-and-drop interactions with the Draggable and DragTarget widgets in FlutterFlow Studio.
The **Draggable** and **DragTarget** widgets let users move items from one place to another in your app. Use **Draggable** for the item that can be moved and **DragTarget** for the area where it can be dropped. For example, users can sort items, move tasks between columns, or drag products into a cart.
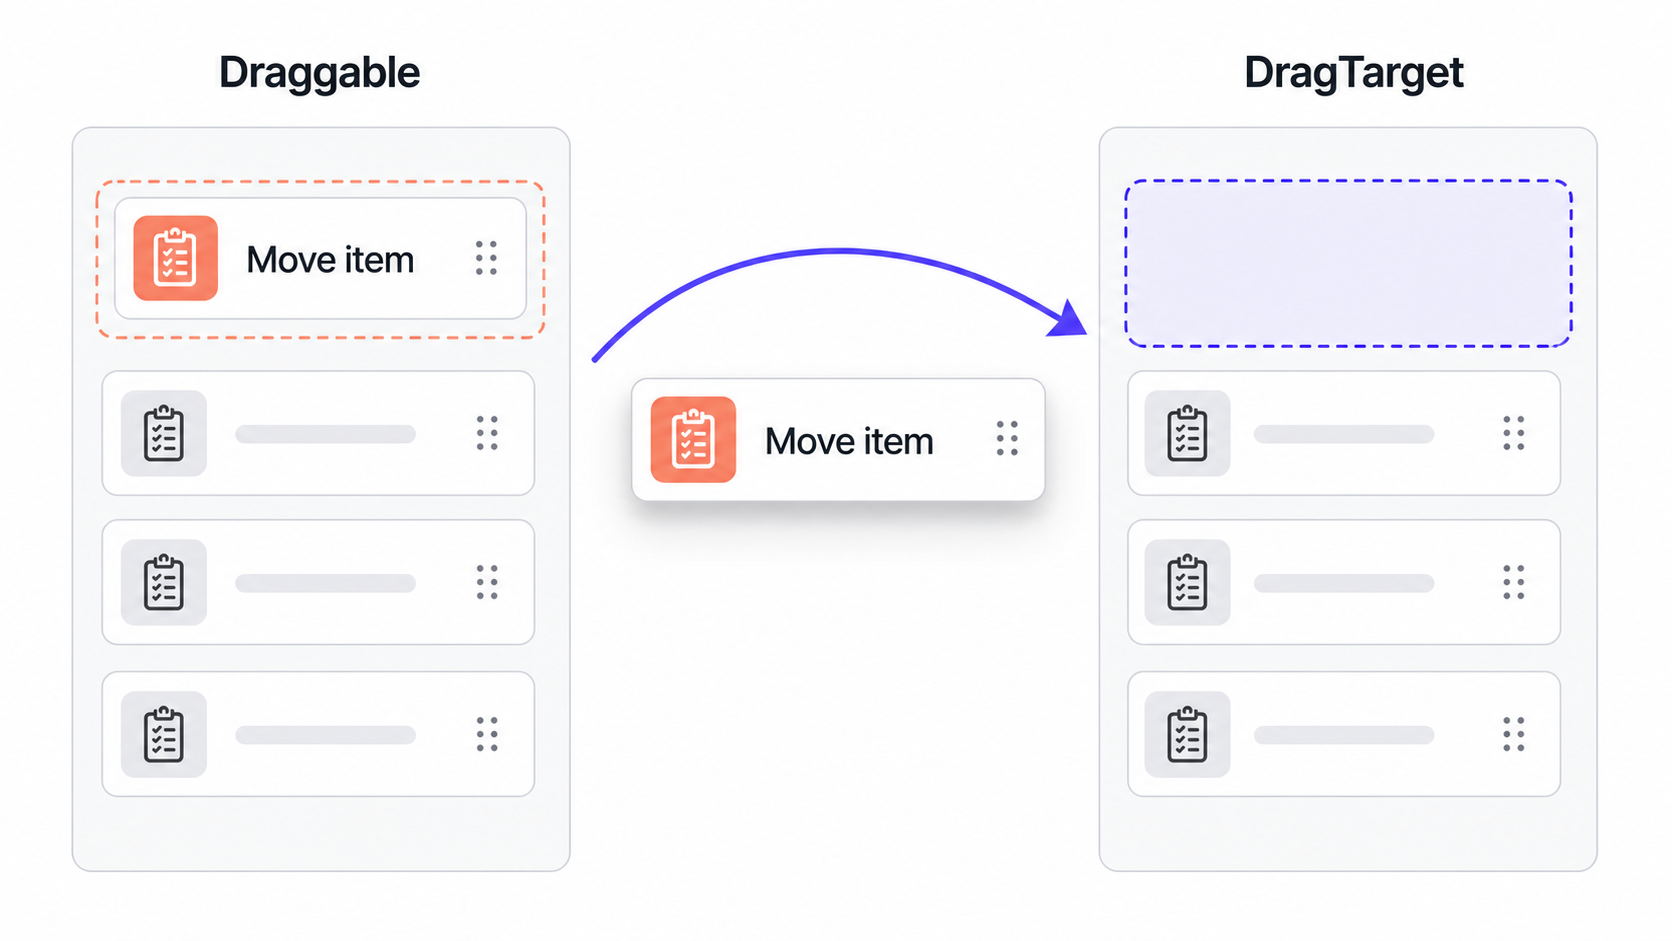
## How Draggable and DragTarget Work
A drag-and-drop interaction has three parts:
1. The user starts dragging the child of a **Draggable** widget.
2. The Draggable carries its configured data **Value**.
3. A **DragTarget** with a matching data **Type** receives the value and runs the configured actions.
The data type controls compatibility between the widgets. The value identifies the dragged item and can be checked before the app updates its state.
## 1. Adding a Draggable Widget
1. Add a **Draggable** widget from the [Widget Palette](https://docs.flutterflow.io/flutterflow-ui/widget-palette).
2. Add the widget that users should drag, such as an **Image**, **Container**, or **Card**, as its child.
:::tip
The child of a Draggable widget must have its **Width** and **Height** set explicitly.
:::
### Setting the Draggable Data
- **Type:** Defines the kind of data carried by the widget. This must match the **Type** configured on the intended DragTarget.
- **Value:** Contains the data passed to the DragTarget. The value can be static or set from a variable.
For simple interactions, the value can be a string or number that identifies the item. Use a custom data type when the target needs multiple related values, such as a product ID, name, and price.
## 2. Adding a DragTarget Widget
1. Add a **DragTarget** where users should drop an item.
2. Add a child widget to define its visible content and drop area. For example, use a [Container](https://docs.flutterflow.io/resources/ui/widgets/container) to give the target clear boundaries.
3. In the DragTarget properties, set **Type** to the data type used by the corresponding Draggable widgets.
The size of the DragTarget determines the area that can detect the dragged item. Make this area large enough to use comfortably, especially on touchscreens.
## 3. Accepting a Draggable Widget
A DragTarget accepts data from a Draggable widget when both widgets use the same data **Type**. If their types do not match, the data is rejected and the **On Drag Accept** action does not run.
Three Draggable widgets pass data to a String DragTarget. String plant and String spoon are accepted, while Integer 10 is rejected because its type does not match.
In this example, the DragTarget accepts the **String** values `plant` and `spoon` but rejects the **Integer** value `10`.
To access and process the accepted value:
1. Select the **DragTarget** and open the **Actions** tab.
2. Select **On Drag Accept**. In the action flow, use **Drag Target > Dragged Data** to access the accepted value and process it as needed.
## Handling Drag Events
You can use [Action Triggers](https://docs.flutterflow.io/resources/functions/action-triggers) on both widgets to customize the drag-and-drop experience.
### Draggable Events
These events are available from the **Actions** tab of the Draggable widget.
- **On Drag Started:** Runs when the user starts dragging the widget.
- **On Drag Update:** Runs as the widget moves during the drag.
- **On Drag Completed:** Runs when a DragTarget accepts the dropped data.
- **On Drag Cancelled:** Runs when the item is released without being accepted.
- **On Drag End:** Runs when the drag finishes, whether it is completed or cancelled.
### DragTarget Events
These events are available from the **Actions** tab of the DragTarget widget.
- **On Drag Enter:** Runs when a compatible Draggable enters the target. Use it to highlight the drop area.
- **On Drag Exit:** Runs when the dragged item leaves the target. Use it to remove temporary hover feedback.
- **On Drag Accept:** Runs when compatible data is dropped and accepted. Use it to inspect the value and update persistent state.
## Customizing the Drag Experience
Use the drag events with state variables and conditional styling to make the interaction clear:
- Set a temporary state variable with **On Drag Enter** to highlight an active drop area.
- Reset the temporary state with **On Drag Exit** when the item leaves the area.
- Update persistent app or page state only after **On Drag Accept** runs.
- Use **On Drag Started** and **On Drag End** to change the appearance of the draggable item or surrounding interface during the interaction.
- Show a message when a dropped value does not meet the target's conditions.
Keep hover state separate from the state created after an accepted drop. Resetting persistent state with **On Drag Exit** can undo a completed interaction when the pointer leaves the target.
## Best Practices
- Use the simplest data type that contains the information needed after the drop. Use a custom data type when several related values must move together.
- Do not rely on color alone to identify an active or valid drop target. Pair color with a border, icon, label, or another visual cue.
- For important tasks, provide a tap or button-based alternative to drag and drop.