Custom Data Types
In FlutterFlow, custom data types allow you to define structured data models that enhance data management and consistency across applications. These data types serve as blueprints for organizing related data attributes.
For instance, you can define a custom data type "Book" that combines predefined data types, such as a string for the title, an integer for the year of publication, and a list of strings for the authors.
Custom data types have several key advantages:
- Reusable: Define once, use everywhere.
- Easy to Update: Change data structure in one place, and see it reflected throughout your app.
- Consistent: Keeps data format uniform across the application.
- Efficient: Simplifies complex data handling, reducing errors and redundant code.
- Use custom data type when predefined data types, such as integer and string may not be enough to store certain kinds of information.
- FlutterFlow also supports some Built-in Data Types.
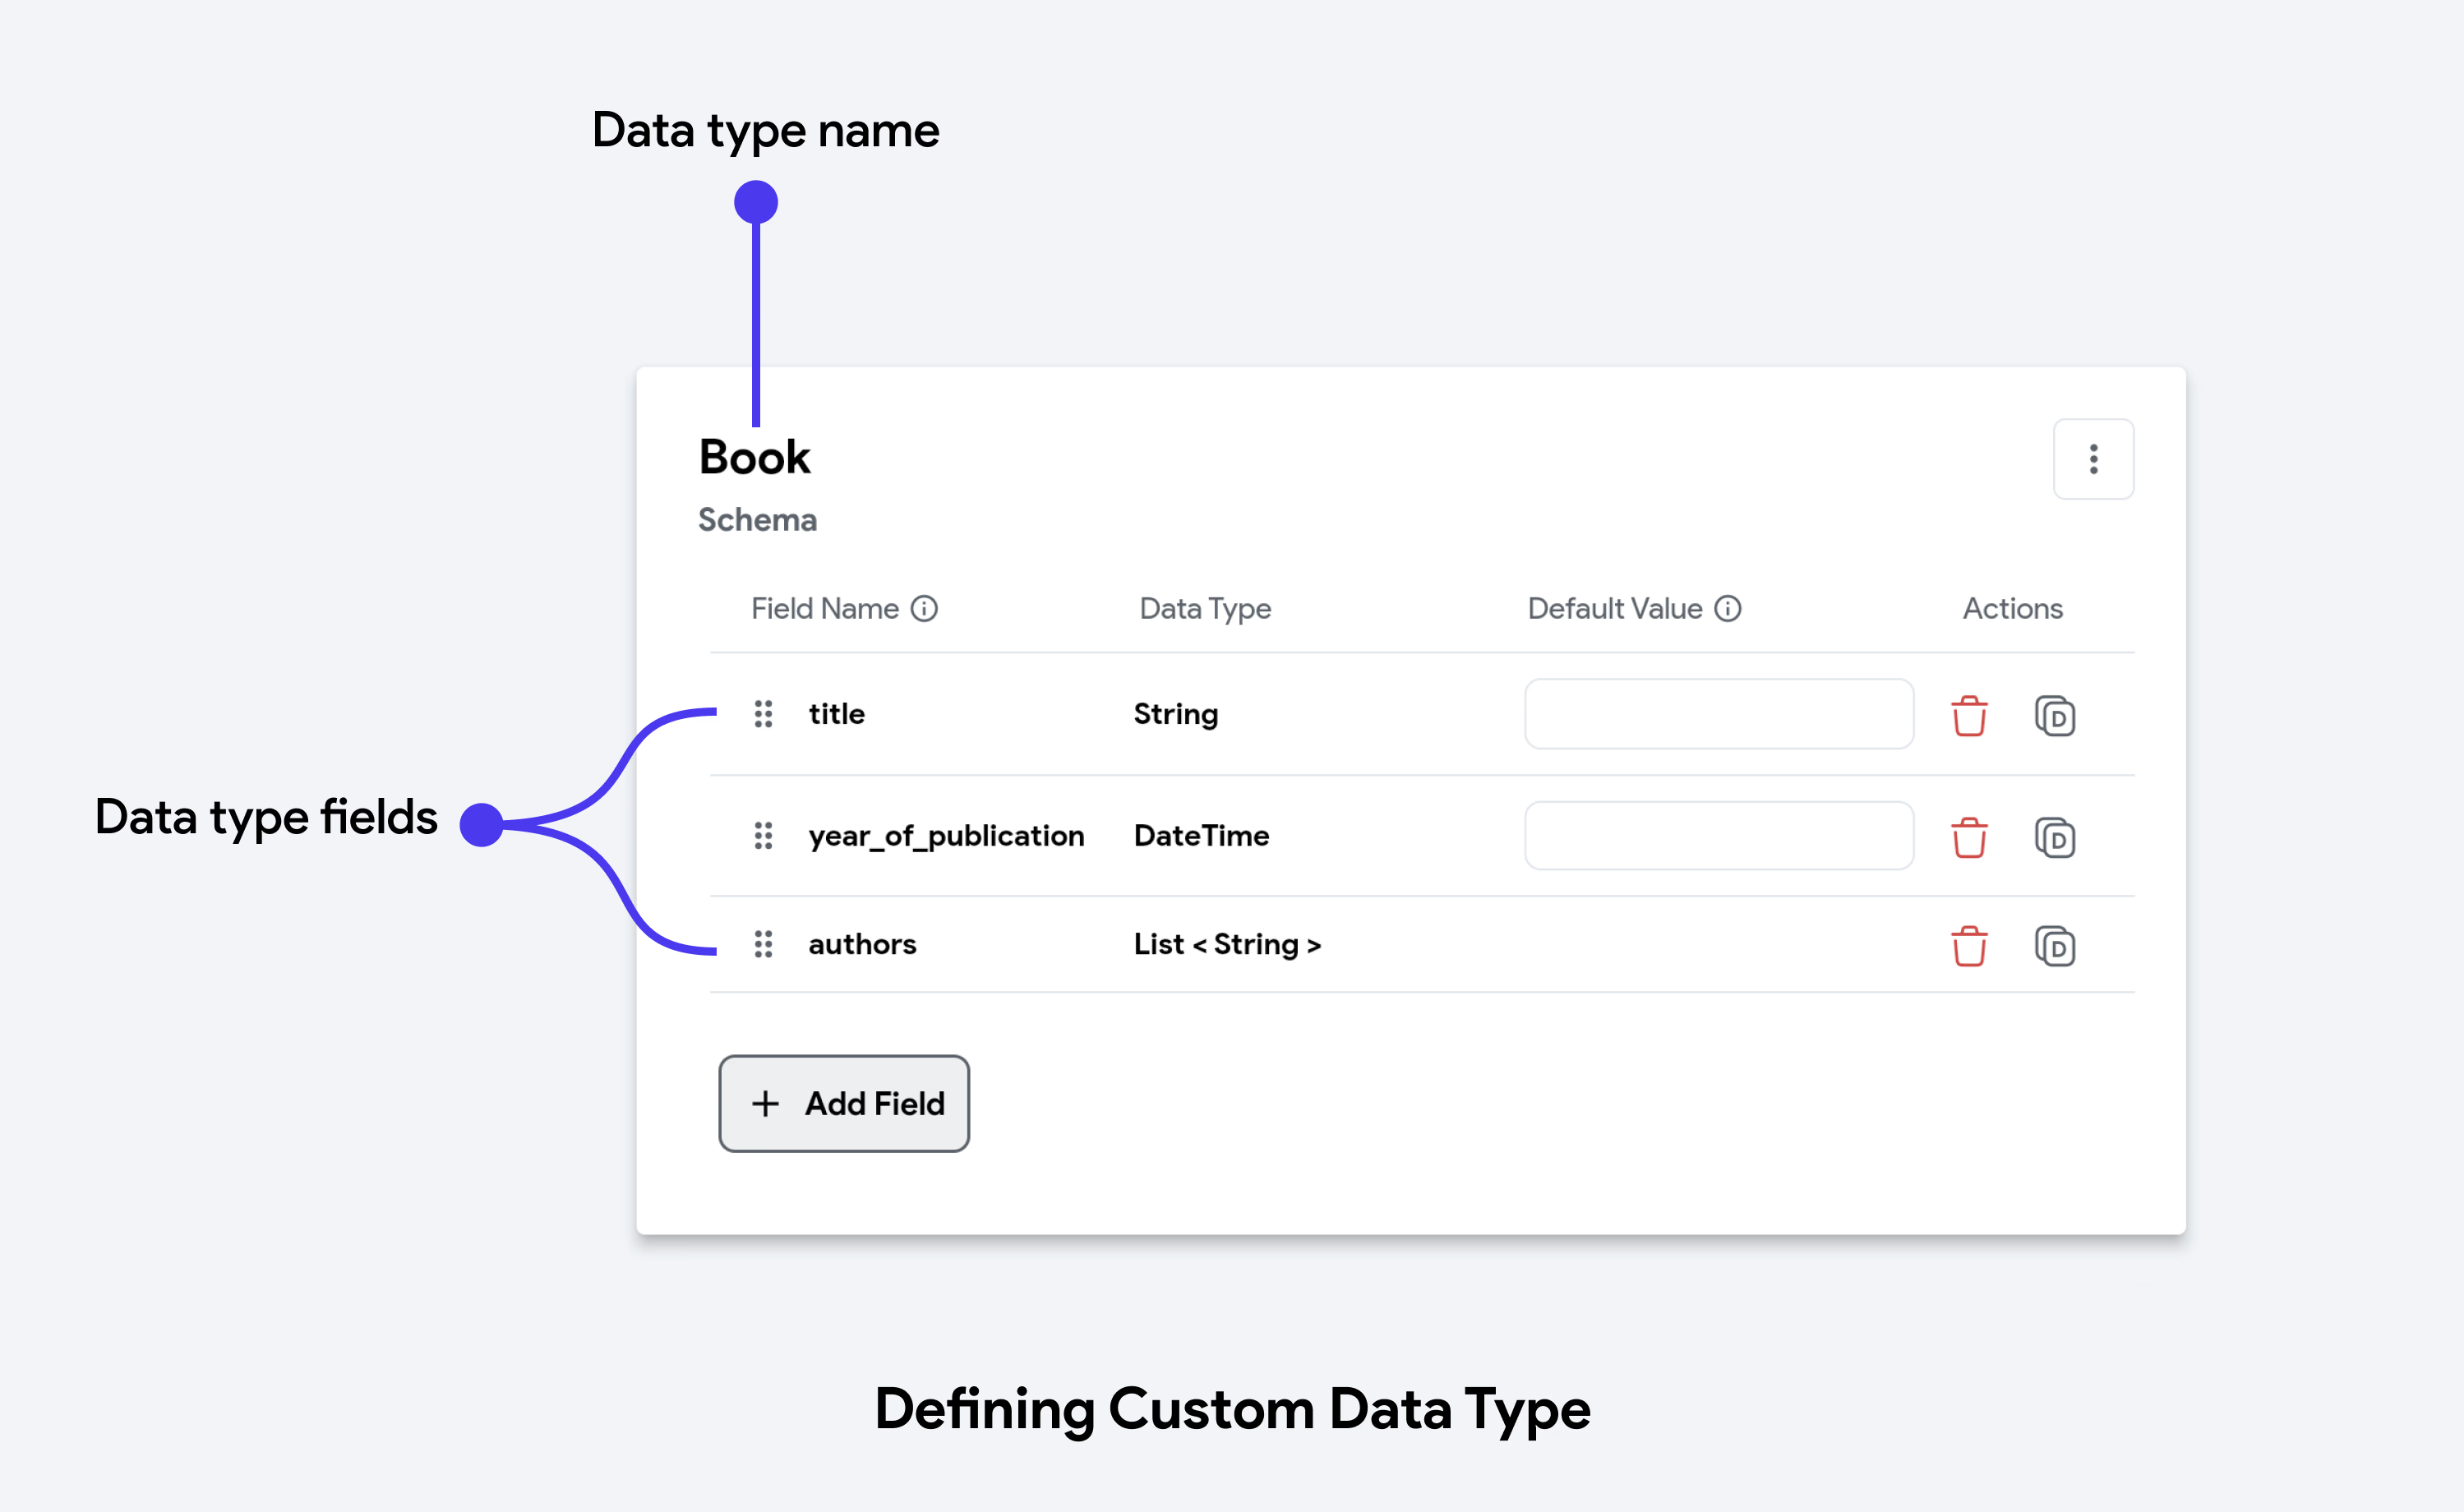
When you create a custom data type, it internally creates a Struct. A struct, or structure, is a composite data type that lets you combine fields of different data types to construct a data structure to suit your specific needs.
The class name for such data types is generated by appending "Struct" to the name of the data type. For example, if you create a custom data type called "Cart", the corresponding class would be named "CartStruct".
Creating Custom Data Type
To create a custom data type, specify its name and the corresponding fields. Each field can have a distinct data type. You can also specify if a field should allow multiple entries using the Is List toggle.
When naming custom data types, always use UpperCamelCase, as recommended by the Dart Style Guide. To learn more, refer to the guide on Naming Variables & Functions.
Accessing Custom Data Type
After creating the custom data type, you can use it to create variables, such as an app state variable, and then access them. Here's an example.
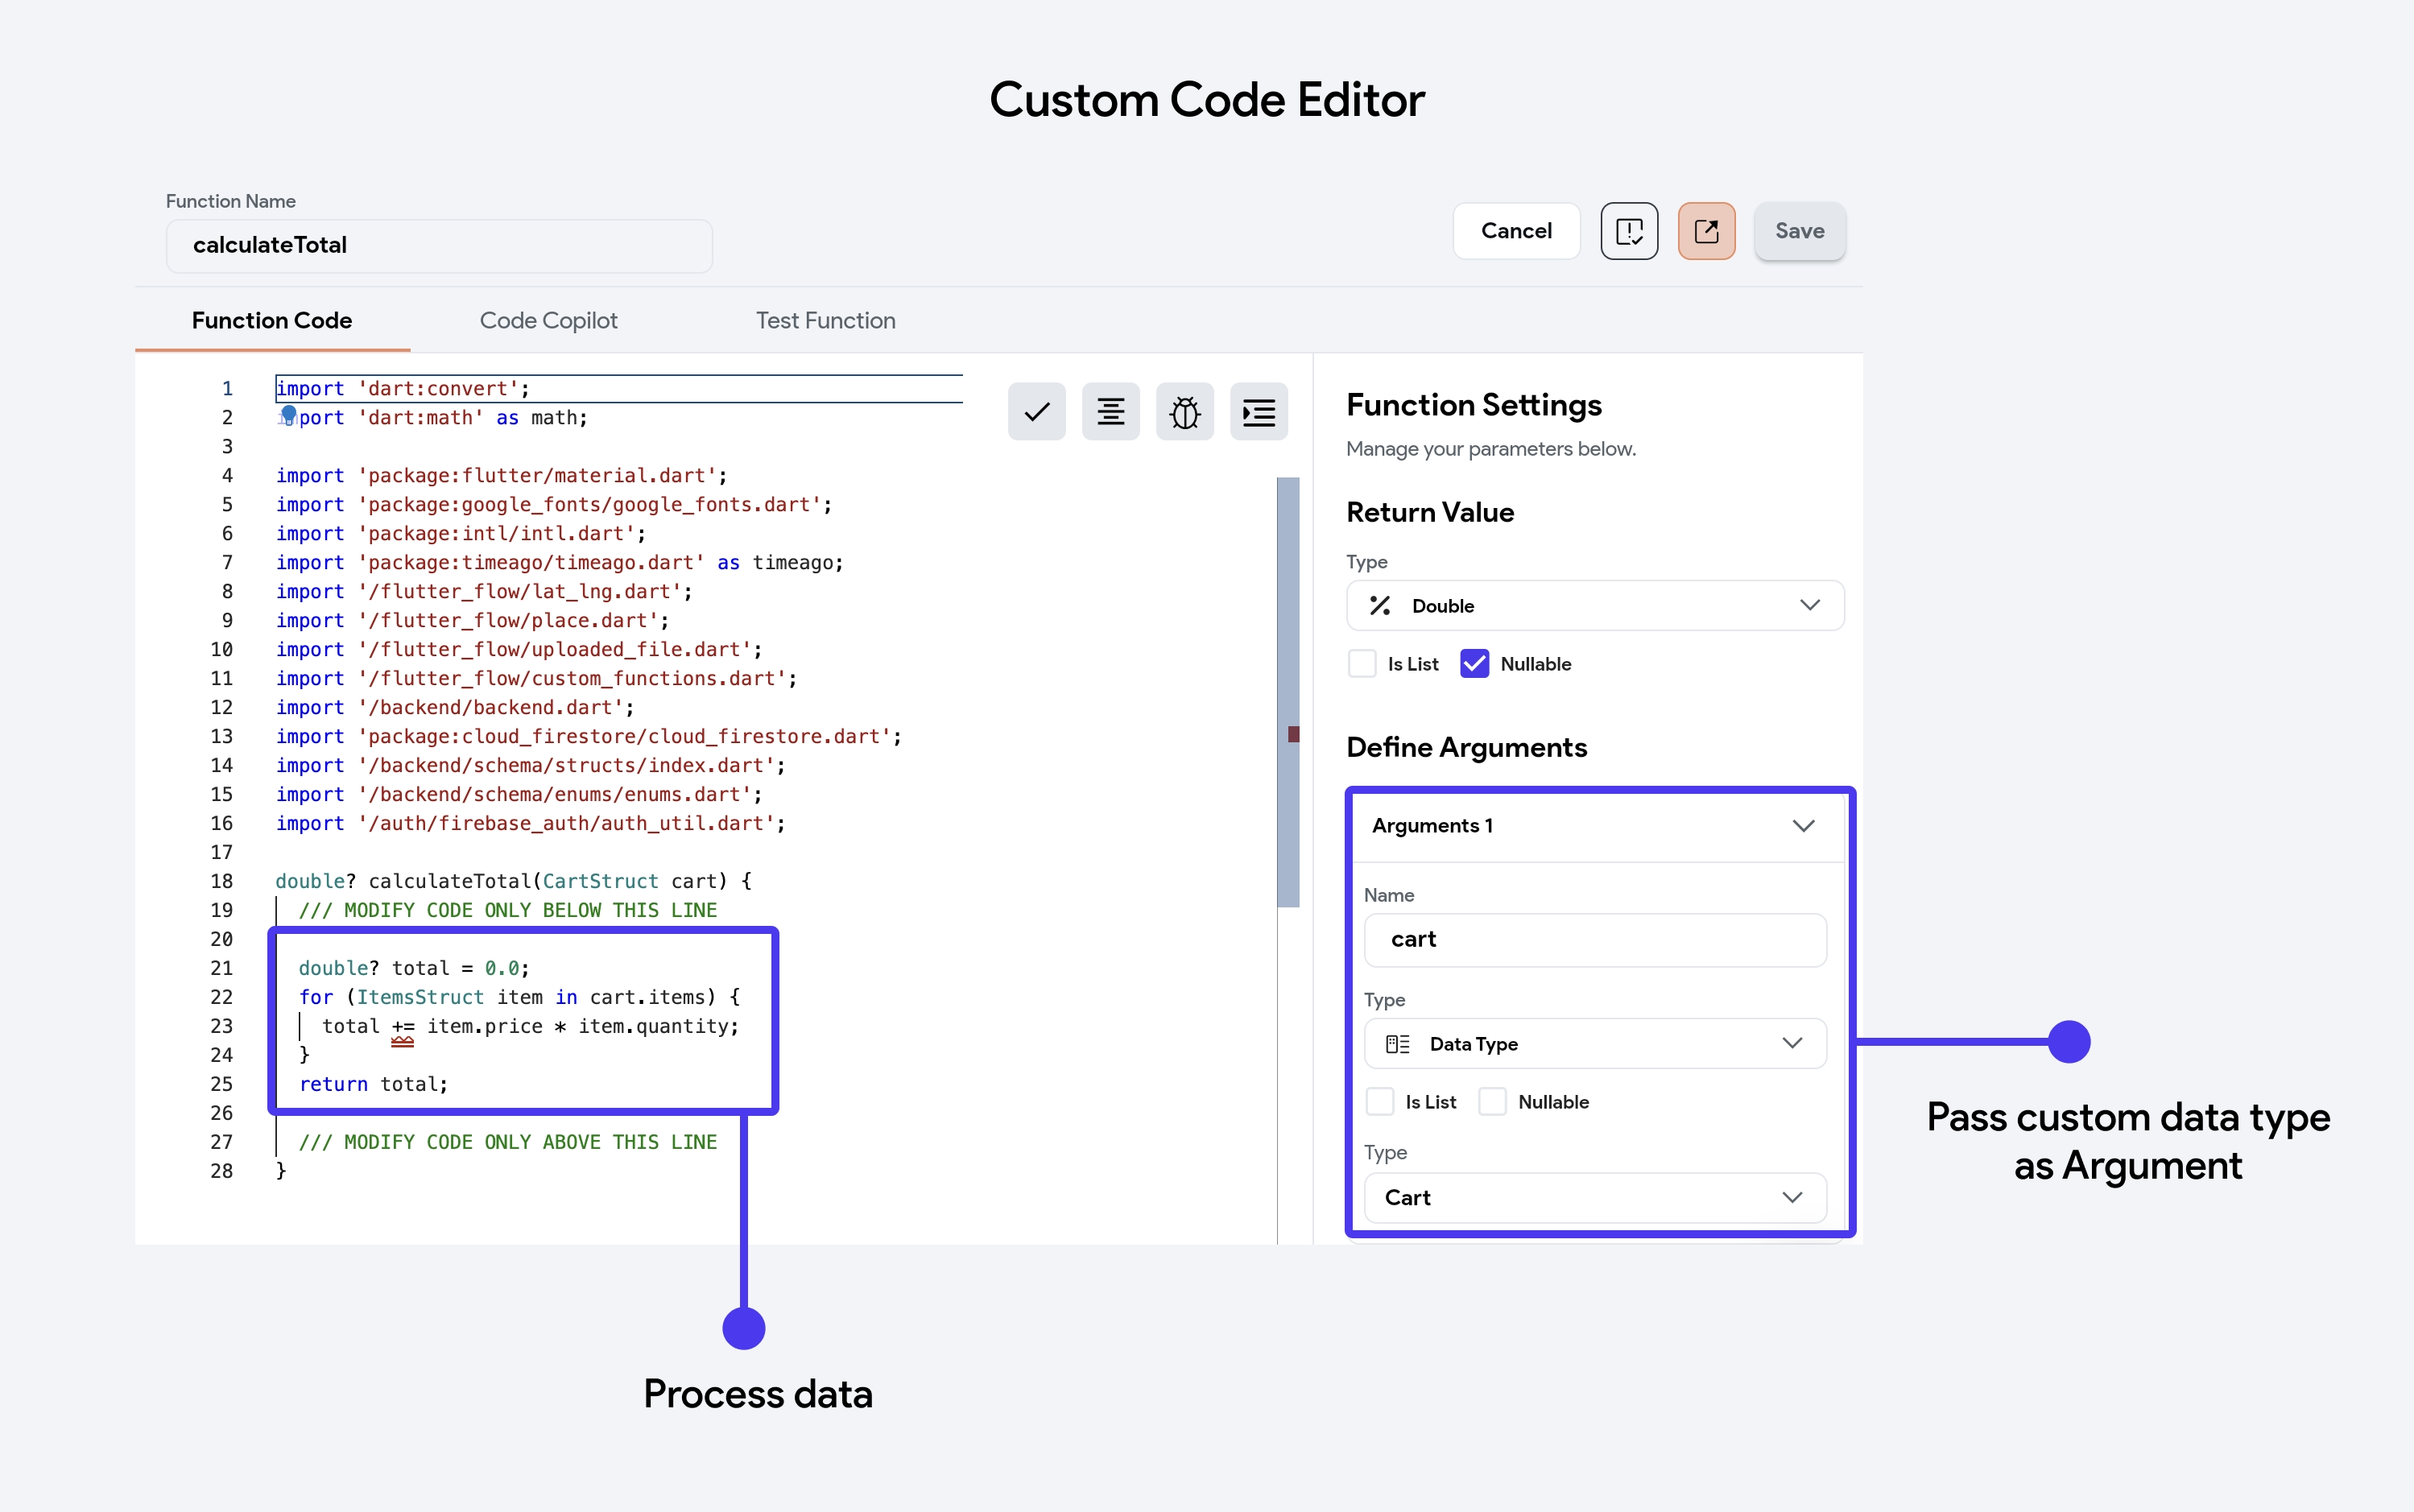
Custom Data Type in Custom Code
Sometimes, you might want to access the custom data type in your custom code. Our custom code editor allows you to receive and pass data into a variable of a custom data type. For example, you could manipulate or analyze the data as needed, and then return the modified result in the custom data type.
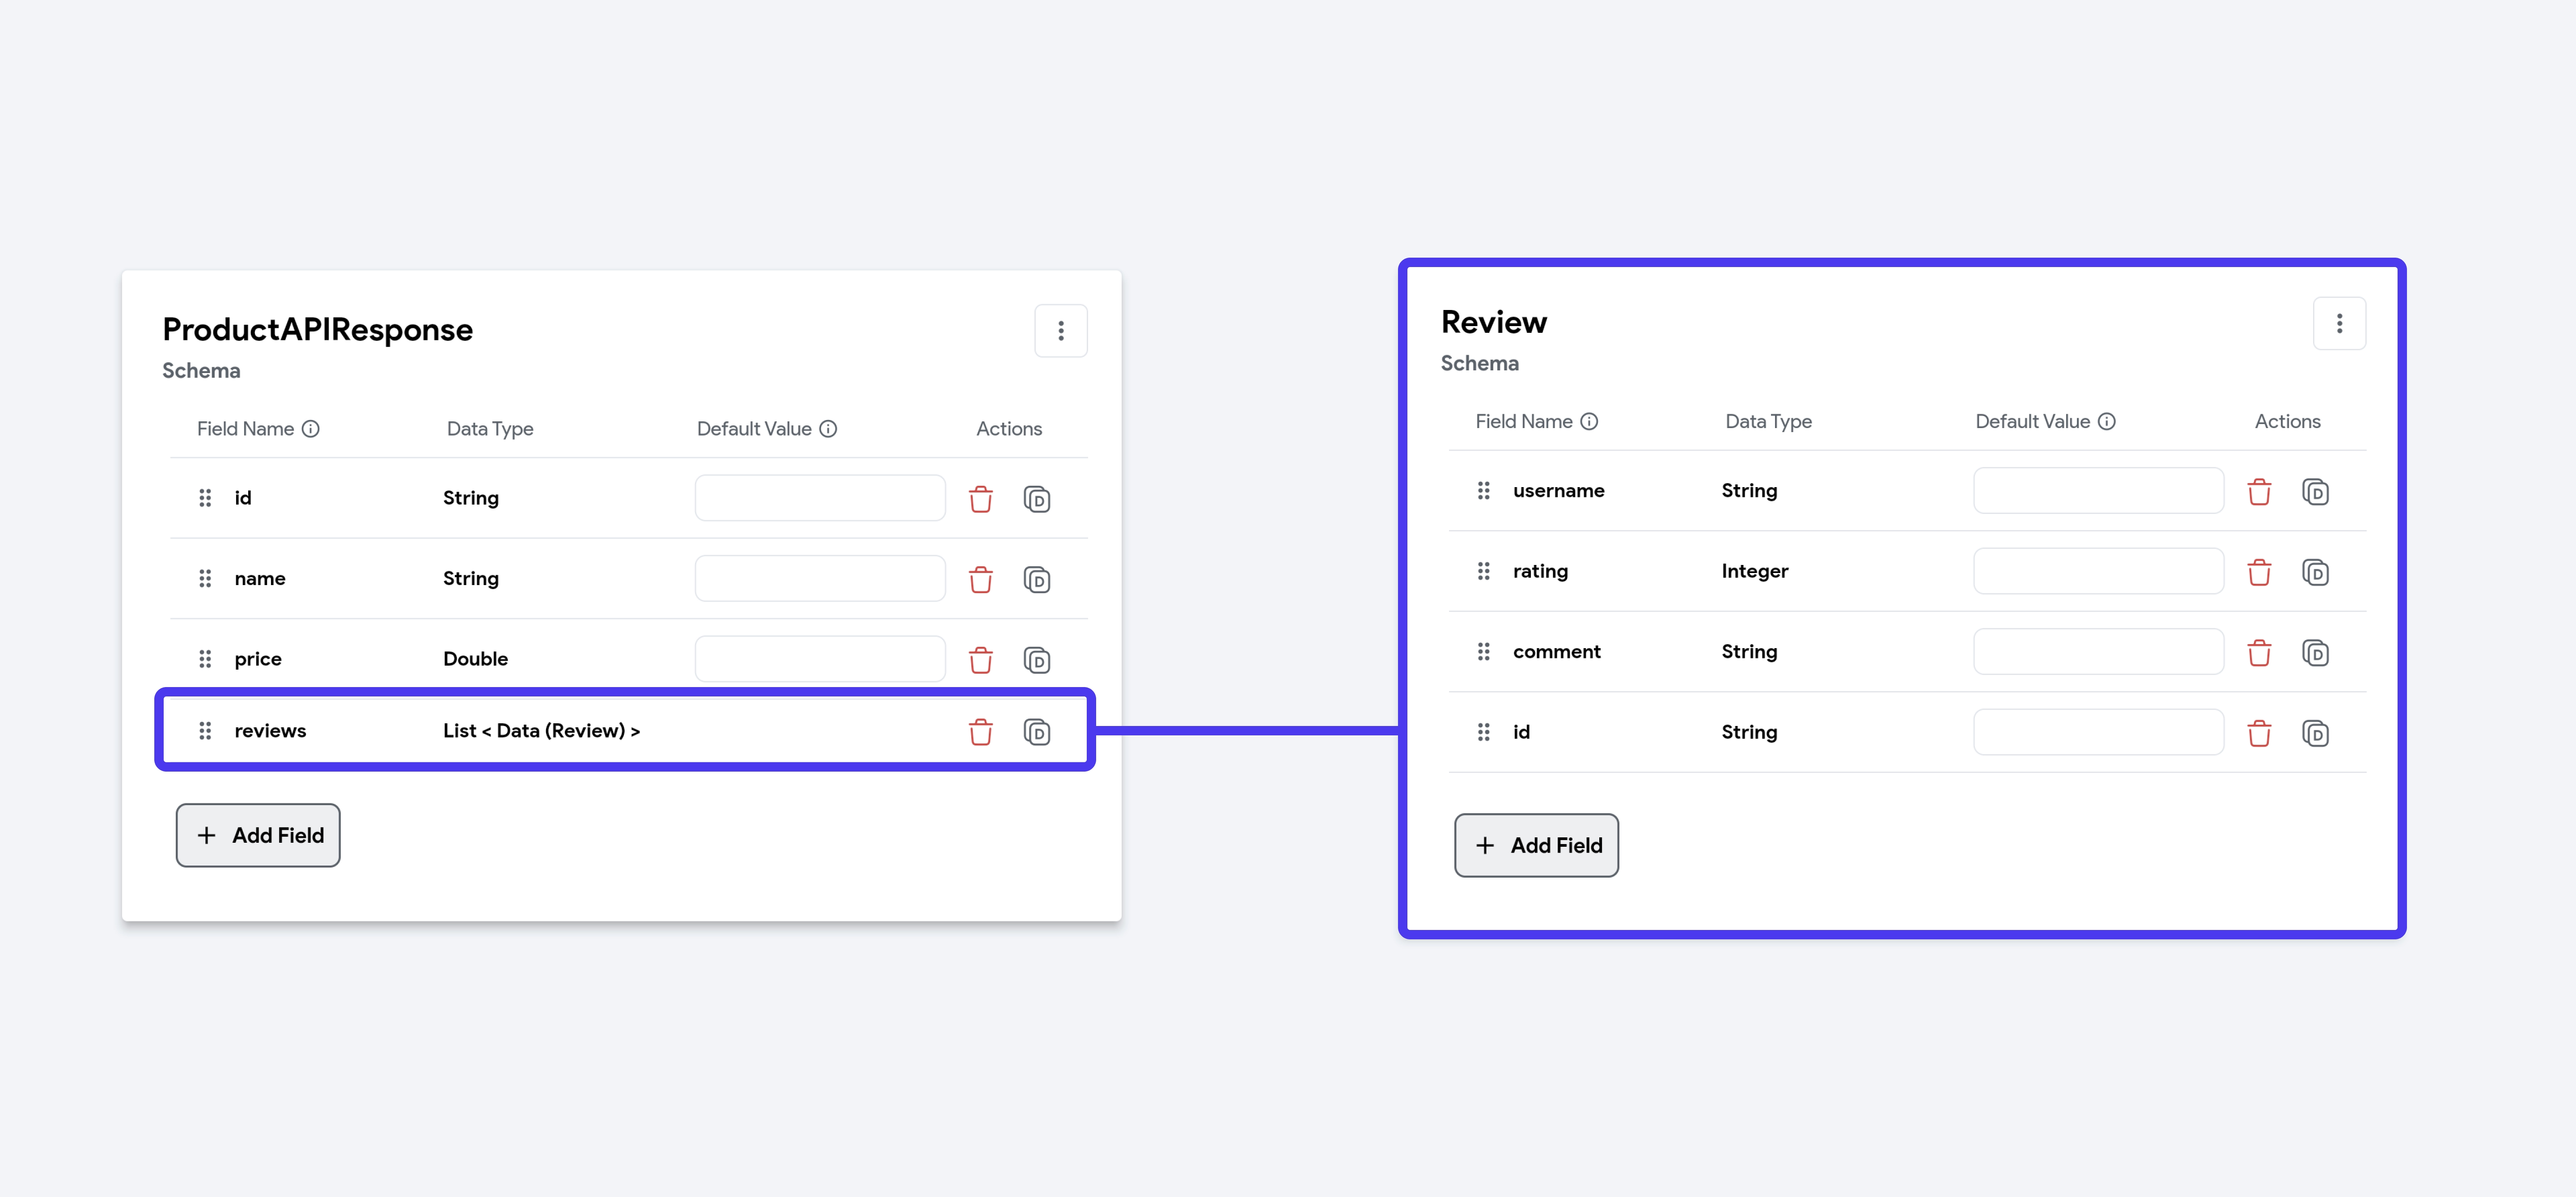
Use case: mapping JSON responses from API calls
Consider a case where you're calling an API that returns product details. You could create a custom data type 'Product' representing the JSON structure and then map the JSON values to the custom data type field.
So, if the JSON response looks like this:
{
  "id": "a1b2c3d4e5f678901234567",
  "name": "Jacket",
  "price": 199.99,
  "reviews": [
    {
      "id": "rev101",
      "username": "mike",
      "rating": 4,
      "comment": "This product exceeded my expectations in every way. Highly recommended!",
    },
    {
      "id": "rev102",
      "username": "kera",
      "rating": 2,
      "comment": "Great quality, but the color was not as shown in the picture.",
    }
  ],
}
Here’s how you map into a custom data type: