Custom Authentication
Custom authentication allows you to manage auth-related data (login details) while utilizing your own backend to authenticate users.
Understanding the concept of Token is essential for grasping how secure access and user verification work in an application.
Adding custom authentication
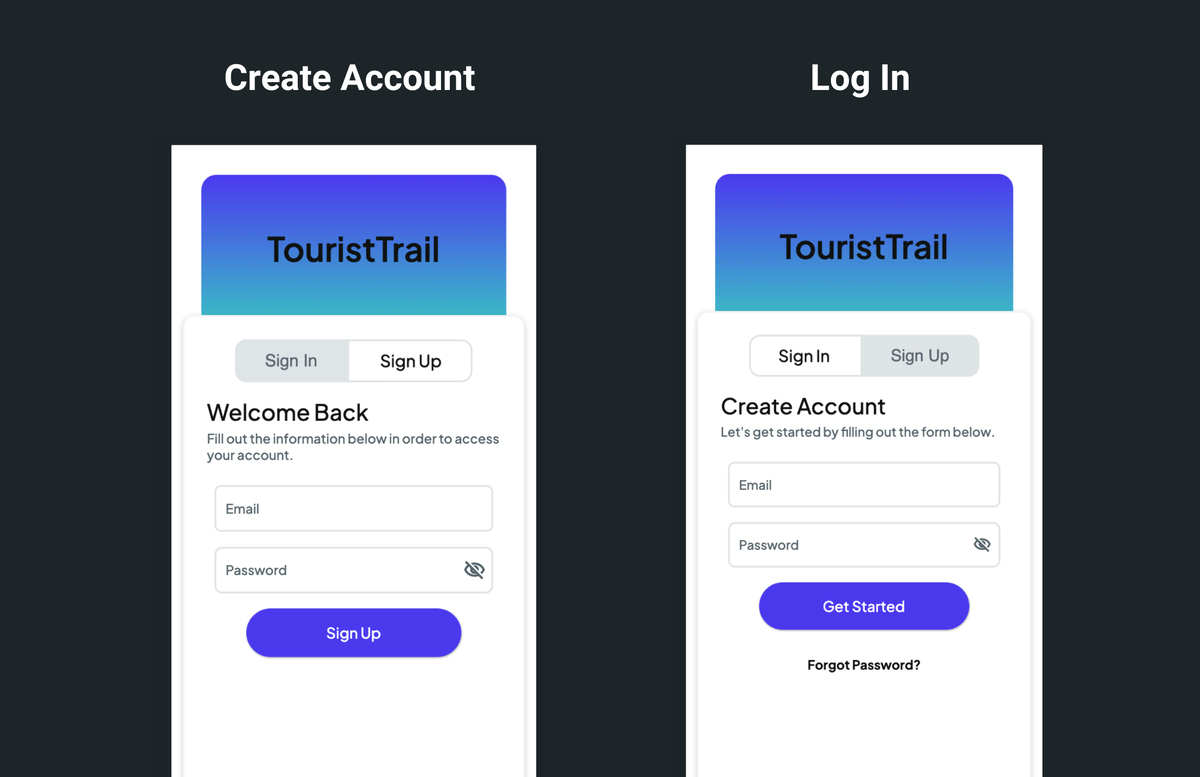
Let's see how to add custom authentication by building an example that looks like this:
The steps to add custom authentication are as follows:
- Enabling custom authentication
- Building pages
- Authenticate users
- Save auth data
- Access auth data
- Update auth data
- Logout
1. Enabling custom authentication
To enable custom authentication in FlutterFlow:
-
Open Setting and Integrations () > App Settings > Authentication.
-
Turn on the Enable Authentication toggle and set Authentication Type to Custom.
-
To ensure that your users are directed to the appropriate pages based on their login status, you must set the initial pages.
-
By default, the Persist Auth Sessions option is enabled, which means users remain logged in until they actively log out. With this option enabled, your app will automatically open to the homepage whenever it's restarted.
-
After successful authentication, your backend typically sends login details like an authentication token, a refresh token, and user details. To keep the user logged in within your app, you must store this data. You can achieve this by enabling Associate User Data Type and setting User Data Type to the Custom Data Type. Note that the structure of your Custom Data Type should closely resemble the structure of a successful authentication's JSON response. At the very least, it should include critical fields like the authentication token.
2. Building pages
Let's add a page that allows users to create accounts and log in. To speed up, you can add a page from the template. Here is the page added from the templates, and after some modification, it looks the below:
Also, see how to build a page layout in case you want to build a page from scratch.

3. Authenticate users
On each page, on click of a button, you can add appropriate authentication related API calls. For this example, we use this.
4. Save auth data
After successful authentication, you can save the auth related data using the 'Log in' action. Here's how you do it:
-
Inside the TRUE branch of the previous API call, add the Log in (under Backend/Database > Custom Authentication) action.
-
Under the User Auth Properties, you can set values for Authentication Token, Refresh Token, Token Expiry Time, and User UID. Note that for the 'Persist Auth Sessions' option to work, you must set the Authentication Token.
-
Set User Data to store the result of the previous API call (i.e., auth details) in a Custom Data Type. See how to get the JSON into Data Type.
5. Access auth data
To access the auth data after a user logs in, open the set from variable menu > Authenticated User > choose from Auth Properties or User Data Fields.
6. Update auth data
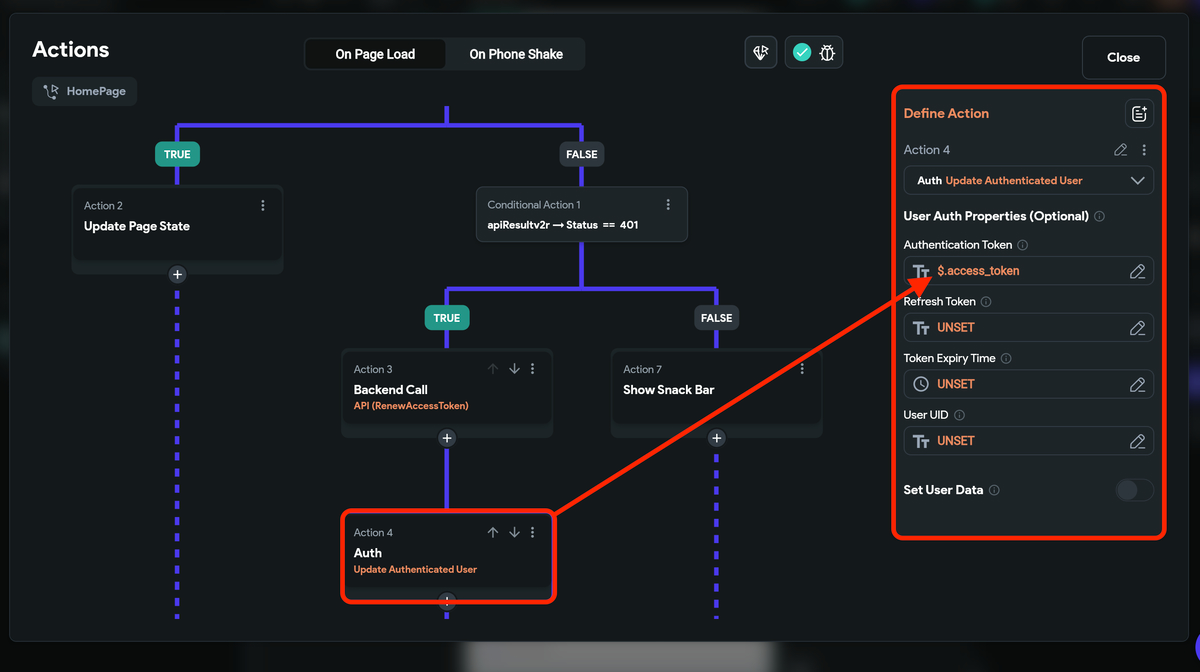
You may want to update the auth data in situations like updating the access token with the new one after it has expired. You can do so using the Update Authenticated User action.
Here's exactly how you do it:
-
Once you get the 401 status code, i.e., unauthorized user error, ensure to make an API call to renew the access token.
-
On getting the new access token, add a new action named Update Authenticated User.
-
Under the User Auth Properties, you can update a value for the Authentication Token with a new access token.

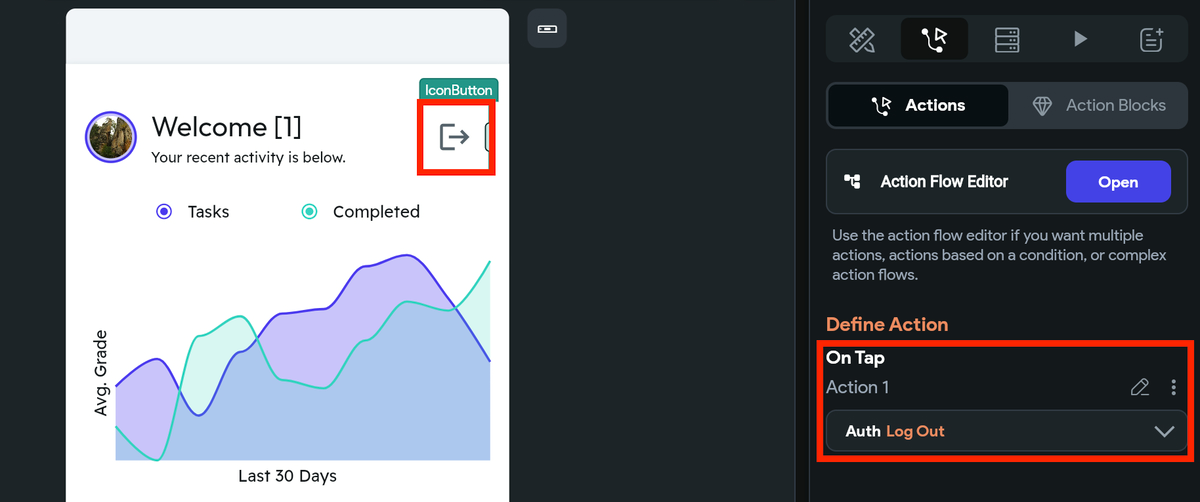
7. Logout
You can logout a user by adding the Log Out action.
