Actions
Effectively managing user interactions is essential for developing interactive applications. Designing interactivity involves two steps:
- Listening for Interaction (Action Triggers)
- Responding to Interaction (Actions)
Action Triggers represent a specific event, while Actions are functions executed in response to the triggered event. Common triggers are:
- On Tap: Triggered on tapping on a widget or specifically buttons.
- On Selected: Triggered on selecting an option from a dropdown list.
- On Page Load: Triggered on loading a page
Actions are tasks or operations that are performed in response to an event detected by a trigger.
Action Flow Editor
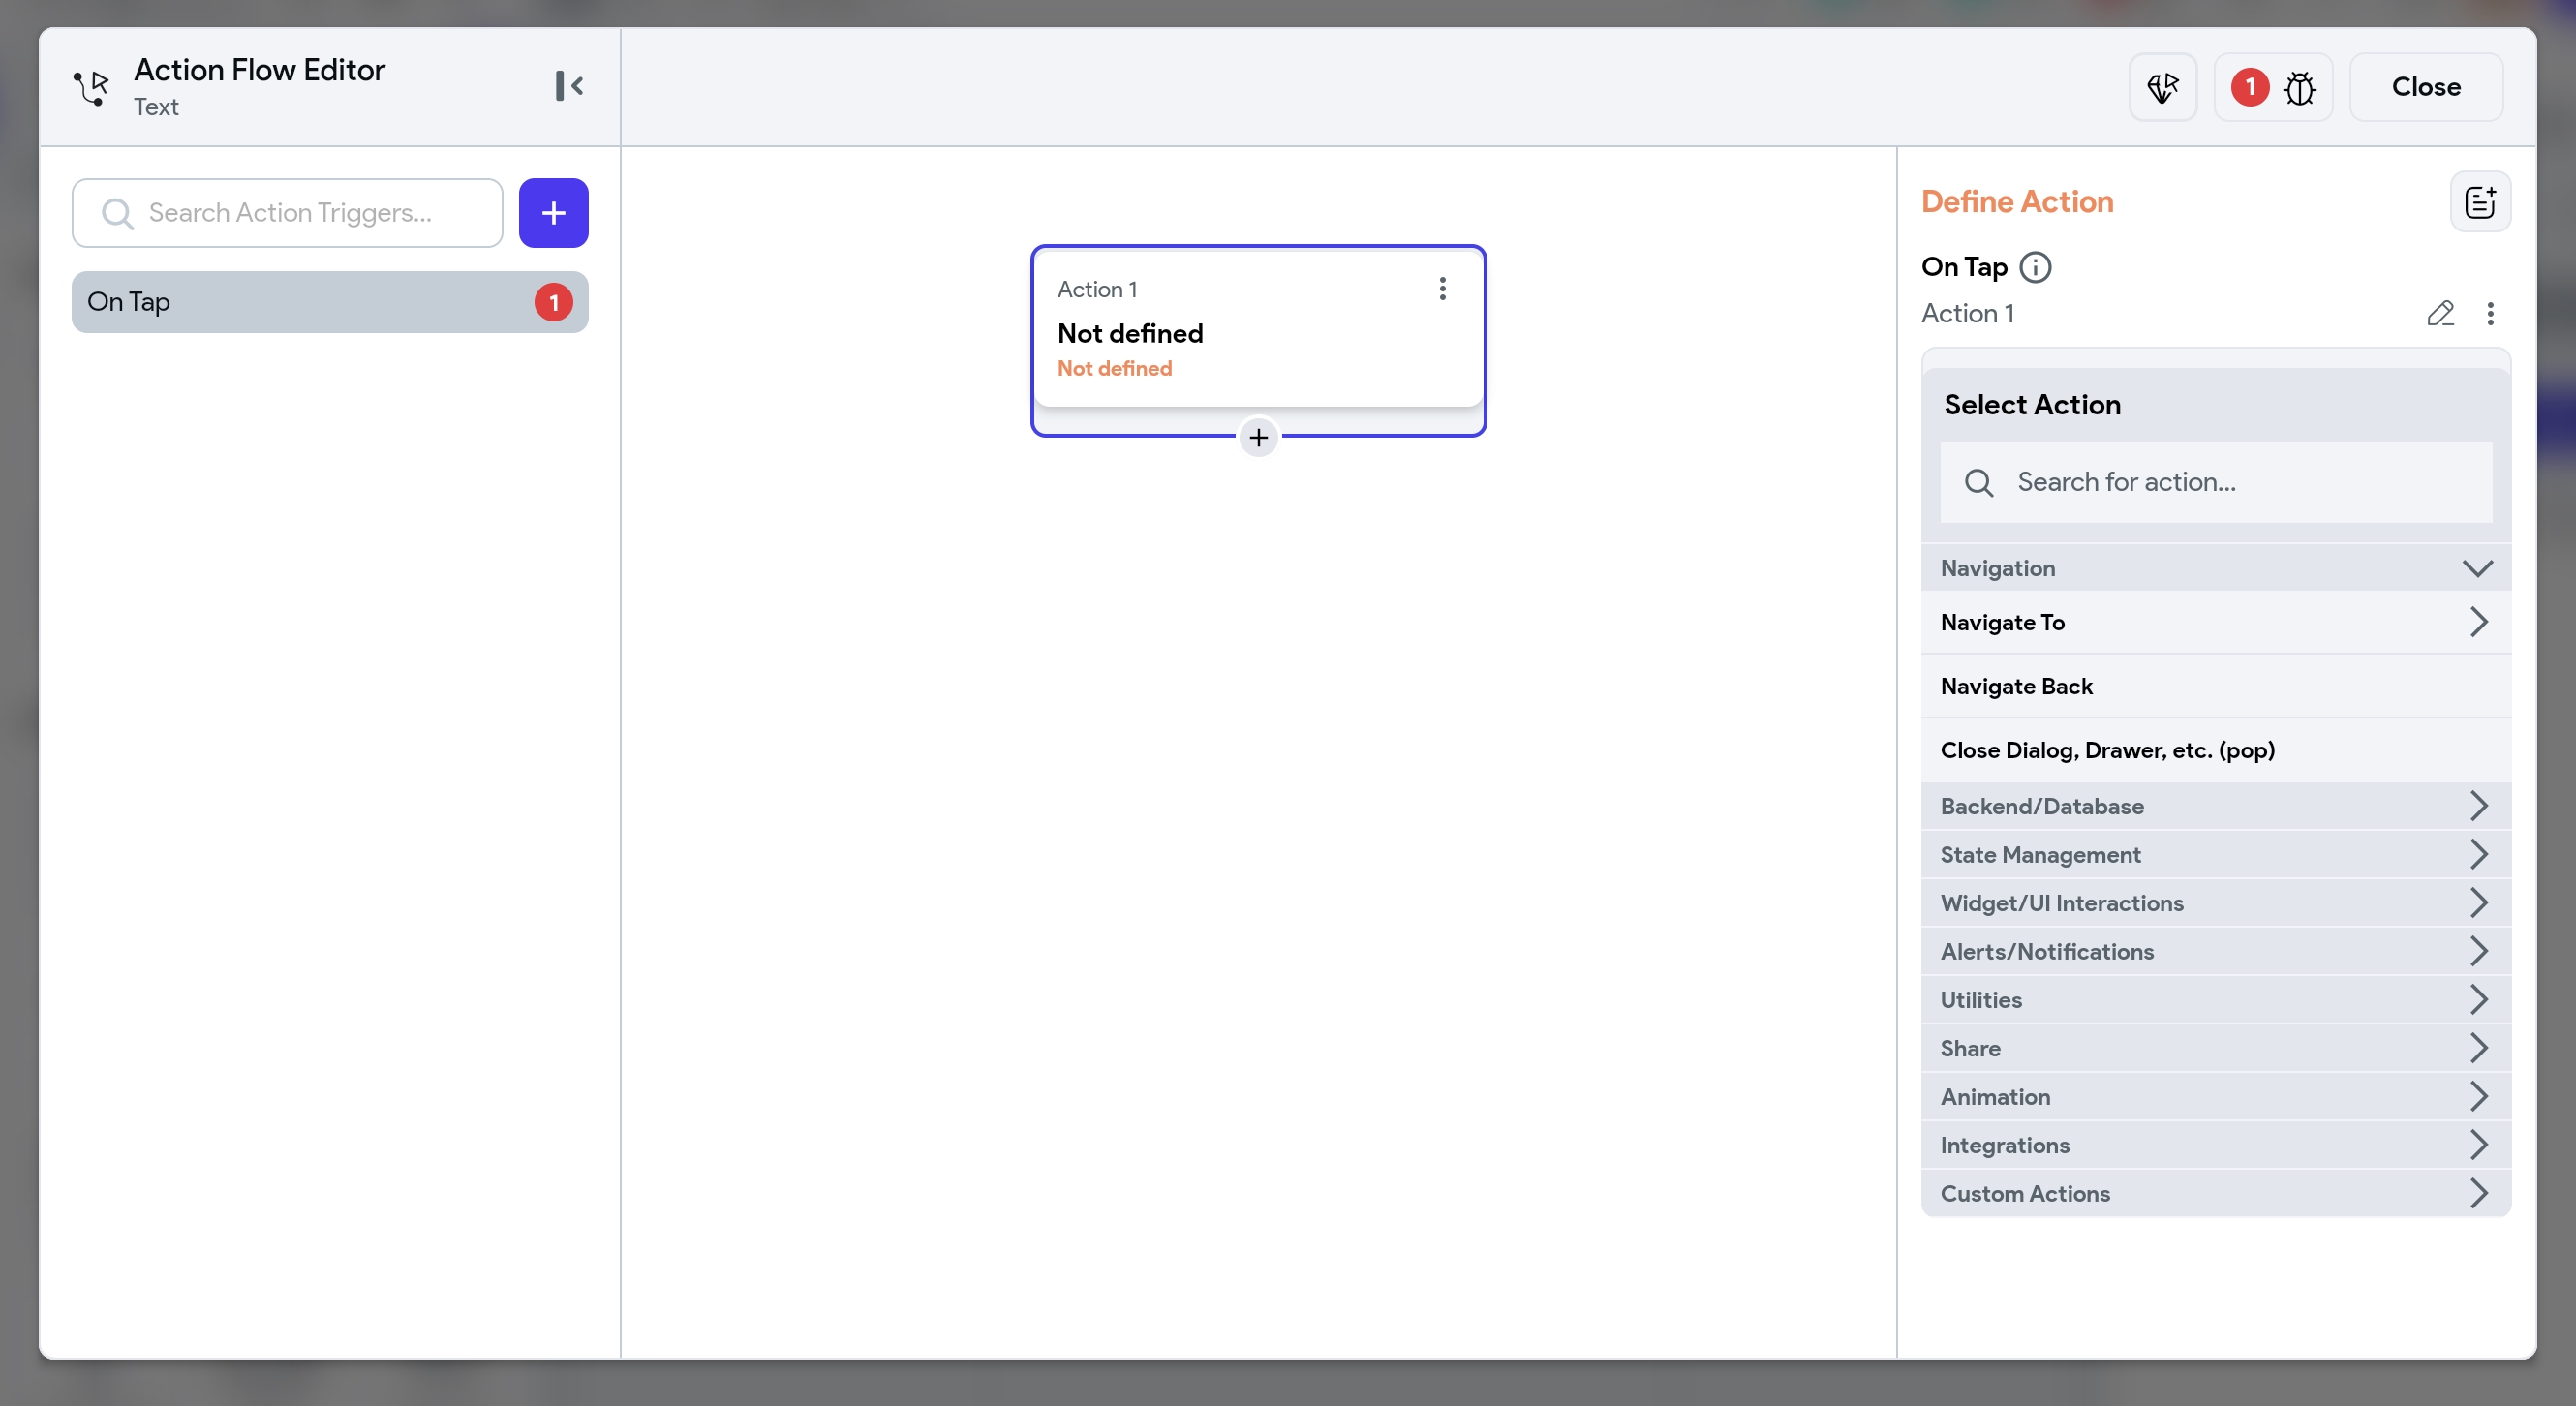
The Action Flow Editor is a visual, node-based editor used to configure the functions that run in response to a trigger. This editor simplifies the process of creating and managing business logic.

Action Triggers
When you open the Action Flow Editor, no triggers are added by default. To add a trigger, simply search for and select the desired one from the available options. The Action Triggers bar, located at the left of the editor, displays all added triggers.
To learn more about Action Triggers and its types, refer here.
Please note that Action Triggers are exposed by FlutterFlow and are not user-generated. You can only work with the ones provided in the Action Flow Editor.
Each trigger has its own separate node-editor, allowing you to create distinct logic flows for different events. When you switch between triggers, the node-editor will update to display the logic specific to the selected trigger.
It's important to note that the logic defined in the node-editor is associated with the selected trigger. This means that the actions you set up will only be executed when that particular trigger is activated.
Node Editor
This central area of the editor is where you define and visualize the logic/actions that will execute in response to the selected trigger. The actions are laid out in a flowchart-like manner, making it easy to understand and modify the flow of actions.
Actions in the Node Editor are executed synchronously. This means that if an action returns a value, it will be available to subsequent actions within the flow.
Synchronous actions are executed one after another, with each action waiting for the previous one to complete. Asynchronous actions are executed independently and can run concurrently, allowing other following tasks to proceed without waiting for them to finish.
Creating Action
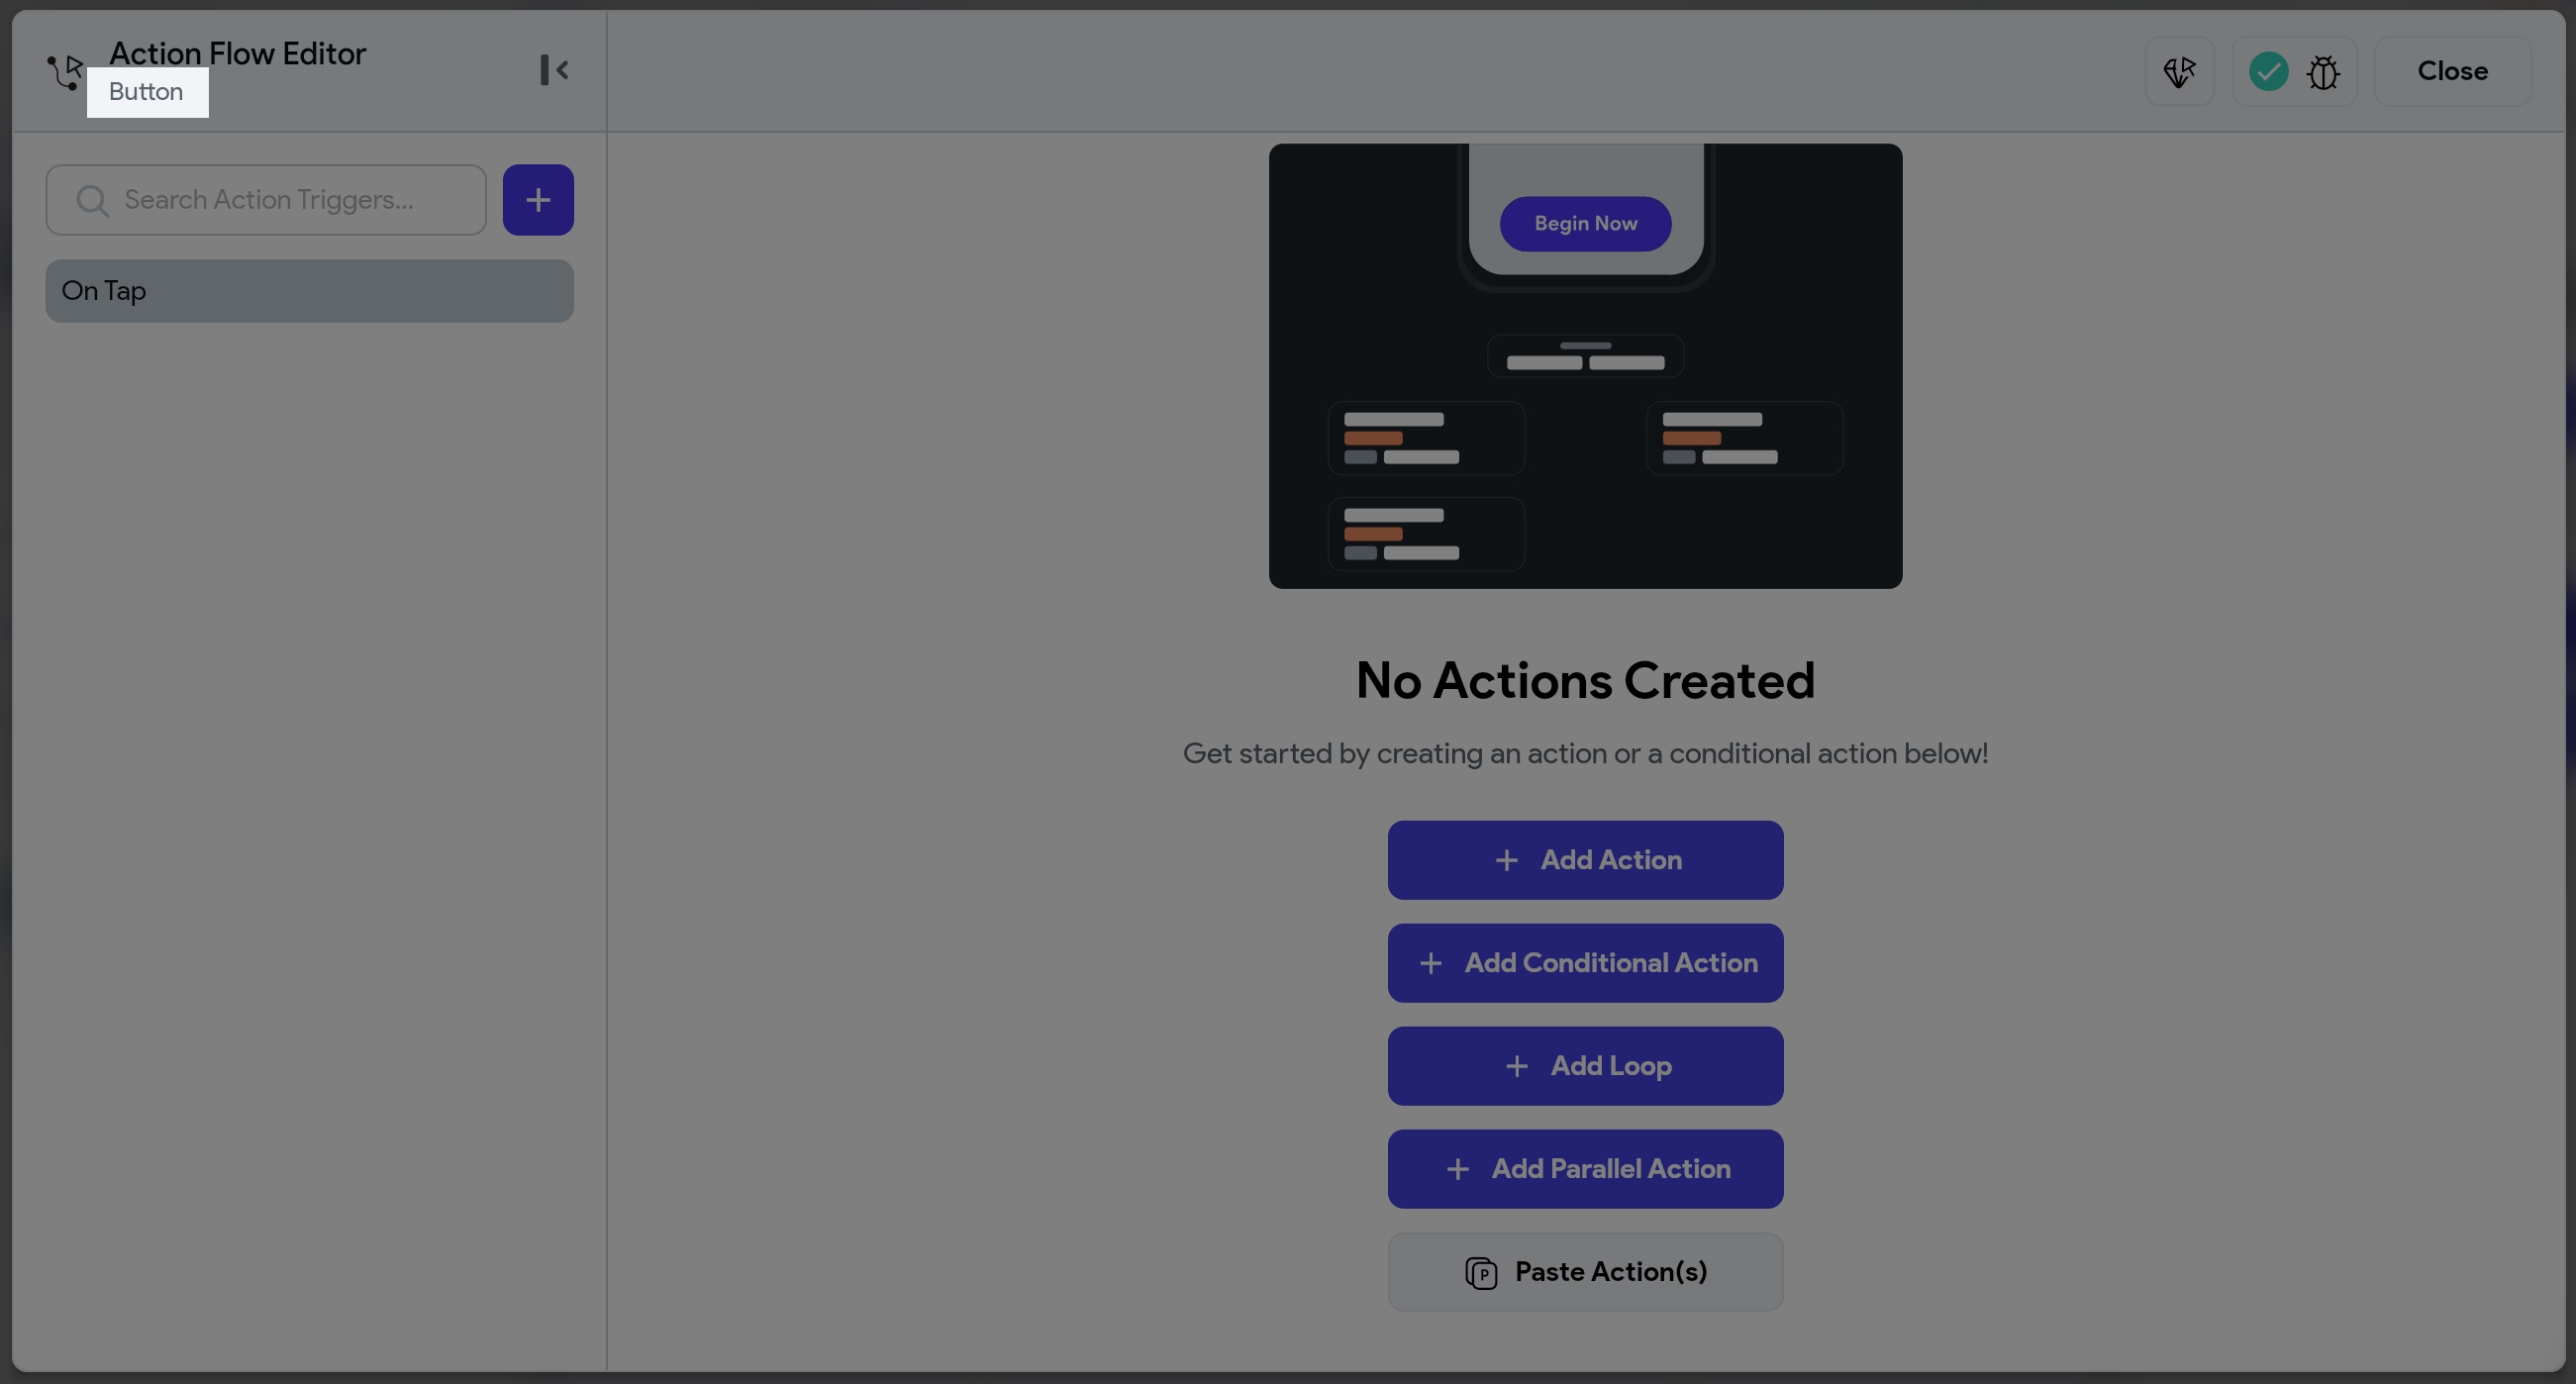
If there is no initial action or if there is an action,and you want to add another one and press the plus icon, the following options will be available:
-
Add Action: Adds a single action node to the flow. You can add multiple synchronous actions one after another.
-
Add Conditional Action: Adds a conditional node with an input for a boolean expression and two action branches. The actions in each branch will be executed based on the evaluation of the boolean expression.
-
Add Loop: Adds a loop flow that contains an input boolean expression and an action flow. The actions within the loop will be executed repeatedly as long as the expression evaluates to true ( similar to a while loop).
-
Add Parallel: Adds two action flow branches that will be executed in parallel.
-
Paste Action(s): Allows you to paste actions previously copied to the clipboard.
After creating an action node, you need to specify the action type in the Right Panel. Creating a node is equivalent to creating an empty function, and specifying the action type is like filling out the function body with the desired logic.
Right Panel
The Right Panel serves two main purposes:
- Selecting Actions: Choose the specific actions you want to add to your action flow.
- Configuring Actions: Configure the properties, parameters, and return names of the selected action.
Widget Binding
In the Action Flow Editor, the icon in the upper left corner indicates the widget to which the current action flow is bound.

If you rename your widget, the new name will automatically be updated and associated with this action flow. This makes it easier to keep track of the logic associated with each widget, ensuring clarity and better organization of your action flows.
Issues
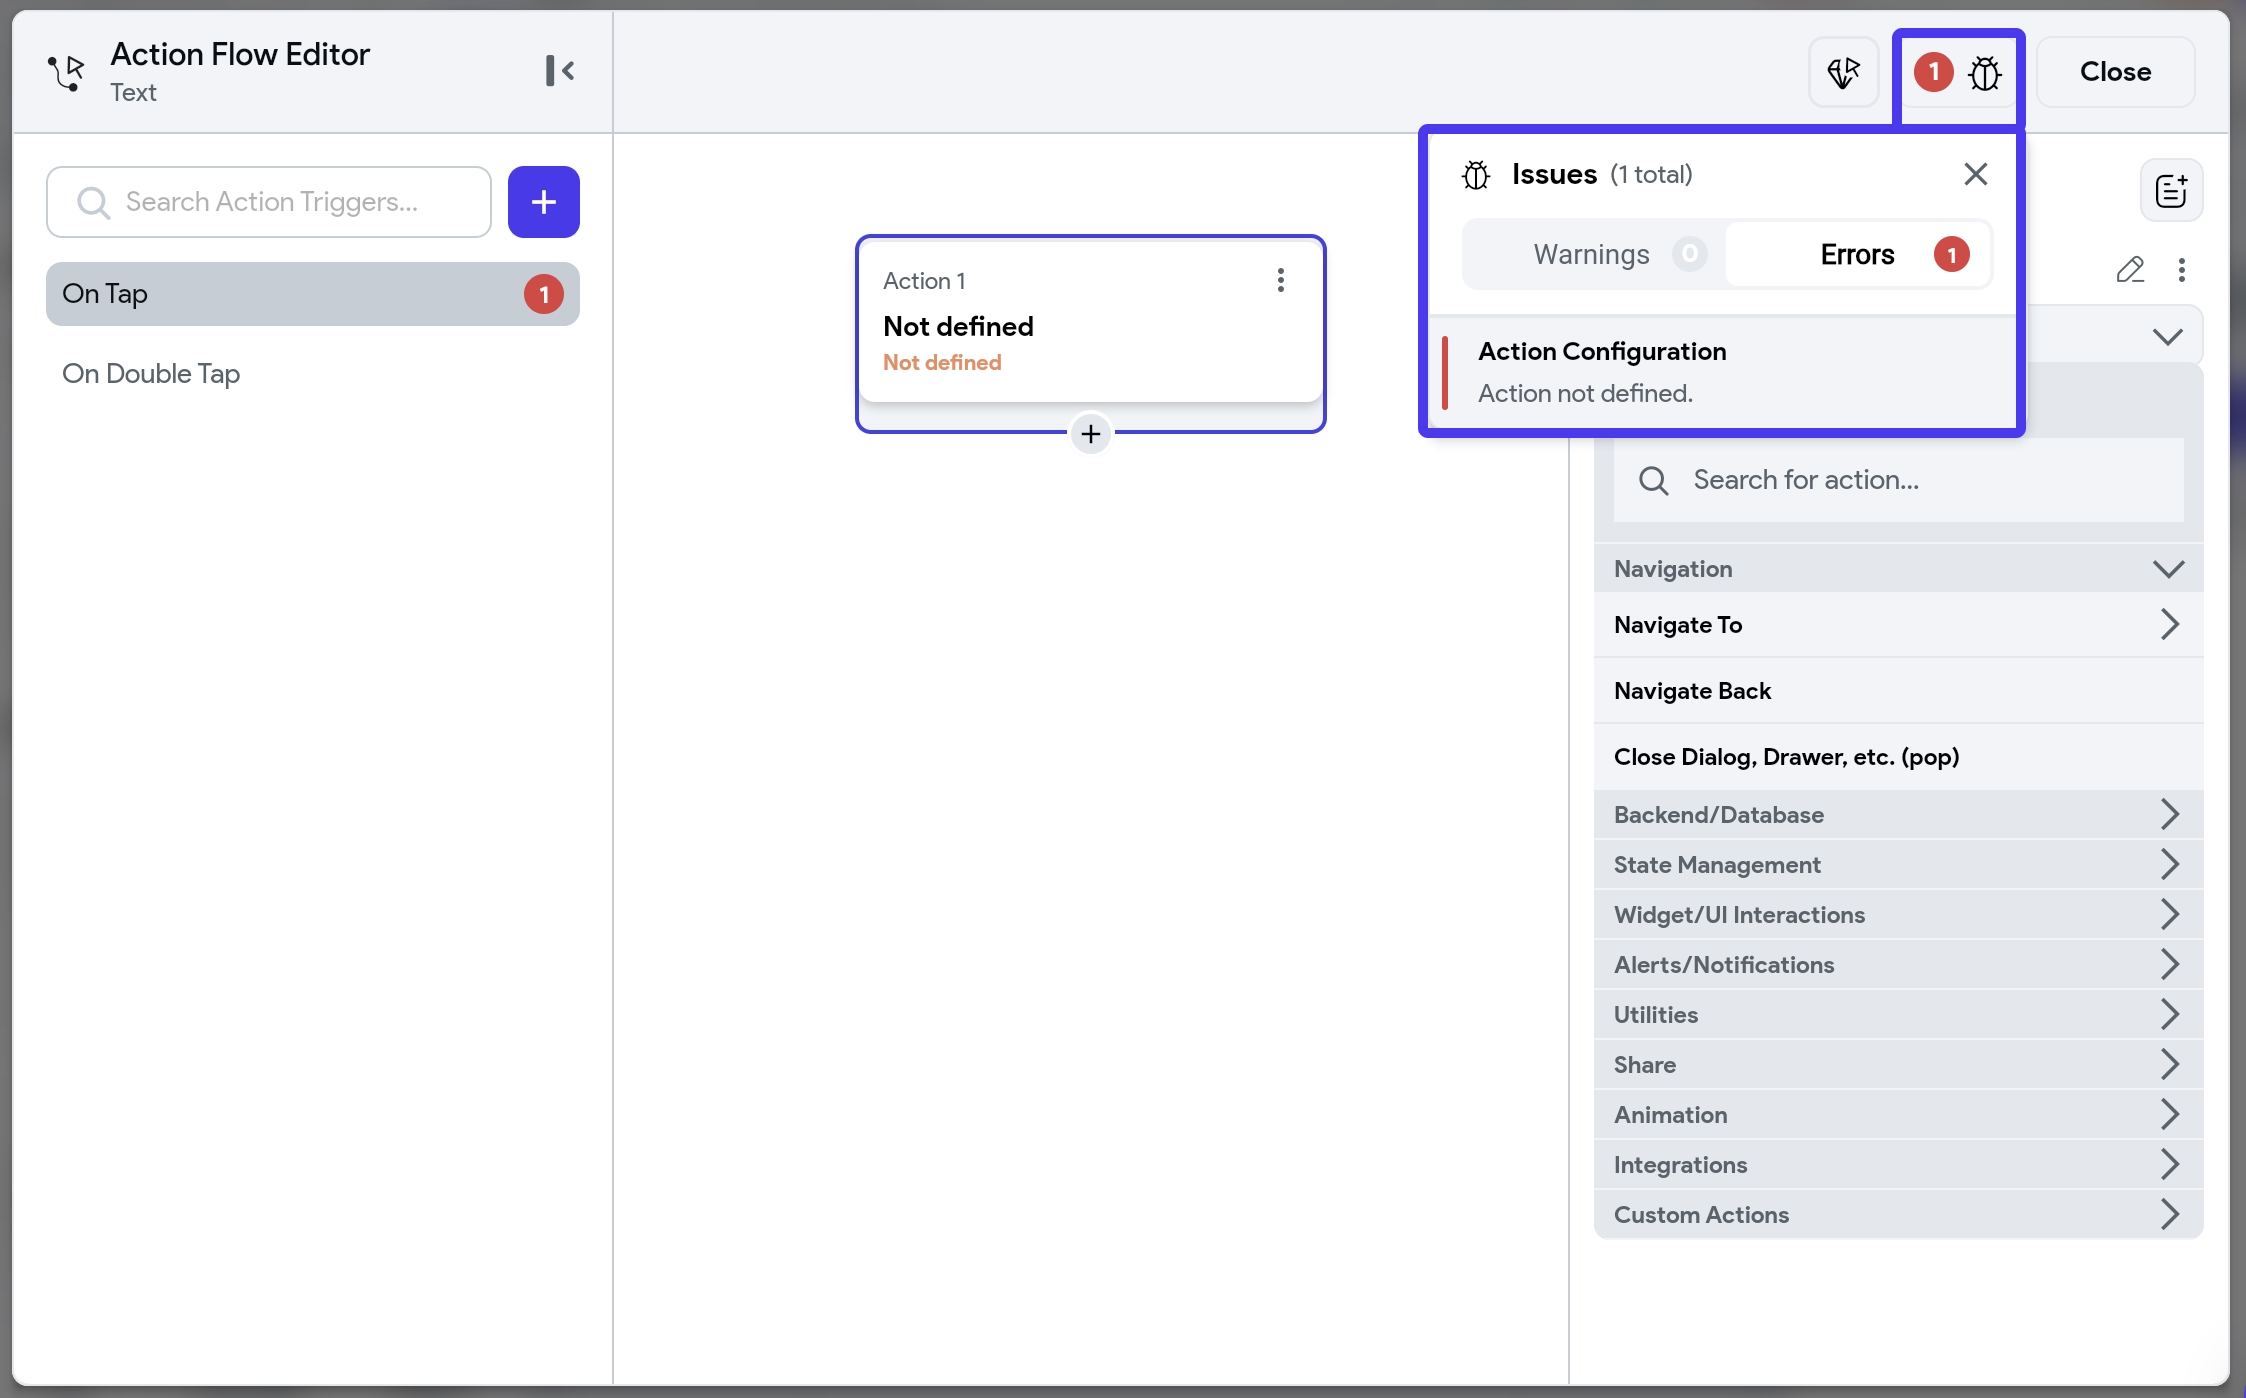
The bug icon will display warnings and errors in any of the action flows bound to this widget. Note, these are neither issues in the whole project nor issues in all of the action flow but only issues generated from the action flows bound to this widget. This includes all the action flows on all the triggers and not just currently visible action flow on the selected trigger.

Action Blocks
The diamond icon in the Action Flow Editor opens a menu where you can create and edit Action Blocks. Action Blocks are reusable action flows that can accept parameters and return values, promoting code reusability and modularity.
![]()
Learn more about different types of Action Blocks and their scopes.
Adding an Action [Example]
Here's a quick demo of how you can add an action or multiple sequential actions to a widget: