Email Login using Firebase
Before getting started with this section:
- Complete Firebase Setup
- Complete Initial Setup
Enable Email Login Provider in Firebase
- Open the Firebase Console and click on Authentication
- Click on the Get started button (this may not be visible if you have already set up other forms of Authentication).
- Select the Sign-in method tab.
- Click on Email/Password (Under the 'Native providers' section). If you have already added any other provider, click on Add new provider and then click on Email/Password.
- Find the Email/Password switch and enable it.
- Click on the Save button.
Add a Login Screen with Email/Password Fields
In FlutterFlow, you can utilize the Page Templates feature to create a new authentication page that includes both a "Create Account" component and a "Log In" component.
This setup aligns with Firebase's authentication process, which requires users to first create an account using their email and then allows them to sign in using the email ID they registered with.
Create Account Action
The Create Account action is the entry point for new users in any application. It's about establishing a user's credentials and granting them access for the first time. This action involves collecting necessary information such as email, password, and potentially other user-specific details like name or phone number.
The primary goal is to register and store new user data securely in your backend or authentication service (like Firebase). This process typically includes steps like validating the data format (e.g., email format), checking for unique usernames or email addresses etc.
To enable this in FlutterFlow, follow these steps:
- Create a page using Page Templates or from scratch, and add fields such as Email, Password, and Confirm Password. Based on your requirements, you may add additional fields.
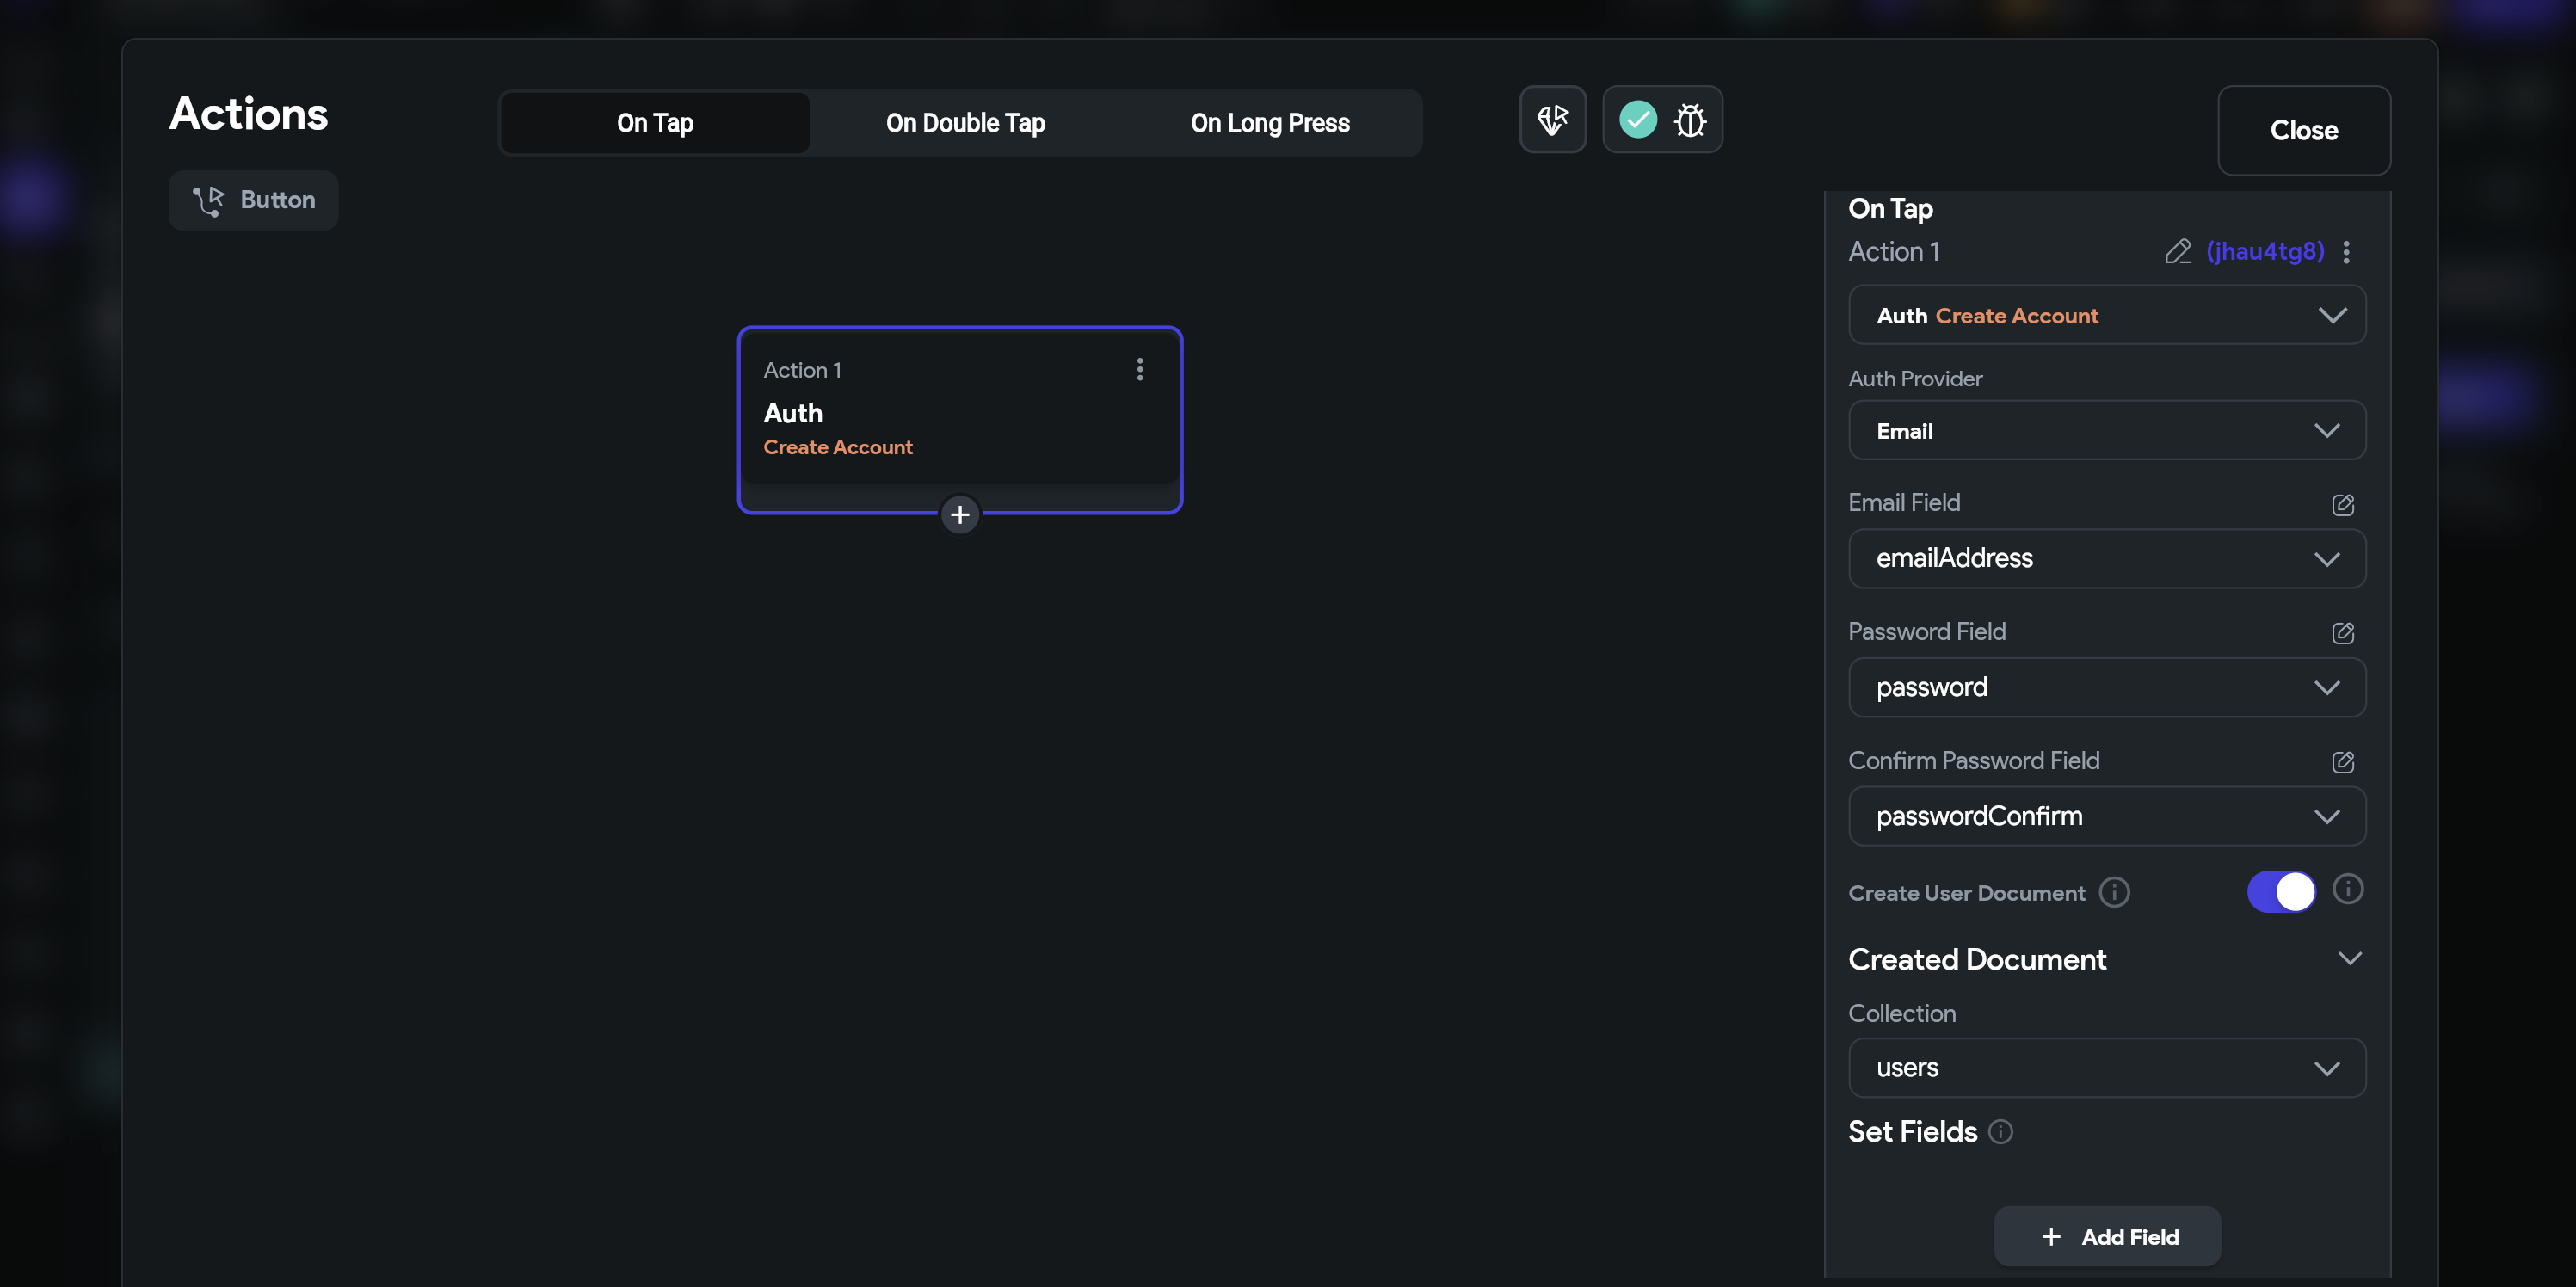
- Add a "Create Account" or "Sign Up" button and attach an action to it.
- Search for and select the Create Account action under Backend/Database > Firebase Authentication.
- Set the Auth Provider to Email.
- Configure the fields to retrieve values from variables, which are usually found under Widget State > Field Name.
- The Create User document is enabled by default. This means a user
document will
be created in the 'users' collection after the user is authenticated, if it
does
not already exist with details like email and UID.
- To create a user document in a different collection, adjust the Created Document > Collection dropdown to the desired collection.
- If additional details such as name, age, and birthday are needed at signup, click on the + Add Field and set its value. Make sure these fields are already created in the 'users' collection.
Send Email Verification Link [Action]
To understand why email verification is required when authenticating with an email and password, refer to Authentication Methods
-
Add a new action immediately after the Create Account action.
-
Search for and select the Send Email Verification Link (located under Backend/Database > Firebase Authentication) action. The user's email is automatically retrieved from Firebase Authentication, and a verification link is sent to the user for confirmation.
The user should receive an email verification link in their inbox. Upon successful verification, they will see a success message.
Log In [Action]
The Log In action, on the other hand, is for users who already have an account. It involves verifying the credentials provided by a returning user against stored data to grant access to the system. This action is crucial for maintaining secure access control as it ensures that the entity attempting to gain access is indeed who they claim to be. The process usually requires users to provide their registered email and password, which are then checked for correctness through your authentication system.
To enable this in FlutterFlow, follow these steps:
-
Create another Log In page using Page Templates or from scratch, and add fields such as Email, Password.
-
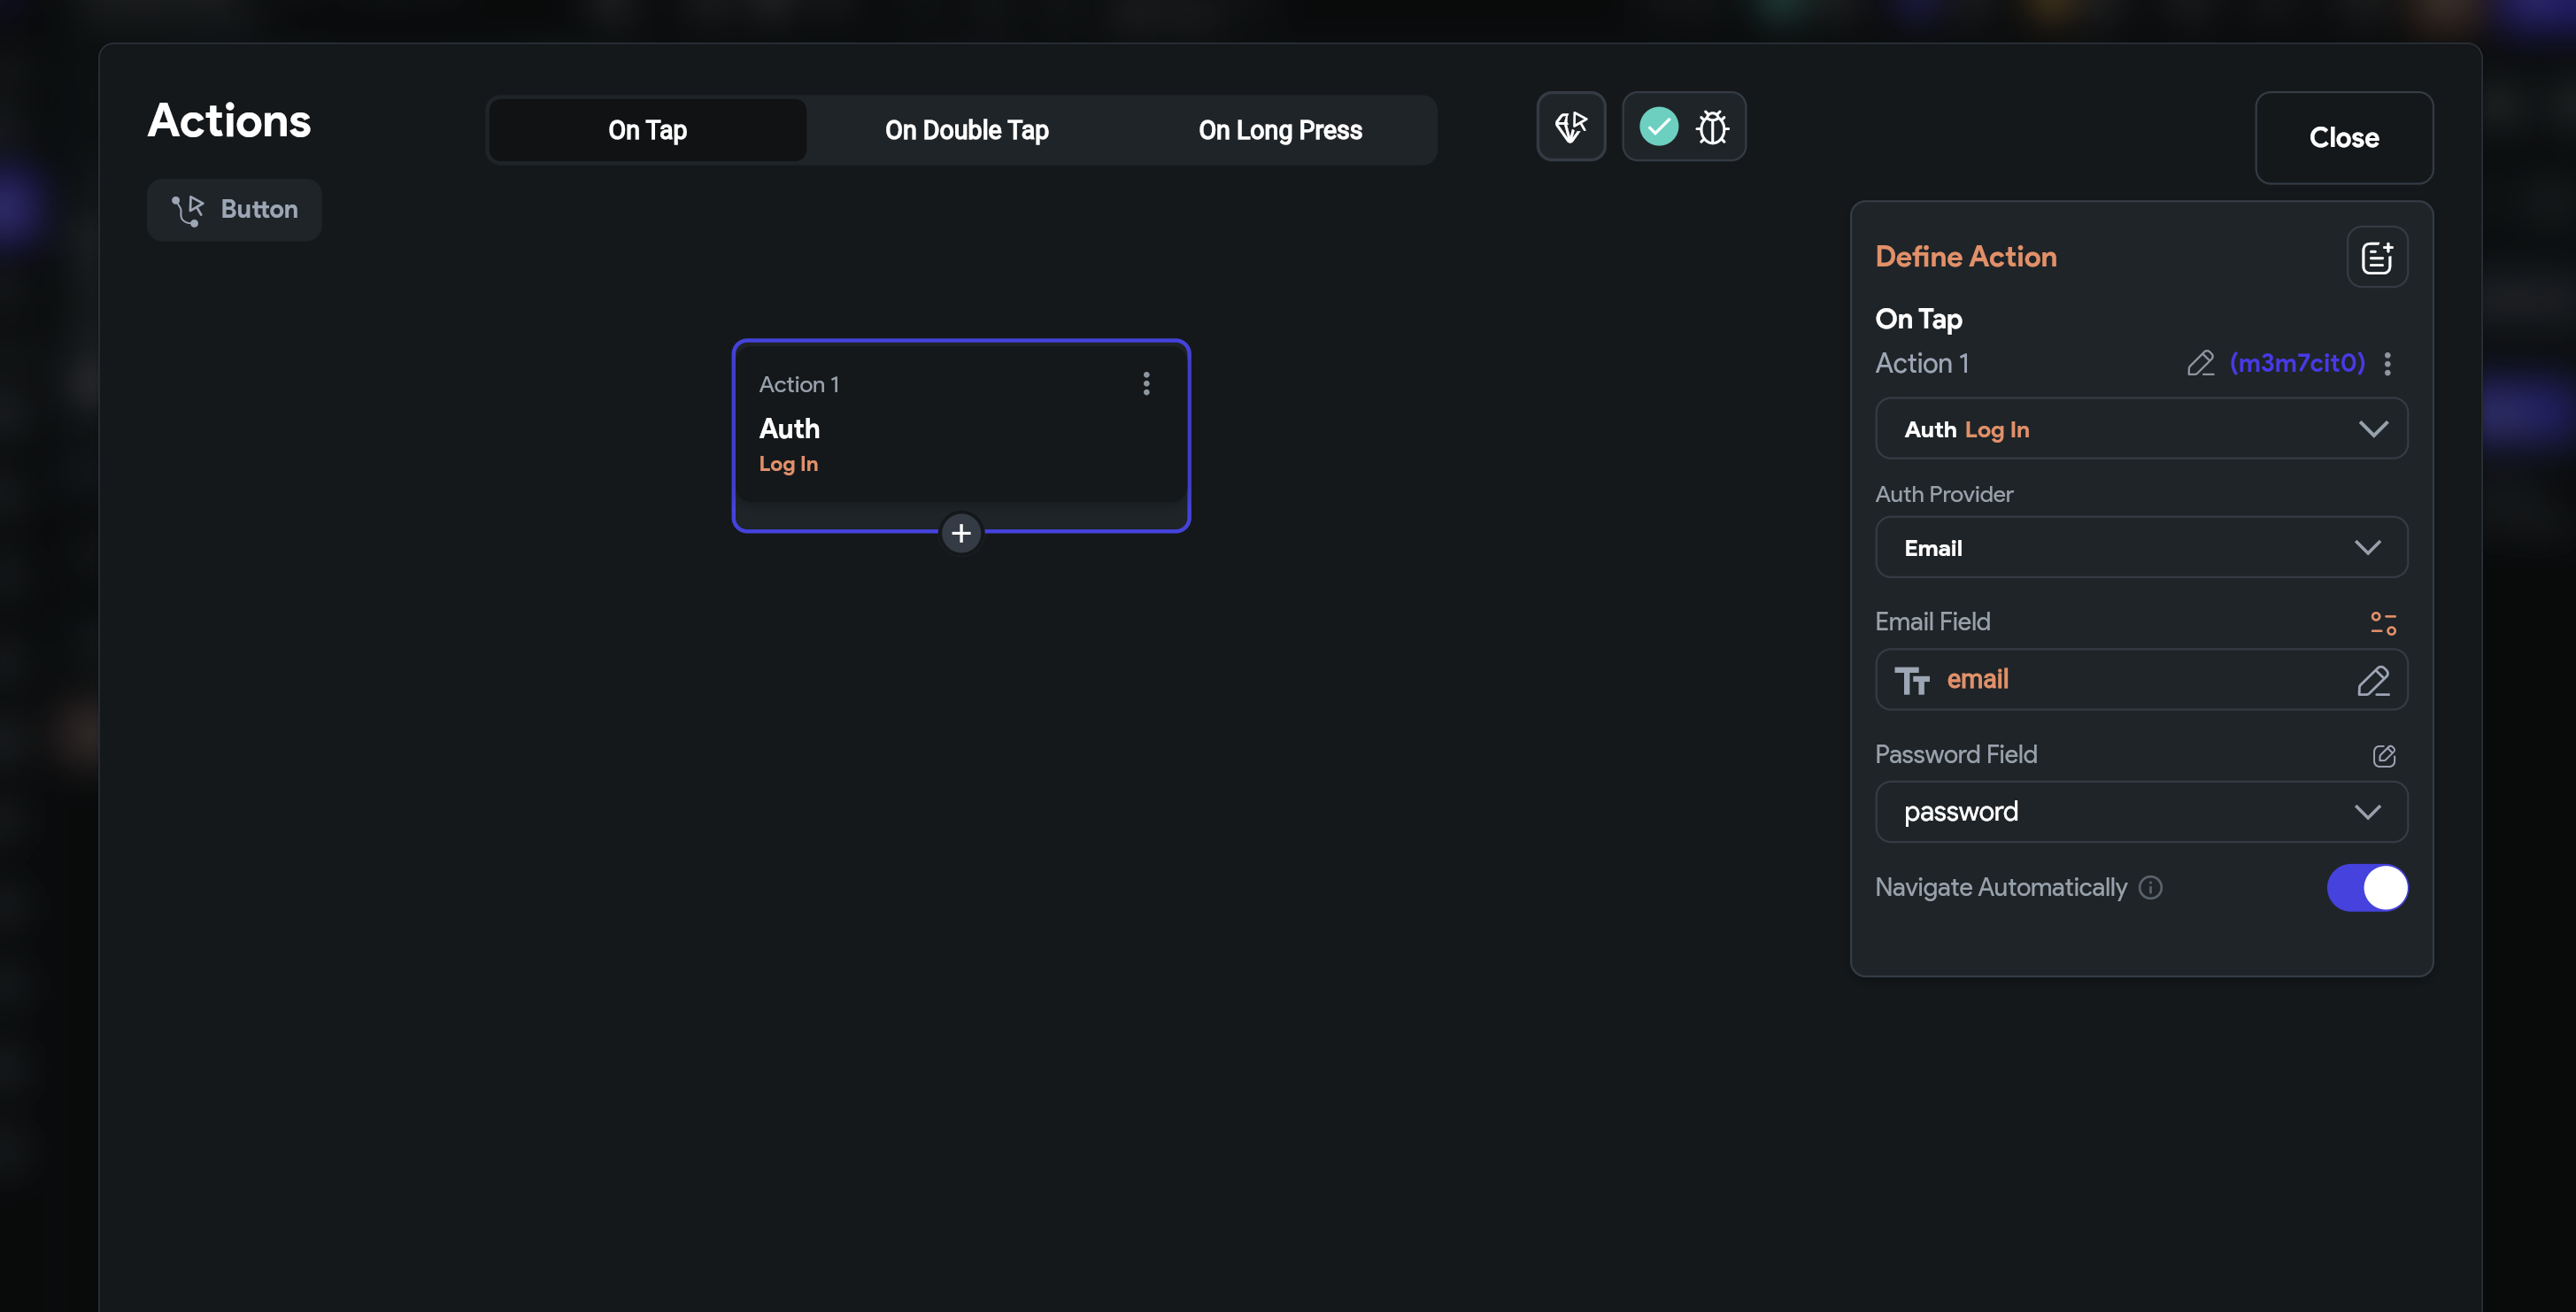
Add a "Log In" button and attach an action to it.
-
Search for and select the Log In action under Backend/Database > Firebase Authentication.
-
Configure the fields to retrieve values from variables, which are usually found under Widget State > Field Name.
To let users log out of your app, you can use the Logout action.
Verify user created in Firebase Dashboard
To verify that you have successfully added the email authentication and that users are being created, you can head over to your Firebase project > Authentication > Users and verify the user entries.