Common Auth Actions
Here's a list of common authentication actions:
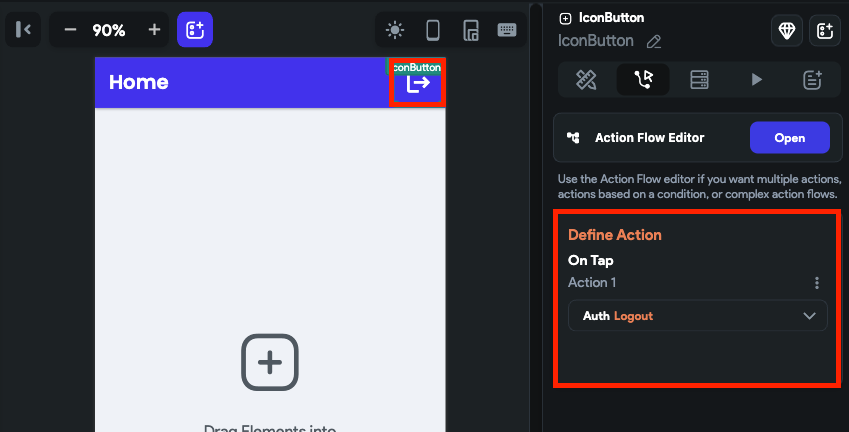
Logout [Action]
This action enables users to securely log out of their account and clear their session data from the app, which ensures that their account remains safe and secure.
Follow the steps below to add this action:
- Select the widget (e.g., Button) on which you want to add the action.
- Select Actions from the properties panel (the right menu), If it's the first action, click + Add Action button. Otherwise, click the "+" button below the previous action tile (inside Action Flow Editor) and select Add Action.
- Search and select the Logout (under Backend/Database > Firebase Authentication) action.
Reset Password
With Firebase Authentication, there are two ways you can allow users to reset their password in your FlutterFlow app:
In-App Password Change
This option allows users to change their password while they are logged into the app. This is useful when a user is authenticated but wants to update their password for security reasons.
To implement this, create a new page in your app, such as a ChangePassword page. This page should include two TextFields for the user to enter a new password and confirm it, along with a button (e.g., Update Password) to submit.
On the button's click, add the Update Password action (under Backend/Database > Firebase Authentication) and bind the Password Field and Confirm Password Field to their respective input widgets.
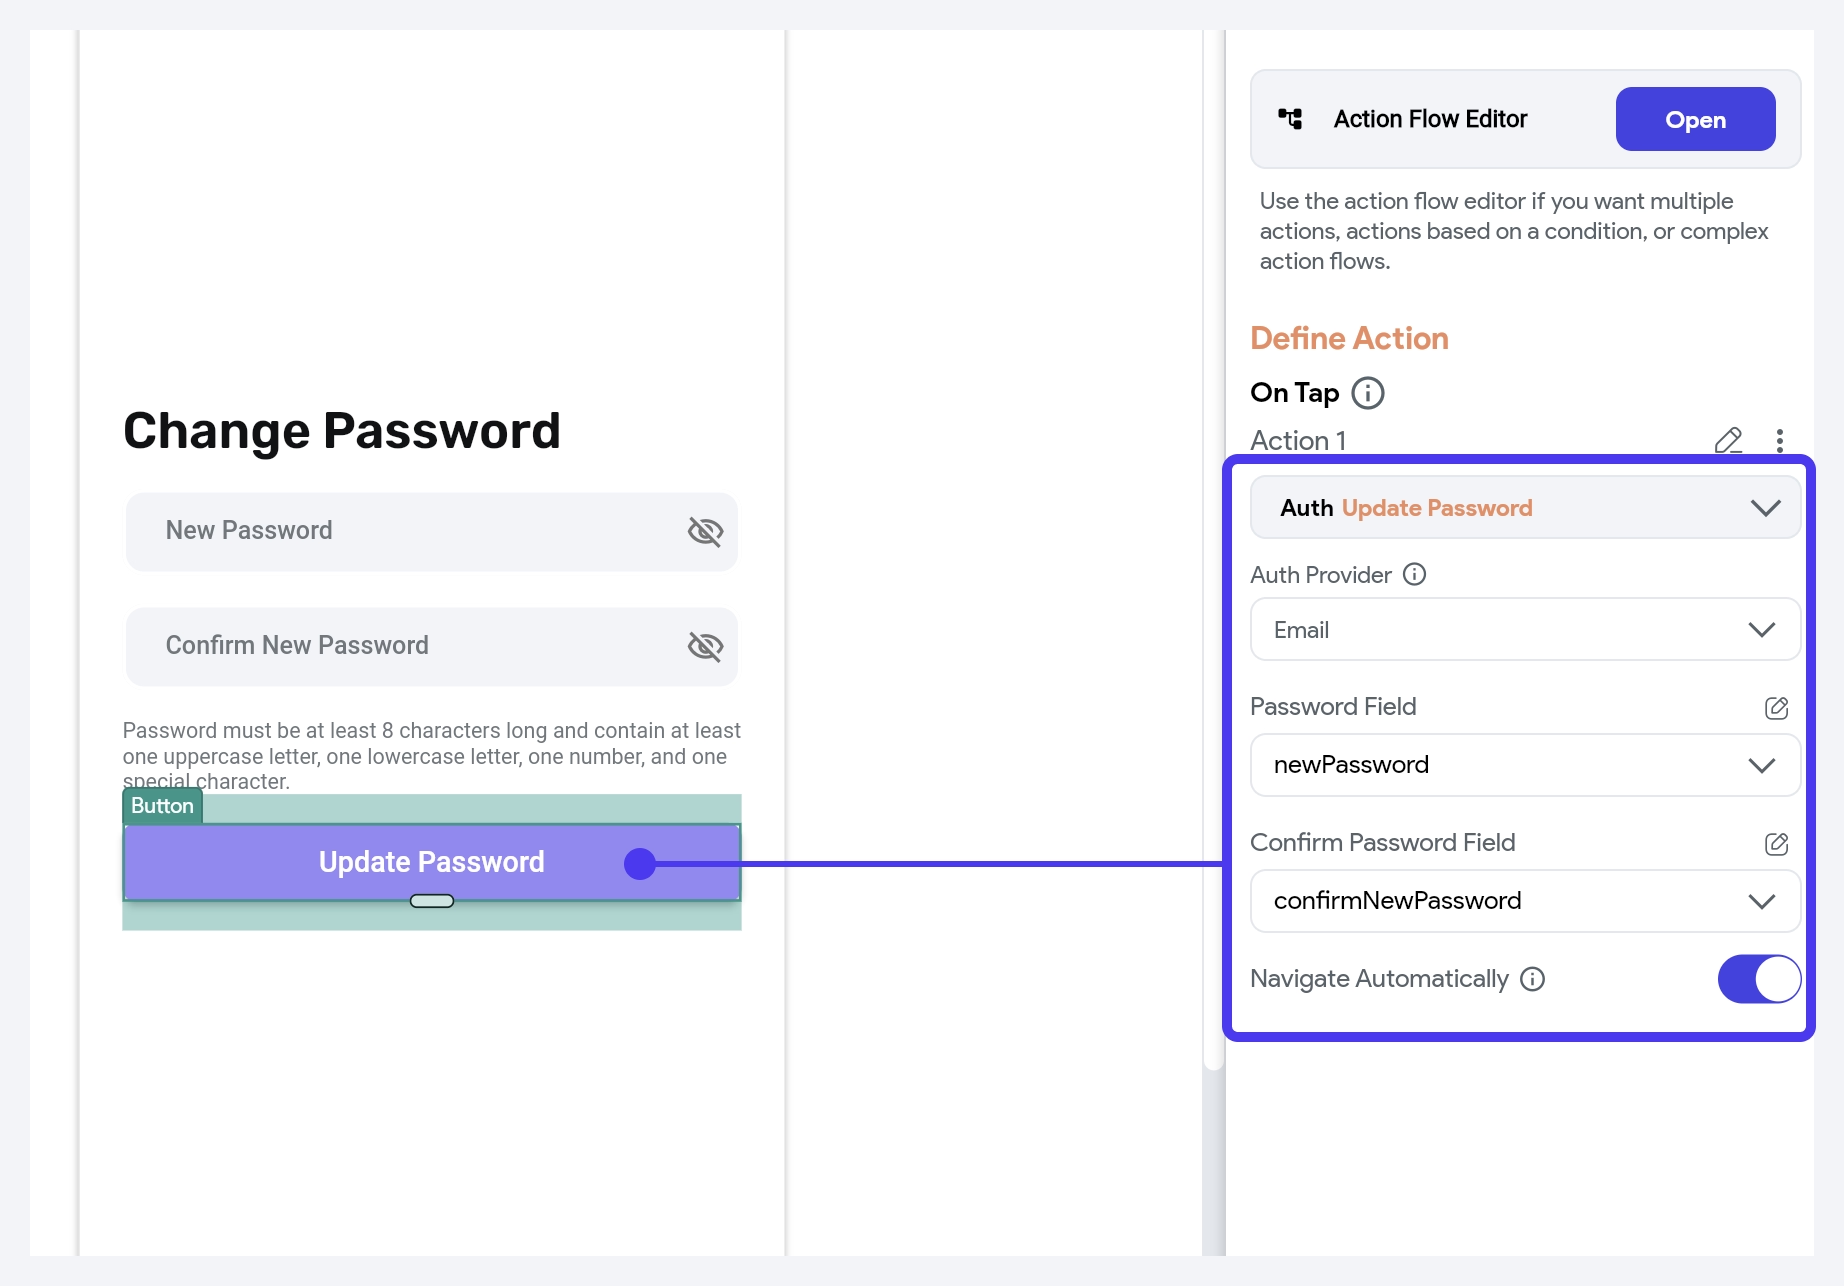
By default, the Navigate Automatically option is enabled. This means that after the password is successfully updated, the user will be redirected to the Logged In Page specified in your Initial Page settings.
Reset Password Link
This allows users who are logged out to reset their password. It sends a password reset link to the user's email address. When clicked, the user is directed to a Firebase-hosted webpage where they can set a new password.
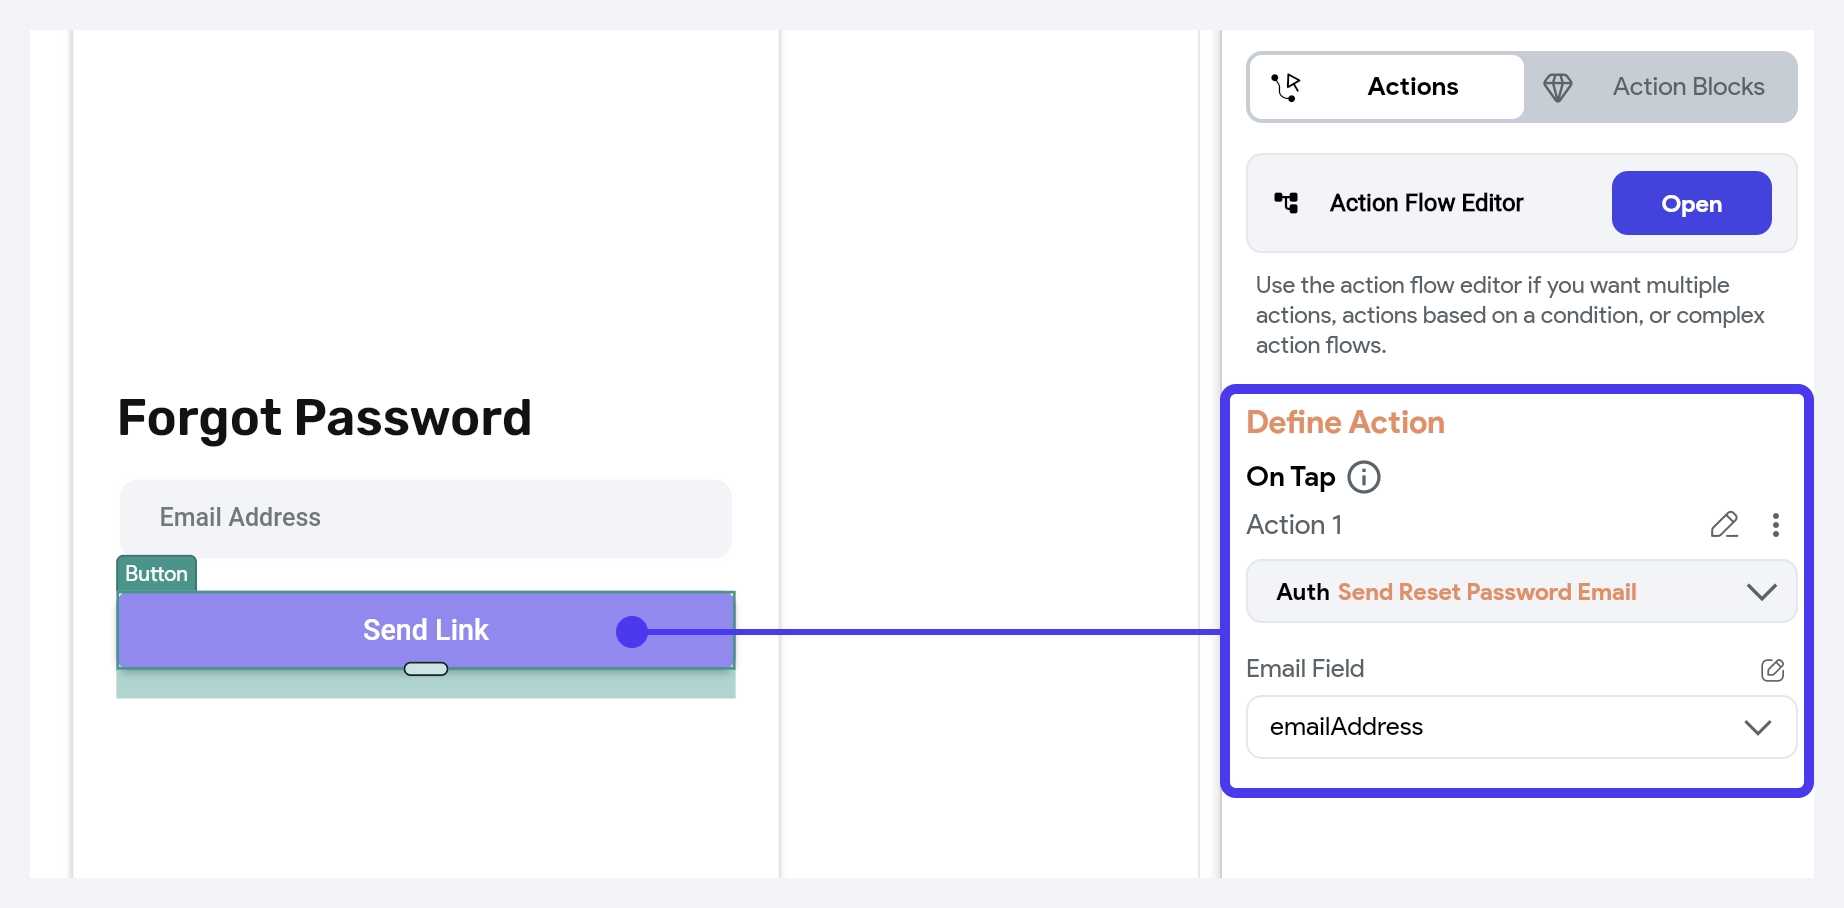
To set this up, create a page in your app, such as a ForgotPassword page. This page should include a TextField for the user to enter their email address and a button (e.g., Send Reset Link) to submit the request.
On the button's click, add the Send Reset Password Email action (under Backend/Database > Firebase Authentication) and set the Email Field dropdown to the widget that takes user’s email. This action will send a password reset link to the provided email address.
Update Email [Action]
This action allows users to change their registered email address linked to their user profile, thus ensuring their account details are up-to-date.
This is helpful in scenarios where a user may have changed their primary email address or entered an incorrect one during initial registration. Also, if users lose access to their original email or forget their login credentials, being able to update their email addresses can assist in resetting passwords or recovering account access.
Follow the steps below to add this action to any widget.
- Select the Widget (e.g., Container, Button, etc.) on which you want to add the action.
- Select Actions from the properties panel (the right menu), If it's the first action, click + Add Action button. Otherwise, click the "+" button below the previous action tile (inside Action Flow Editor) and select Add Action.
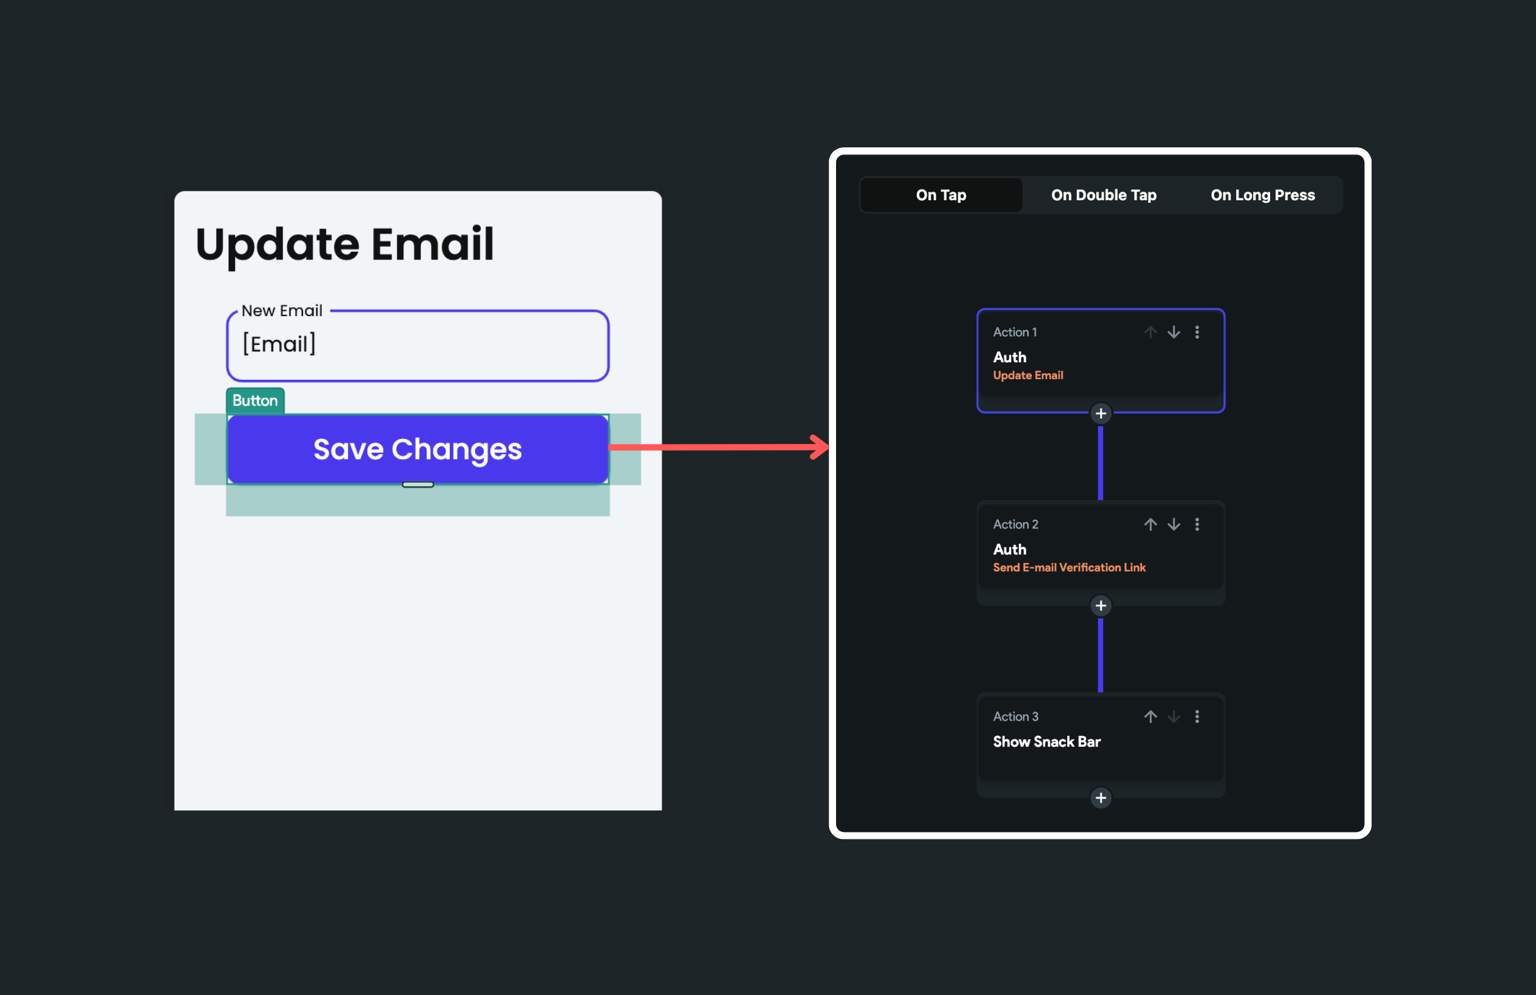
- Search and select the Update Email (under Backend/Database > Firebase Authentication) action.
- As a best practice, it's also recommended to send the email verification link to the new email (using the e-mail verification action) followed by this action.
Delete User [Action]
Using this action, you can delete the user account created using the Firebase authentication. Additionally, you can also set up to delete all data associated with that user.
Follow the steps below to add this action to any widget.
-
Select the Widget (e.g., Container, Button, etc.) on which you want to add the action.
-
Select Actions from the properties panel (the right menu), If it's the first action, click + Add Action button. Otherwise, click the "+" button below the previous action tile (inside Action Flow Editor) and select Add Action.
-
Search and select the Delete User (under Backend/Database > Firebase Authentication) action.
-
As a best practice, it's also recommended to log out the user (using the logout action) following this action.
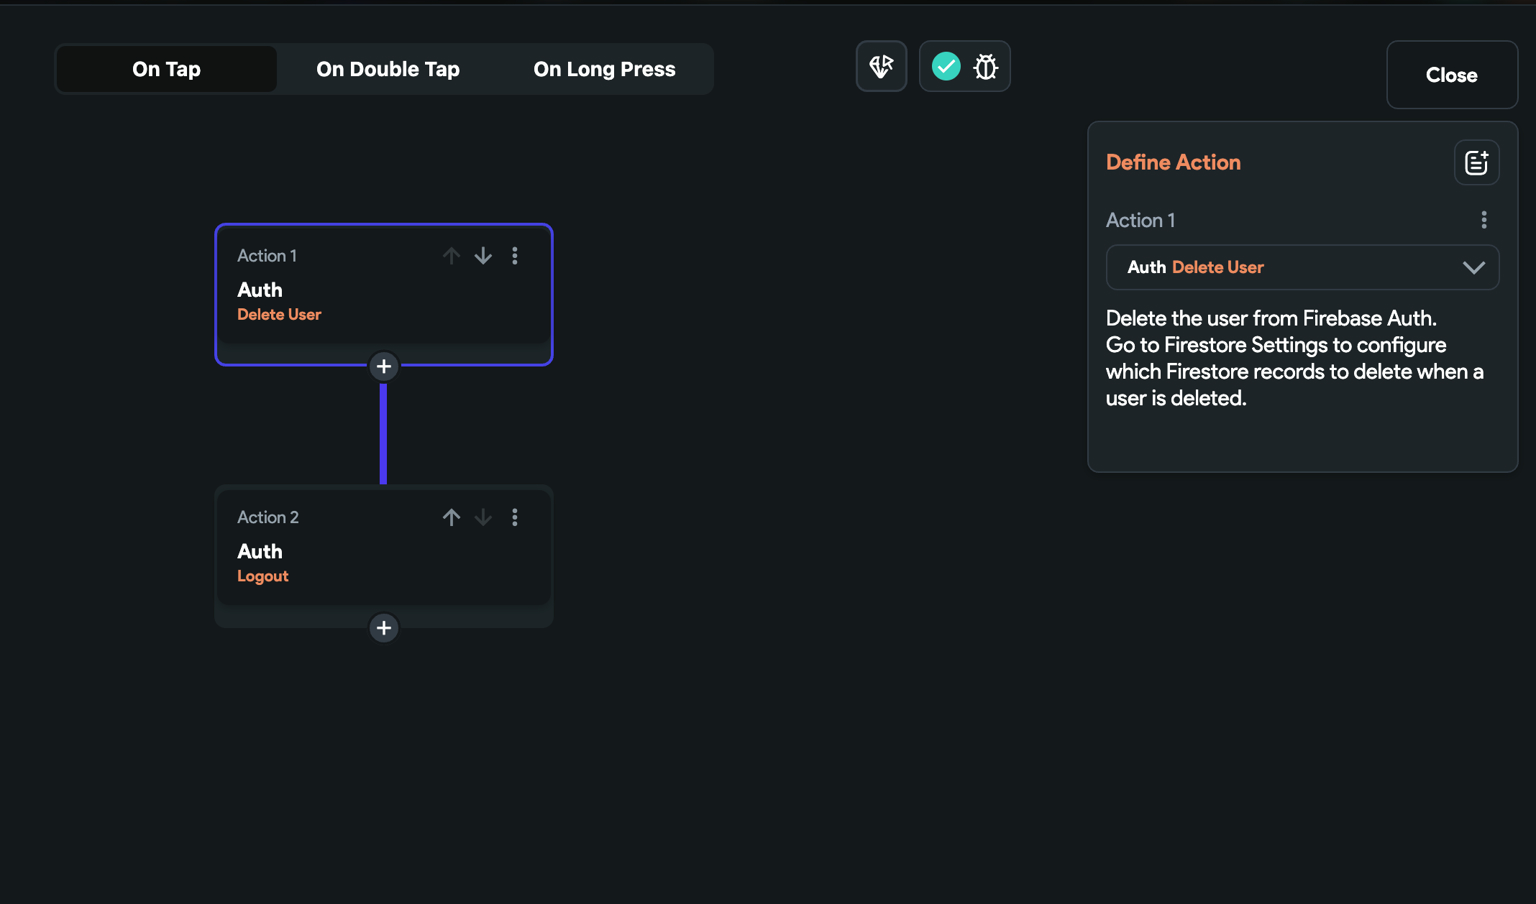
-
To delete all records and data associated with that user's account:
- Navigate to the Firestore (from the Navigation Menu) > switch to Firestore Settings > Firestore Rules.
- Identify the collection from which you want to delete the user's data and ensure the Delete rule is set to Tagged Users. This will open the 'Tag Users' popup; here you can select the field that contains the document reference. See how to setup a rule.
- Tick the checkbox.
- See the Delete User References section and click on Preview to verify the generated rule.
- Click the Deploy button.
FAQs
While adding Delete User [Action], I can't see or select field in 'Tag Users' popup
If you can't see or select the field containing the user reference, ensure that you have enabled the 'Create User Document' option in the Create Account action. Enabling this option ensures that the 'users' collection is properly set up and its reference can be accessed in the 'Tag Users' popup.