Cloud Firestore
Firestore Database is a product from Google's Firebase. It's a flexible, scalable, NoSQL cloud database. It allows you to store your app data and uses real-time listeners to keep the data in sync.
Let's understand the Firestore database (Cloud Firestore, a NoSQL Database) in more detail.
What is a NoSQL Database
The NoSQL database is a schema-less database. That means the data is NOT stored in the table format. You actually don't have any restrictions on how you store your data. The Firestore database uses the collection-document model to store the data.
Key terms to remember:
- Collection: A collection is simply a set of 'documents.'
- Document: A document is a record that contains the 'fields.'
- Fields: The key-value pairs inside the document are called 'fields.' e.g., name, place, age, etc.
To better understand, see the figure below:
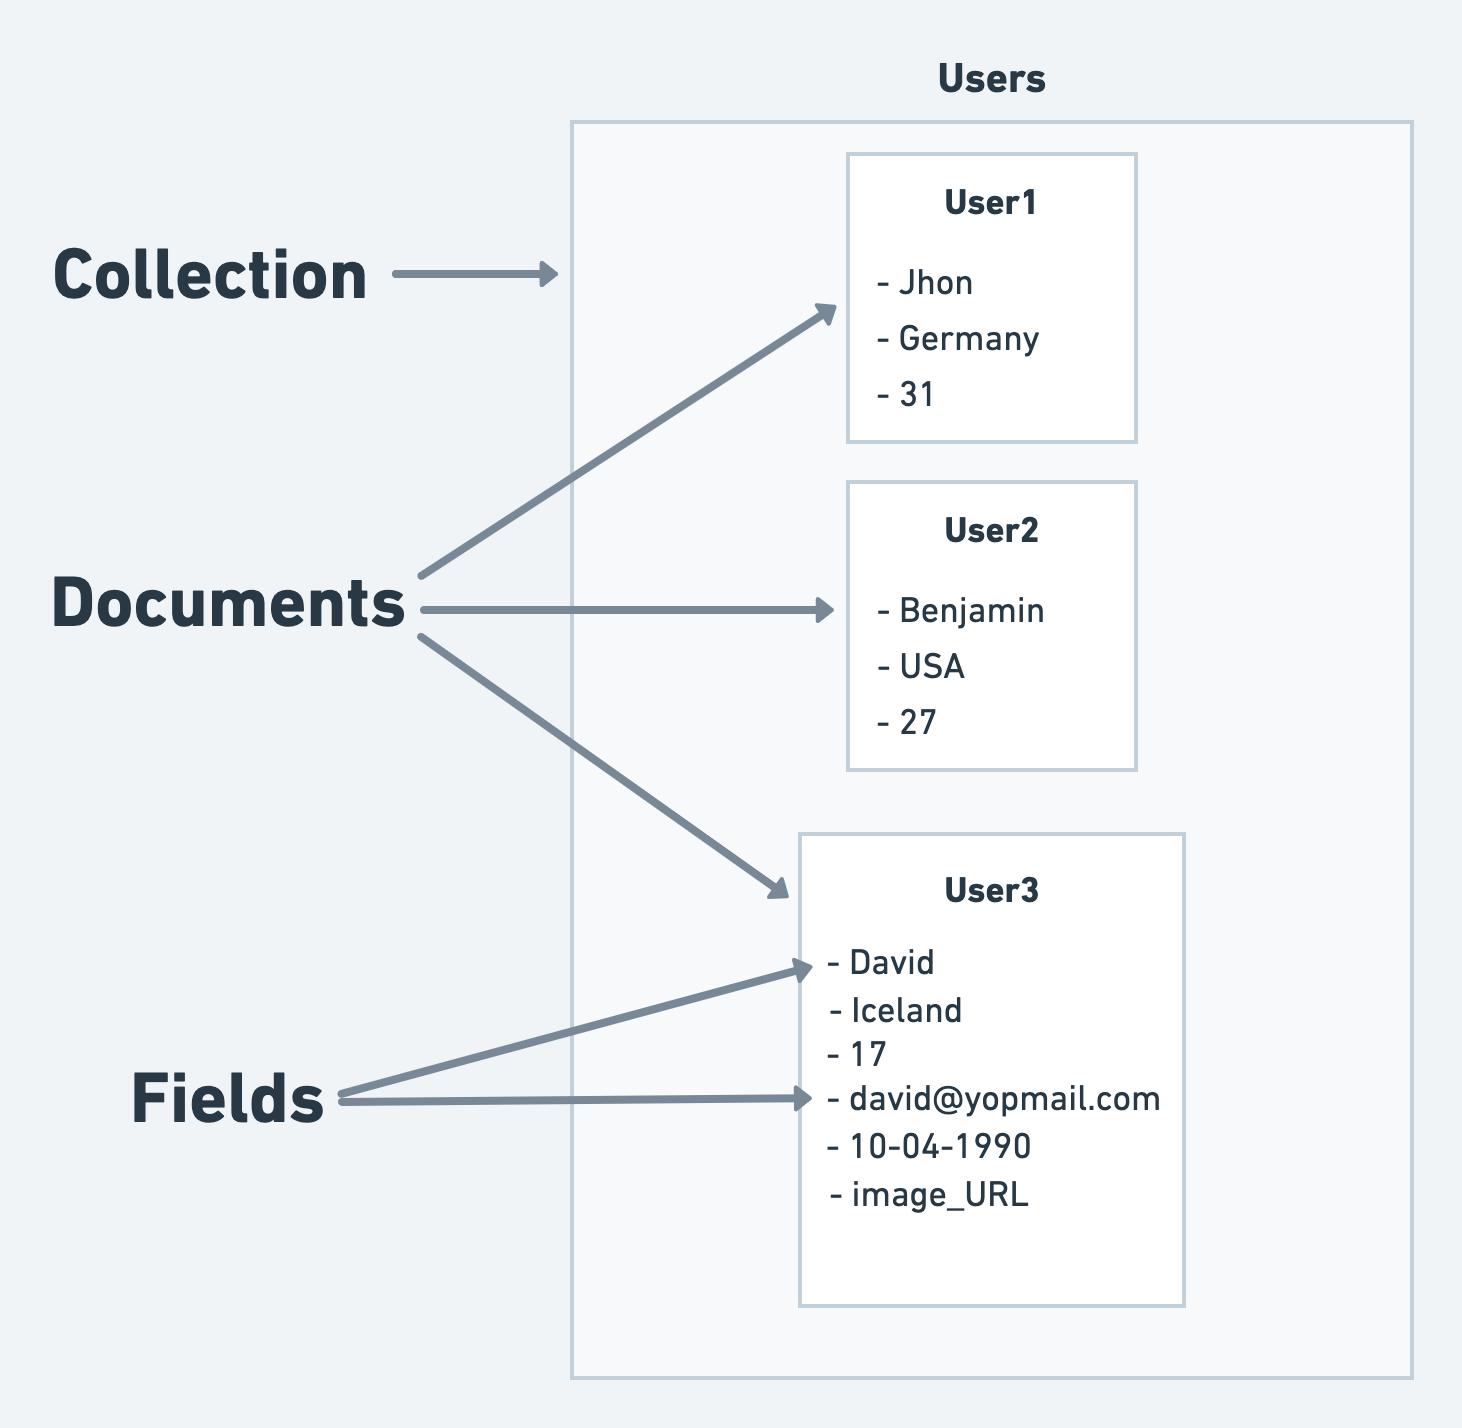
Every user's information is kept in a unique document. Multiple of these documents come together to form a collection. The beauty of this system is that not all documents within a collection need to have identical fields. So, if you decide to add a new field (e.g., DOB, image) to a new document, there's no need to go back and add it to older ones.
Structuring the Database
To see how to structure the database, consider an example that allows users to comment on a post.
With FlutterFlow, you can structure the database in the following ways:
Top-level collections
In Top-level collections, multiple collections are created at the root level of your database.
For example, you create collections such as 'comments' and 'posts' at the root level. Comments for all the posts are stored in a single top-level collection. To know which comment belongs to which post, you include additional reference fields that distinctly identify each post within this structure.
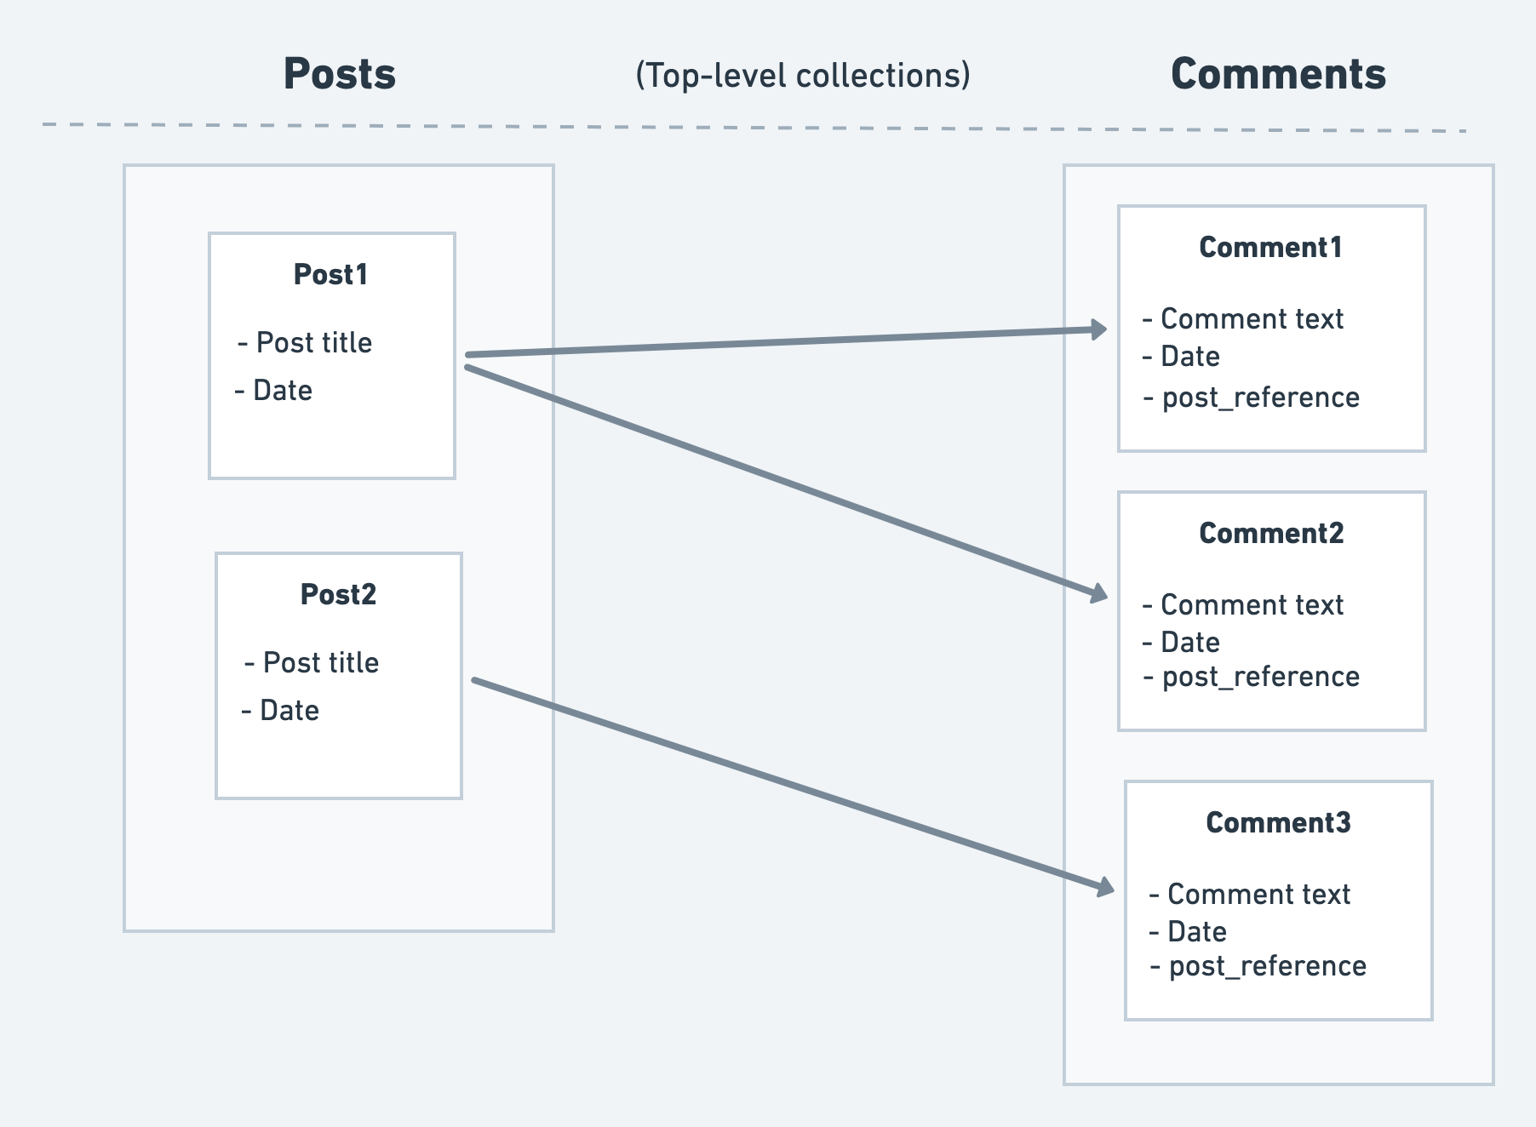
Use top-level collections when you often search or filter within one collection without depending on another. For instance, if you want to see all comments, regardless of their related post (i.e., showing comments with the most likes).
Subcollections within documents
Collections are created inside the document. Such a collection is called subcollection.
For example, you create the top-level collection, such as posts, and then create a 'comments' collection (as a subcollection) inside the 'posts' collection. The advantage? You don't need extra tags or reference fields to know which post a comment belongs to; it's already grouped right there.
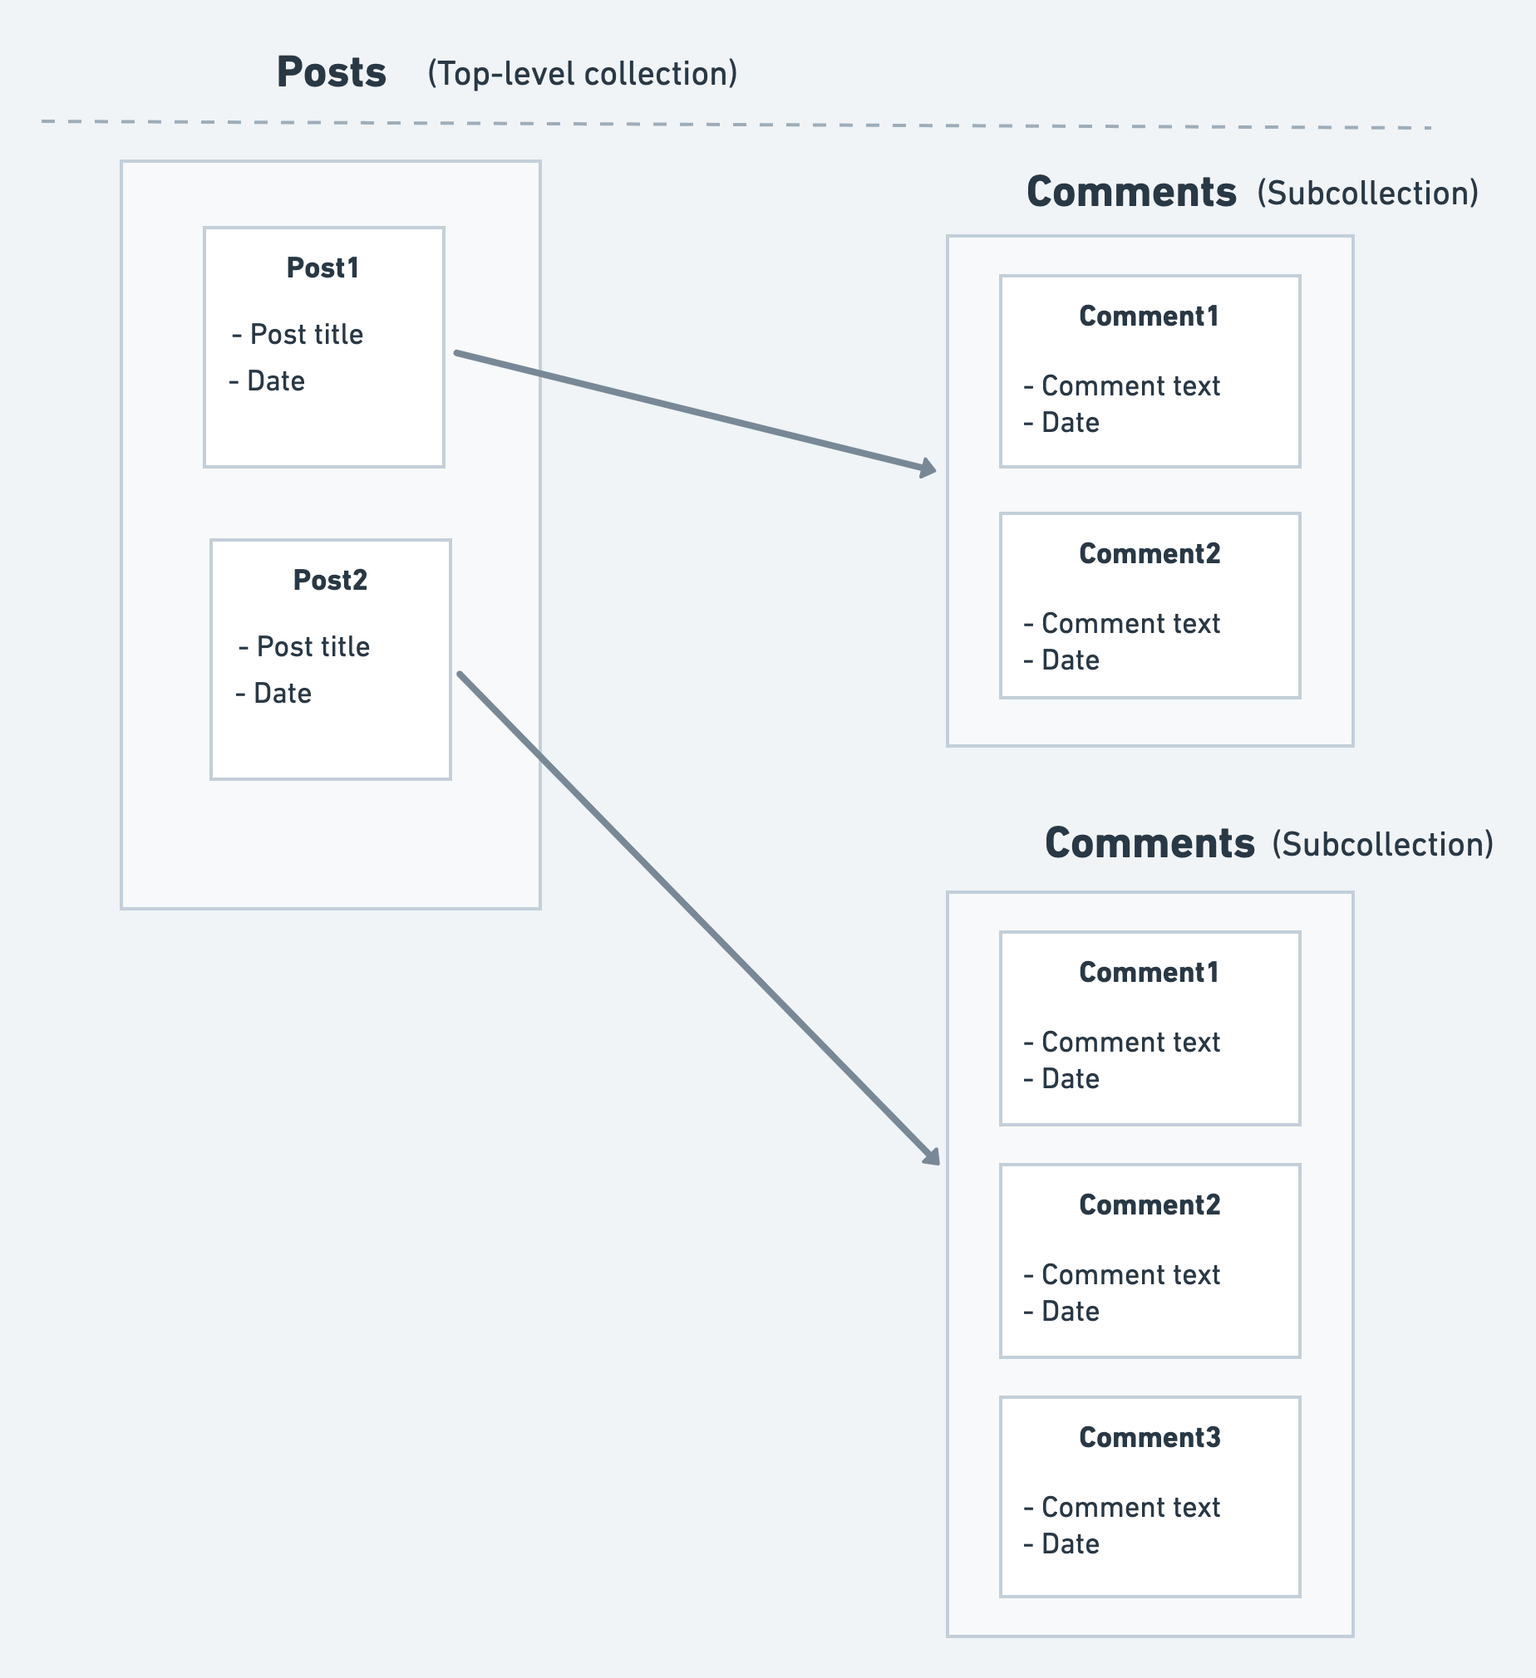
Subcollection is best when you have several queries or filters or search on a collection that is based on the other collection. For example, loading or searching the comments of a specific post (i.e., show all comments of a specific post that have more likes.)
You can secure the data using the Firestore Rules.
MongoDB, Cassandra, and ElasticSearch are the other No-SQL database solutions that exist in the market.
If you are a visual learner, you can check out the video: