Utility Actions
Utility Actions provide essential functionalities that enhance your app's capabilities, such as data manipulation and system interactions. These actions streamline processes and improve the overall user experience. Examples include copying text to the clipboard and selecting colors or dates.
Color Picker [Action]
Using this action, you can allow users to pick their favorite color from the palette or by entering a HEX/RGB color value. You might, for instance, utilize this to give customers the option of choosing the color of a product you offer.
When this action is triggered, it opens the color picker, where users can customize the color. The color picker will close once the desired color has been selected, and the selected color will then be accessible via Widget State > Color Picked.
Follow the steps below to add this action to any widget.
- Select the Widget (e.g., Container, Button, etc.) on which you want to add the action.
- Select Actions from the properties panel (the right menu), If it's the first action, click + Add Action button. Otherwise, click the "+" button below the previous action tile (inside Action Flow Editor) and select Add Action.
- Search and select the Color Picker (under Widget/UI Interactions) action.
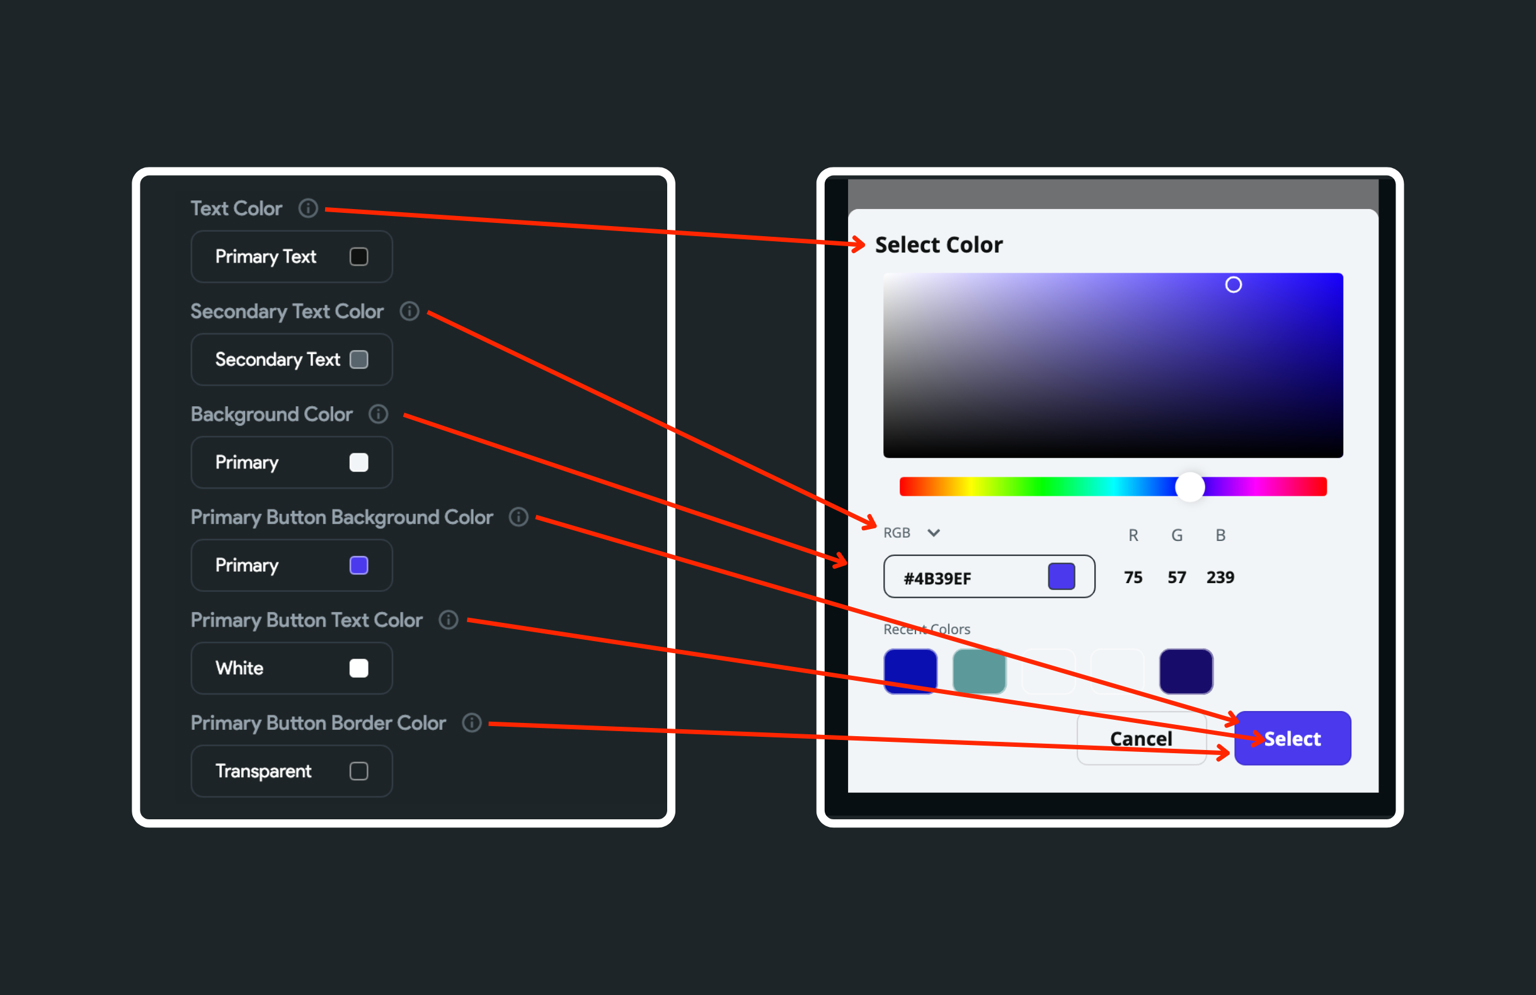
- When the color picker is opened, by default, the primary color is selected. To change this, set the Initially Selected Color.
- You can also customize the look and feel of the color picker by changing the color of the Text, Background, and Button.
- By default, the color picker allows users to add opacity to the color. To allow users only select the opaque colors, disable the Allow Opacity toggle.
- Recent colors help users choose any previous color they have used. Disable the Show Recent Color toggle if you don't want to show them.
- The selected color is now available at Widget State > Color Picked. You can access it from any widget's color property or click the "+" button and add the following action to update the selected color in your backend or app state.
After the user has selected the desired color, the picker will close automatically, and the selected color can then be accessed via the Widget State > Color Picked.
Here's an example of adding the color picker action and updating the selected color in an app state variable.
- Adding color picker action
- Customize color picker
DateTime Picker [Action]
This action allows the user to select a date and time. You could use it to schedule appointments, set a reminder for a specific date, choose travel dates and times, etc.
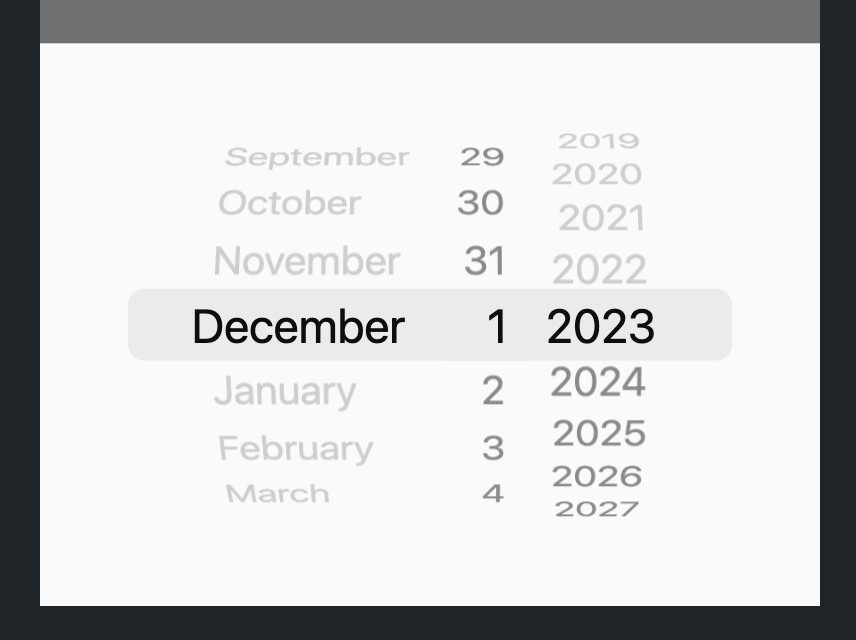
When this action is triggered, it opens the graphical calendar and clock interface that the user can interact with to select a specific date and time.
Types Date/Time Picker
You can choose to open the following types of Date/Time picker dialog:
- Date: Allows you to only select a date.
- Date+Time: Allows you to select the date followed by the time.
- Time: Allows you to only select a time.
Follow the steps below to add this action to any widget.
- Select the Widget (e.g., Container, Button, etc.) on which you want to add the action.
- Select Actions from the properties panel (the right menu), If it's the first action, click + Add Action button. Otherwise, click the "+" button below the previous action tile (inside Action Flow Editor) and select Add Action.
- Search and select the Date/Time Picker (under Widget/UI Interactions) action.
- Set the Date/Time picker type.
- By default, the picker shows the current date/time. You can change this by adjusting the Default Date/Time.
- To define the range of selectable dates, use the Minimum Date/Time and Maximum Date/Time properties. Click on Unset to specify your dates.
- Control whether the past and future dates/times are selectable with Allow Past Date/Time and Allow Future Date/Time. Tip: If you explicitly set the min or max date, this option will be disabled.
- For an iOS-style display, activate the Use Cupertino-style toggle.
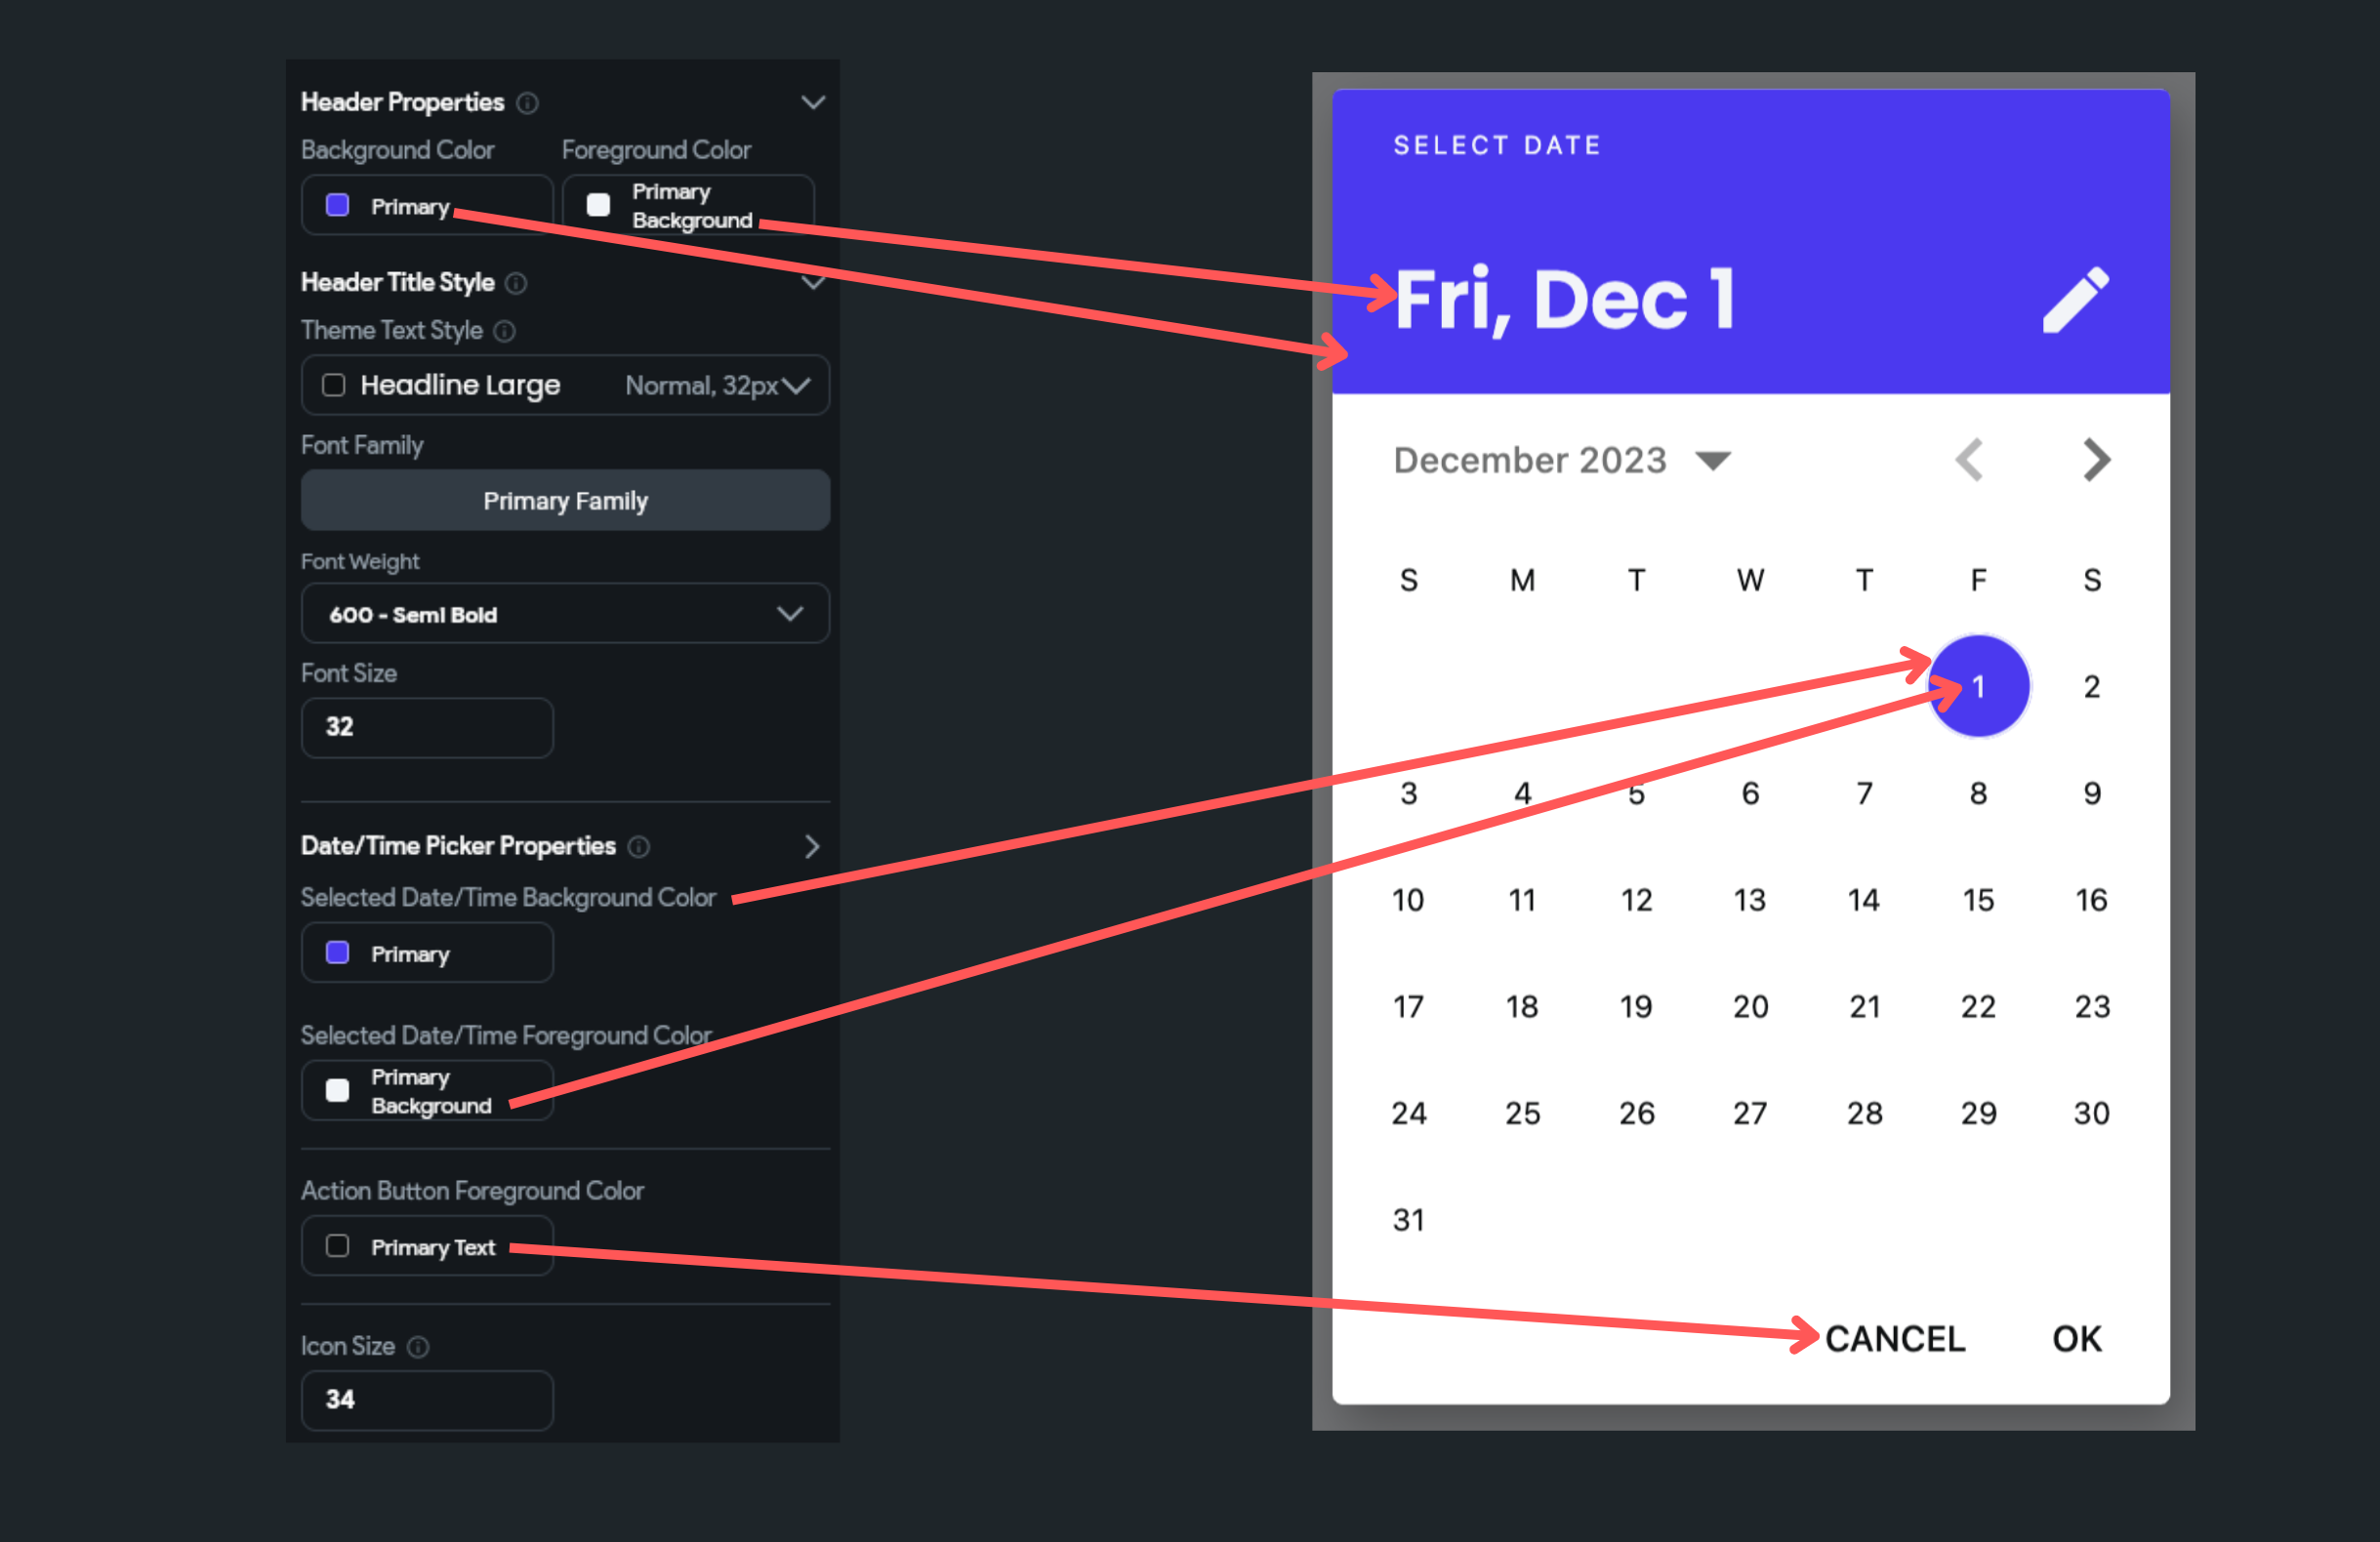
 9. For more personalized styling, turn off Use Default Theme and tweak the settings in the Appearance Properties section.
After the user has selected the desired date and time, the picker will close automatically, and the selected date/time can then be accessed via the Widget State > Date Picked.
Here's an example of adding the date time picker action and displaying the value in a Text widget.
Biometric Verification [Action]
Most modern devices come with biometric sensors to strengthen the device's security. Using this action, you can leverage on-device authentication such as fingerprint or face recognition to protect your app's privacy.
When this action triggers, it checks for the enrolled biometric. If it finds any, it asks users to verify their identity. If the biometric authentication fails, it opens up the screen lock option (e.g., Pattern, PIN, Password, Swipe, etc.) as a fallback method to authenticate users.
A common use case of this action is to allow only the intended user to open an app that involves financial or confidential information, such as an online payment app, stock trading app, or online storage app.
Go to your project page on FlutterFlow and follow the steps below to define the Action to any widget.
- Select the Widget (e.g., Button) on which you want to define the action.
- Select Actions from the Properties panel (the right menu), and click Open. This will open an Action Flow Editor in a new popup window.
- Click on the + Add Action.
- On the right side, search and select the Biometric Verification (under Utilities) action.
- By default, if the biometric verification fails, it opens the on-device credentials such as Pattern and PIN. This helps in a case where the biometric sensor can't recognize a valid fingerprint or face. However, you can disable this behavior and only allow biometric verification. To do so, turn on the Allow biometric only toggle.
- Enter the Biometric Reason text. This message is displayed inside the biometric recognition UI.
- Provide the Action Output Variable Name. The status of biometric verification, True (pass) or False(fail), is stored in this variable. You can use this variable to decide the following action. For example, showing a success or failure message.
- To show a success or failure message, Add Conditional action by clicking on the + button inside the already added action.
- Click on the UNSET, select Action Output, and select the action output variable name.
- Under the TRUE section, add an action to show the snackbar with a success message.
- Similarly, add the failure message under the FALSE section.
Copy to Clipboard [Action]
Using this action, you can allow users to copy a particular text from your app. For example, copying a message or transaction ID and then pasting it into another application.
When this action is triggered, the data is stored temporarily in a special part of the device's memory called the clipboard. The user can then paste the copied text into another application by using the "paste" command.
Follow the steps below to add this action to any widget.
- Select the Widget (e.g., Button) on which you want to add the action.
- Select Actions from the Properties panel (the right menu), and click Open. This will open an Action Flow Editor in a new popup window.
- Click on the + Add Action.
- Search and select the Copy to Clipboard (under Utilities) action.
- Most probably, this value would be dynamic; hence, you can set the Value Source to From Variable and set the Source accordingly.
At present, testing this action isn't possible in Test mode, but you can use the Run mode for this purpose.
Set Dark Mode Setting [Action]
Using this Action, you can set the app theme to Light/Dark or set it as per the system.
- As Per System
- Manually Setting Theme Mode
Types of Dark Mode Setting
There are three types of the mode you can set:
- From System: Set the Light/Dark Mode based on system preference. That means you don't need to build the Light/Dark Mode switch UI in your app. The dark mode will be set automatically if a user has set the dark mode in the Android/iOS operating system.
- Light Mode: Set the theme mode to Light.
- Dark Mode: Set the theme mode to Dark.
Go to your project page on FlutterFlow and follow the steps below to define the Set Dark Mode Setting Action to any widget.
- Select Actions from the properties panel (the right menu)
- Click + Add Action button
- Choose a gesture from the dropdown among On Tap, On Double Tap, or On Long Press.
- Select the Action Type as Set Dark Mode Setting.
- Set the Setting Source to Select Setting.
- Set the Dark Mode Setting to any amongst the From System, Light Mode, Dark Mode.
Send Email [Action]
Using this action, you can send an Email to the specified email Id. This action does not directly send an email. Instead, it redirects you to the email app and prefills the subject and message body, and you have to press the send button to send an email finally.
Follow the steps below to add this action to any widget.
- Select the Widget (e.g., Button) on which you want to add the action.
- Select Actions from the Properties panel (the right menu), and click + Add Action.
- Search and select the Send Email (under Share) action.
- Inside the Email Address section, provide the valid email id. Your message will be sent to this email Id.
- Also, provide the Subject and Body of the message to be sent.
Call Number [Action]
Using this action, you can make a call to the specified number. This action does not directly call a number. Instead, it redirects you to the native Calls app and prefills the specified number; you have to press the call button to make a call.
Follow the steps below to add this action to any widget.
- Select the Widget (e.g., Button) on which you want to add the action.
- Select Actions from the Properties panel (the right menu), and click + Add Action.
- Search and select the Call Number (under Share) action.
- Inside the Phone Number section, provide the valid phone number. The call will be made to this number.
Send SMS [Action]
Using this action, you can send an SMS to the specified number. This action does not directly send SMS. Instead, it redirects you to the native SMS app and prefills your message, and you have to press the send button to send the message finally.
Follow the steps below to add this action to any widget.
- Select the Widget (e.g., Button) on which you want to add the action.
- Select Actions from the Properties panel (the right menu), and click + Add Action.
- Search and select the Send SMS (under Share) action.
- Inside the Phone Number section, provide the valid phone number. Your message will be sent to this number.
- Inside the SMS Body section, provide the message you want to send.