Google Login
Google Sign-In allows users to authenticate using their Google Accounts.
Before getting started with this section:
- Complete Firebase Setup
- Complete Initial Setup
- Added SHA-1 key and regenerated Config Keys.
Enable Google Sign-in Provider in Firebase
Open the Firebase Console, click on Authentication and then follow the steps below to enable Google Sign in for your Firebase project.
Add a Login Screen with Google Login Action
Create a Login Screen
To allow users to authenticate, you need a Login or Sign-in Page with a button. You can create your own or use the one from page templates.
Add Login Action
- On your Google Login button, select Actions from the properties panel (the right menu) and select Add Action.
- Search and select the Log In (under Backend/Database > Firebase Authentication) action.
- Set Auth Provider to Google.
- Enable Create User Document and set the Collection to users. After successful login, this will insert the user's details, such as email, name, and photo, into the users collection. Note that, if a user exists already, it won't add the details again.
If you haven’t already, see how to create users collection.
To let users log out of your app, you can use the Logout action.
Test Google Login
Running on Device
To test during development, you can run your app locally using FlutterFlow’s Local Run. Follow the Local Run documentation and see how to set up a physical device to start testing.
Running on Test Mode/Run Mode
-
To test Google sign-in in Test or Run mode, you must add the authorized domain in the Firebase console and Google cloud console.
-
For Test mode, you can open the browser console, try logging in, and get the domain from the browser console. It should look like
ff-debug-service-frontend-ygxkweukma-uc.a.run.app. For Pro users, the above URL will also include-pro, such asff-debug-service-frontend-pro-ygxkweukma-uc.a.run.app. -
For Run mode, you can simply use 'app.flutterflow.io'.
-
-
To add in Firebase console:
-
Open the Firebase console and click on Authentication and select the Setting tab.
-
Select Authorized domains from the left side menu.
-
Click Add domain.
-
-
To add in Google cloud console:
-
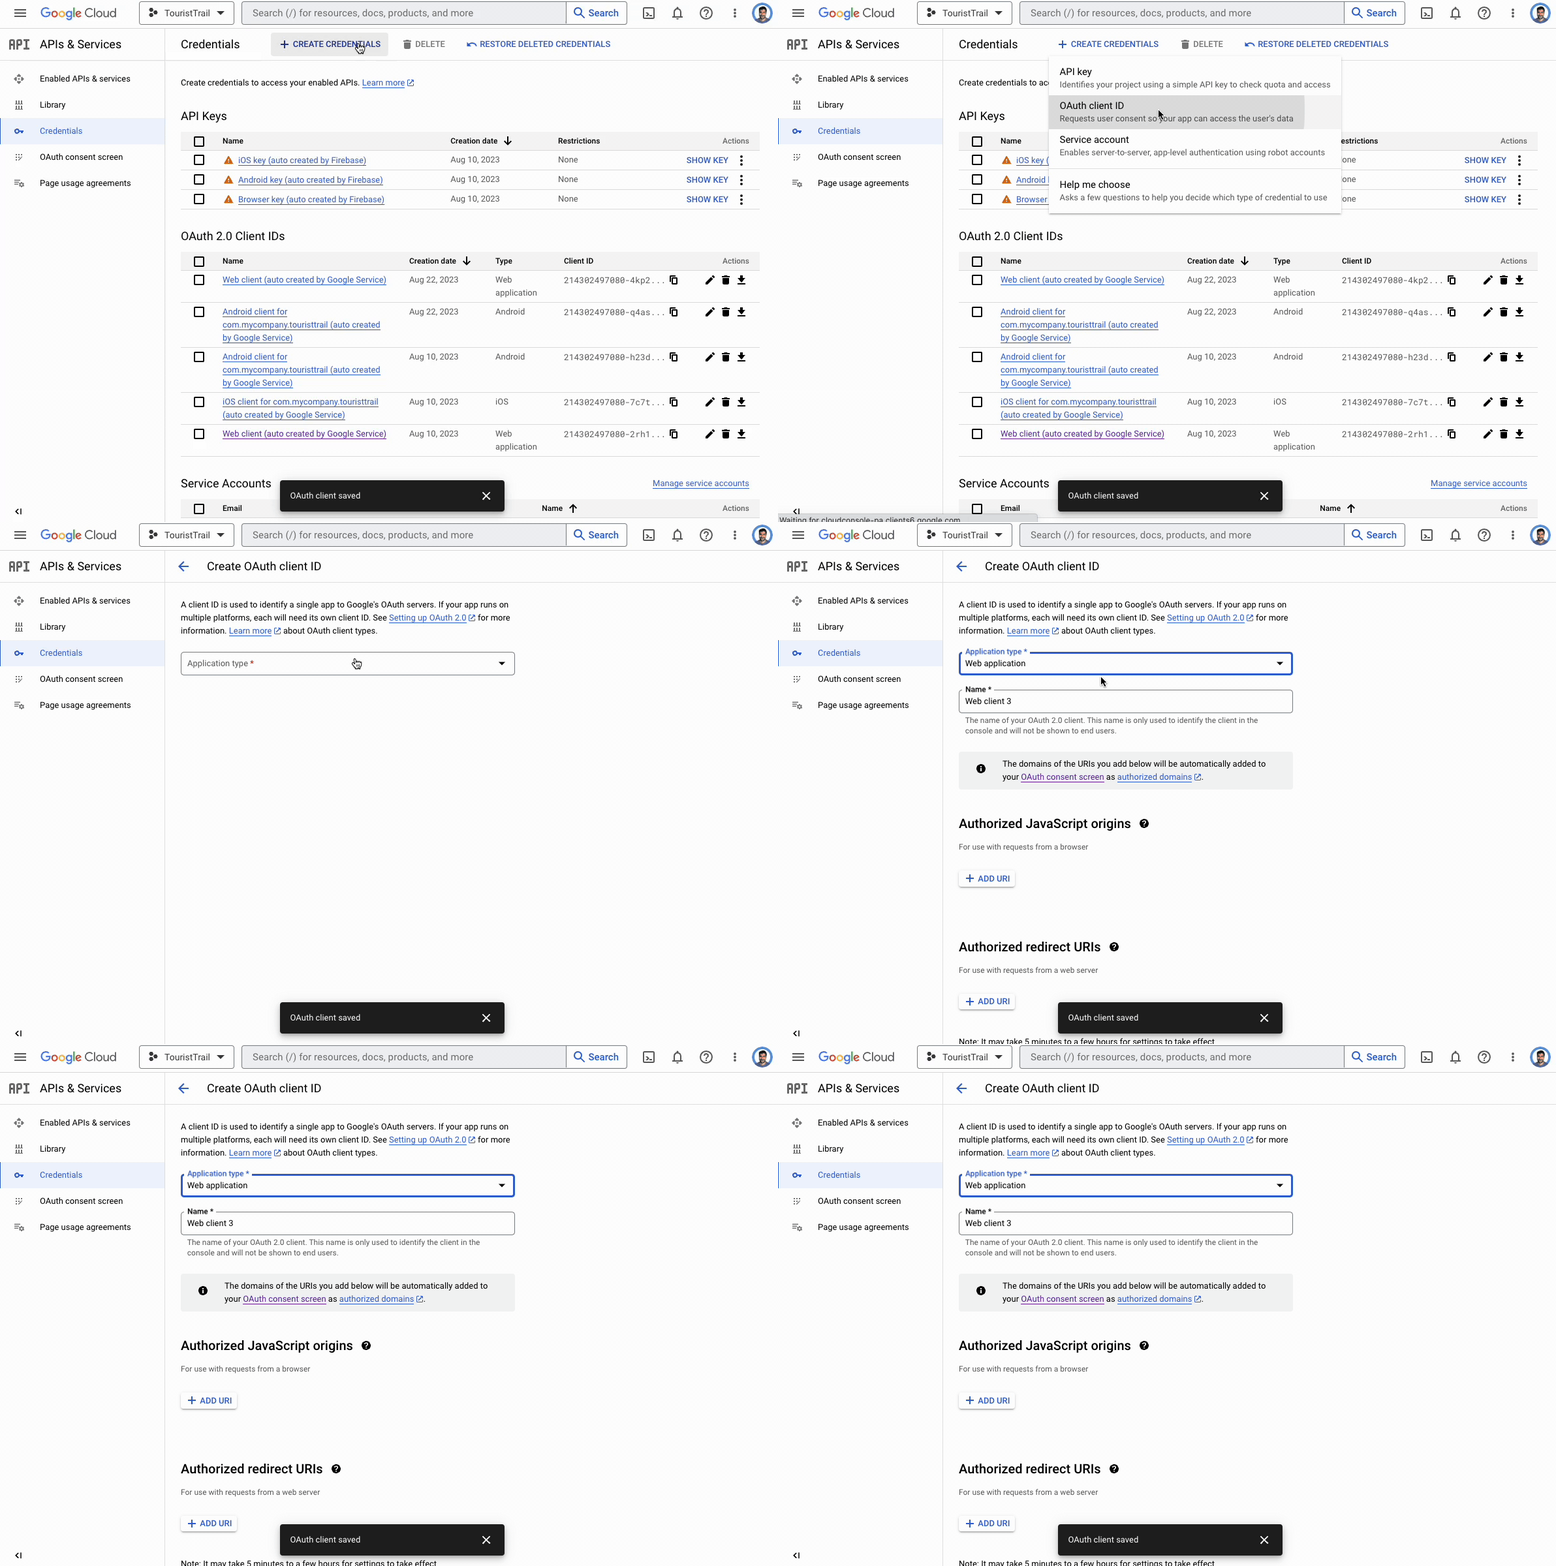
Head over to your Project Credentials page.
-
Ensure you are on the correct project. In our case, we are using the EcommerceFlow demo project, it will be different for you.

-
Under the 'OAuth 2.0 Client IDs', select 'Web client (auto created by Google Service)'.
-
Under the 'Authorized JavaScript origins', click ADD URI and add both the URL.
-
Similarly, under the 'Authorized redirect URIs', click ADD URI, add both the URL and append '/__/auth/handler' at the end.
-
- If you don't see the Web client created yet, you can create new one by clicking + CREATE CREDENTIALS, selecting OAuth client ID and then select Application type to Web application.

Verify user created in Firebase Dashboard
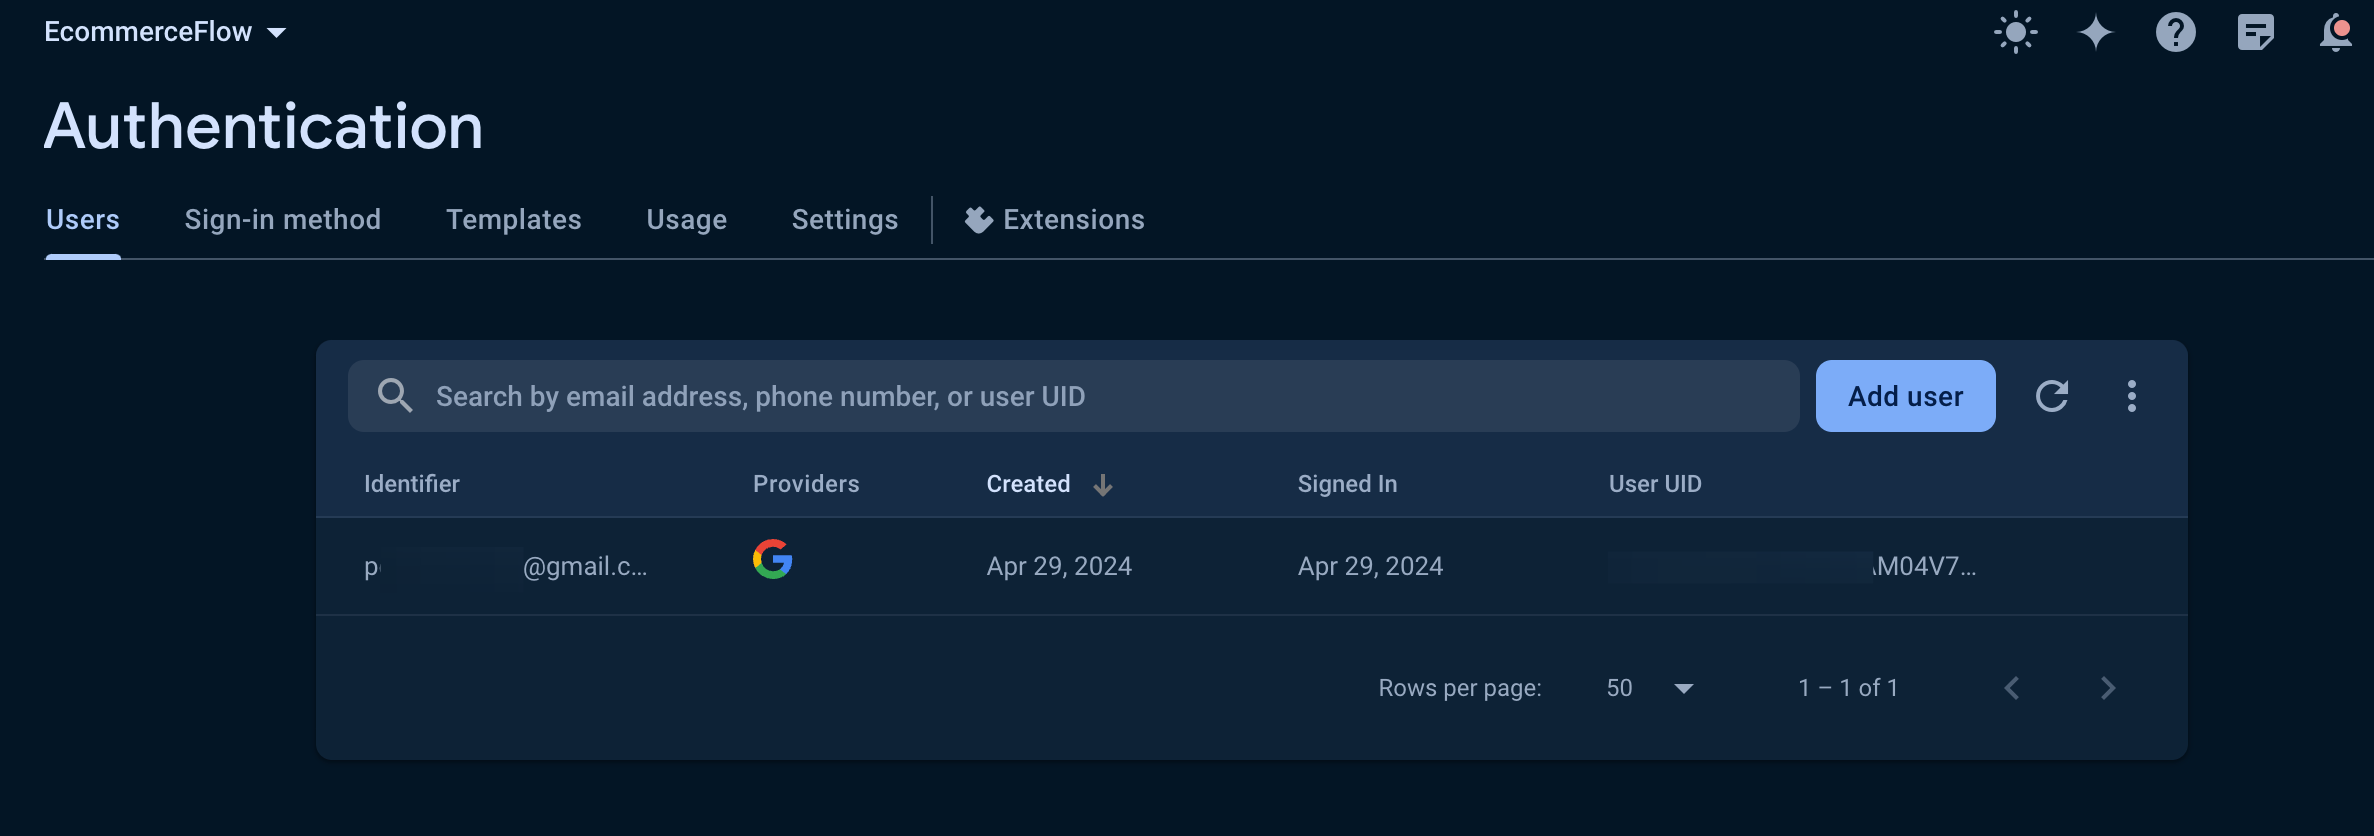
To confirm the successful integration of Google authentication and the creation of users, navigate to your Firebase project > Authentication > Users and check the entries.

To ensure that your Android release will authenticate to Google, make sure to use Google Play Console's SHA keys - see how to Get SHA keys for release mode.