Initial Setup
To use authentication, you will need to complete the following initial setup:
Before you begin, make sure you have completed the Supabase Setup.
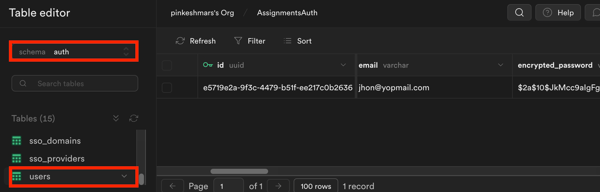
1. Creating a "users" table
To use Supabase authentication, you'll need to create a table to store your users' data, such as their name, email, and profile picture.
Also, it's recommended to create a foreign key relationship from the id column of your "users" table to the id column of the "users" table in auth (protected) schema, i.e., auth.users.id with on delete cascade. This ensures that when a user is deleted from the "auth.users" table, their corresponding data in your "users" table will also be removed.
Here's how you do it:
The "users" table in auth (protected) schema is a private table that Supabase uses to store auth-related sensitive information such as email, encrypted pass, and confirmation token.
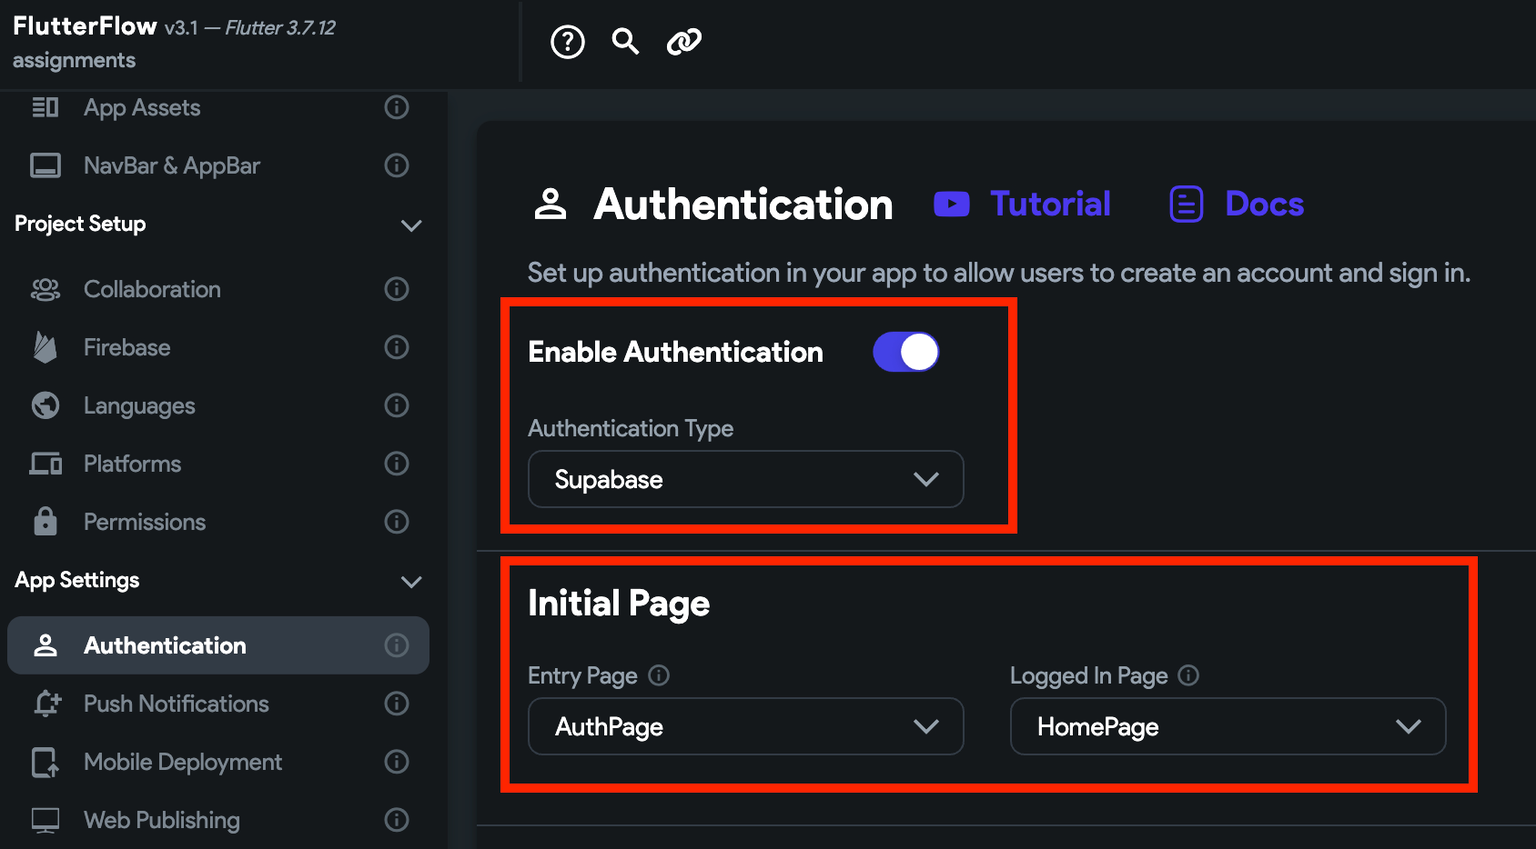
2. Enabling authentication in FlutterFlow
To enable authentication in FlutterFlow:
-
Open your FlutterFlow project.
-
Navigate to the Setting and Integrations () from the Navigation Menu > App Settings > Authentication.
-
Turn on the Enable Authentication toggle and select Authentication Type to Supabase.
-
To ensure that your users are directed to the appropriate pages based on their login status, you must set the initial pages.