Apple Login
Adding Apple Sign-In with Supabase offers a convenient, secure, and privacy-friendly way for users to sign up or log in to your app using their Apple ID.
This guide will walk you through the steps necessary to integrate Apple login with Supabase, including configuring the necessary keys and settings in both Supabase and the Apple Developer Console.
Before adding Apple Sign-In to your FlutterFlow project, make sure you have:
- Completed all steps in the Supabase setup
- Completed Initial setup required for authentication.
- Created an Apple account.
- An active Apple Developer Account. Read more about the Apple Developer Program and how to sign up.
Adding Apple sign-in comprises of the following steps:
Set Up in Apple Developer Console
To set up Apple Sign-In, you need to configure a few settings in your Apple Developer Console. This includes setting up email communication to manage user privacy and enabling the Apple Sign-In capability for your App ID.
Configure Email Communication
"Apple sign-in" is a privacy-focused authentication system. One of its notable features is the ability to hide a user's real email address when signing up for apps and services. When users choose to hide their email, you get one random email address that forwards to the user's actual Apple ID email. This helps users keep their real email addresses private.
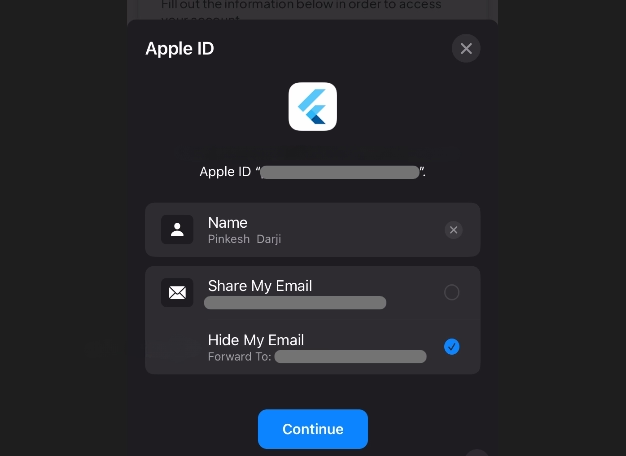
So, in order to contact such users, you must register email sources that your organization will use for communication.
To register email sources, open the Services (under Certificates, Identifiers & Profiles) section in your Apple developer account, configure Sign in with Apple for Email Communication, add the email source, and complete the registration process.
Enable Apple Sign-In Capability in your App ID
To enable Apple sign-in for your app, open the Identifiers section in your Apple developer account, select your existing App ID, enable Sign In with Apple, and click Save.
If you haven't created an App ID yet, follow the instructions provided by Apple to register an App ID.
Configure Apple Auth in Supabase
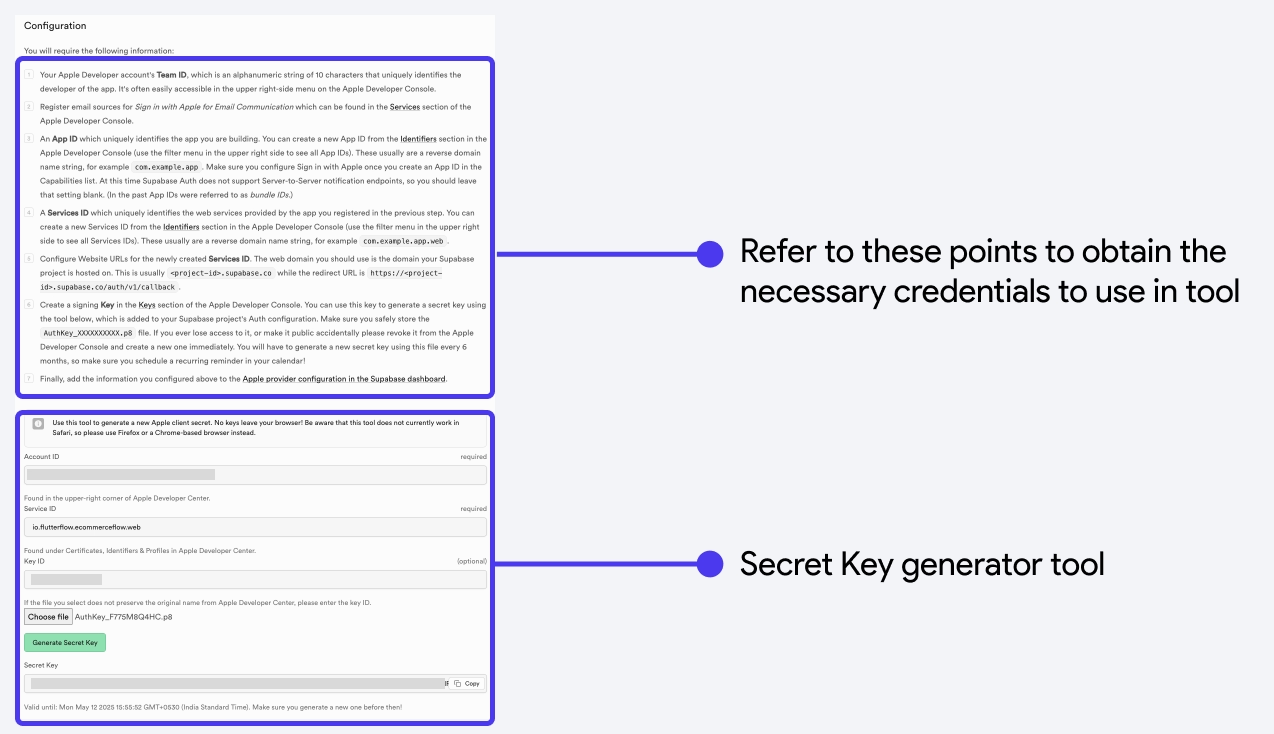
To enable and configure Apple authentication in your Supabase project, open the Supabase dashboard, select your project, enable Sign in with Apple under the Apple section, enter the Client ID and Secret Key, and click Save.
To obtain the secret key, use the tool provided under Configuration section.
Enable Apple Auth in FlutterFlow
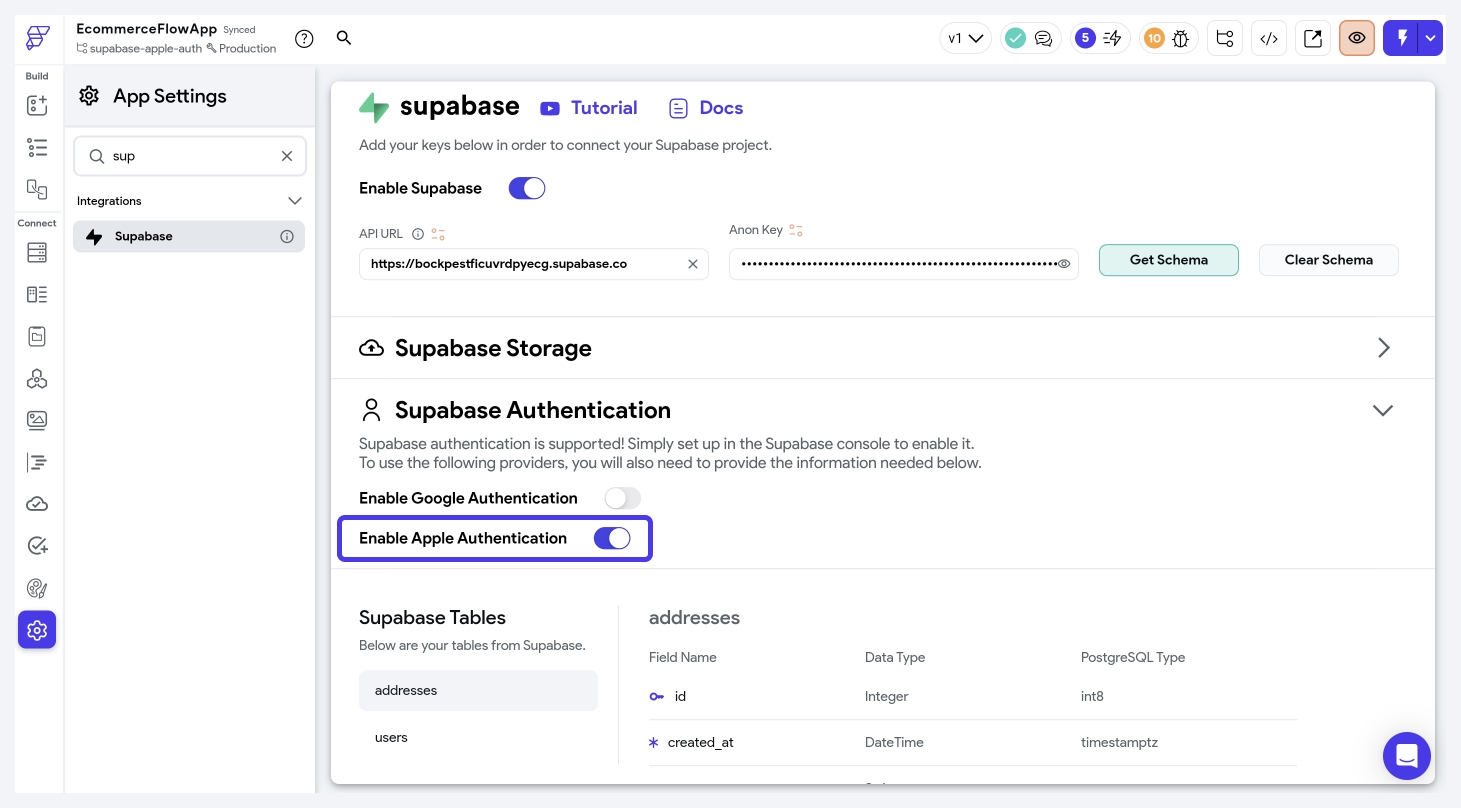
To enable Supabase Apple authentication in FlutterFlow, go to Settings and Integrations > Supabase > Supabase Authentication, and toggle on Enable Apple Authentication.
Create Account [Action]
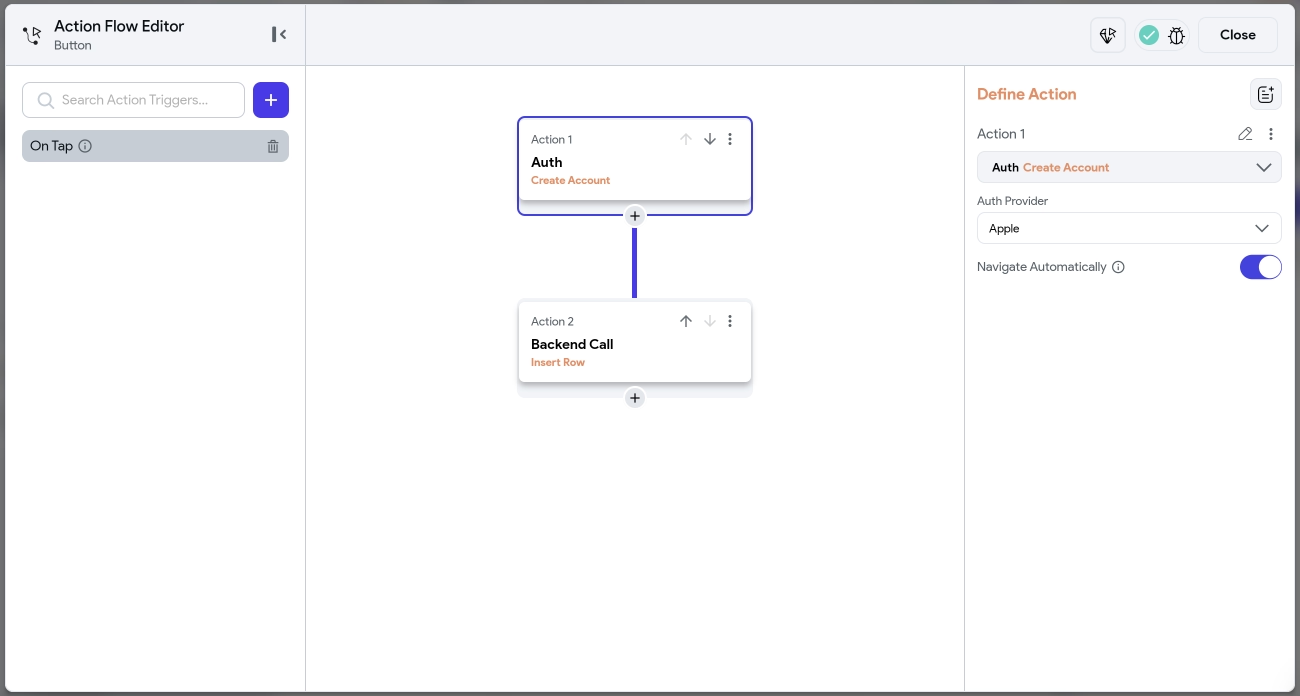
Now, proceed to add an account creation flow, which consists of the following two actions:
- Create Account Action: Add the Create Account action (under Supabase Authentication). This will create an account in Supabase and add the user details to Supabase Dashboard > Authentication > Users.
- Insert Row Action: The previous action does not automatically create an entry in the public "users" table you created here. To do this, add a Supabase Insert Row action, to log the user's details, such as their email.
Login [Action]
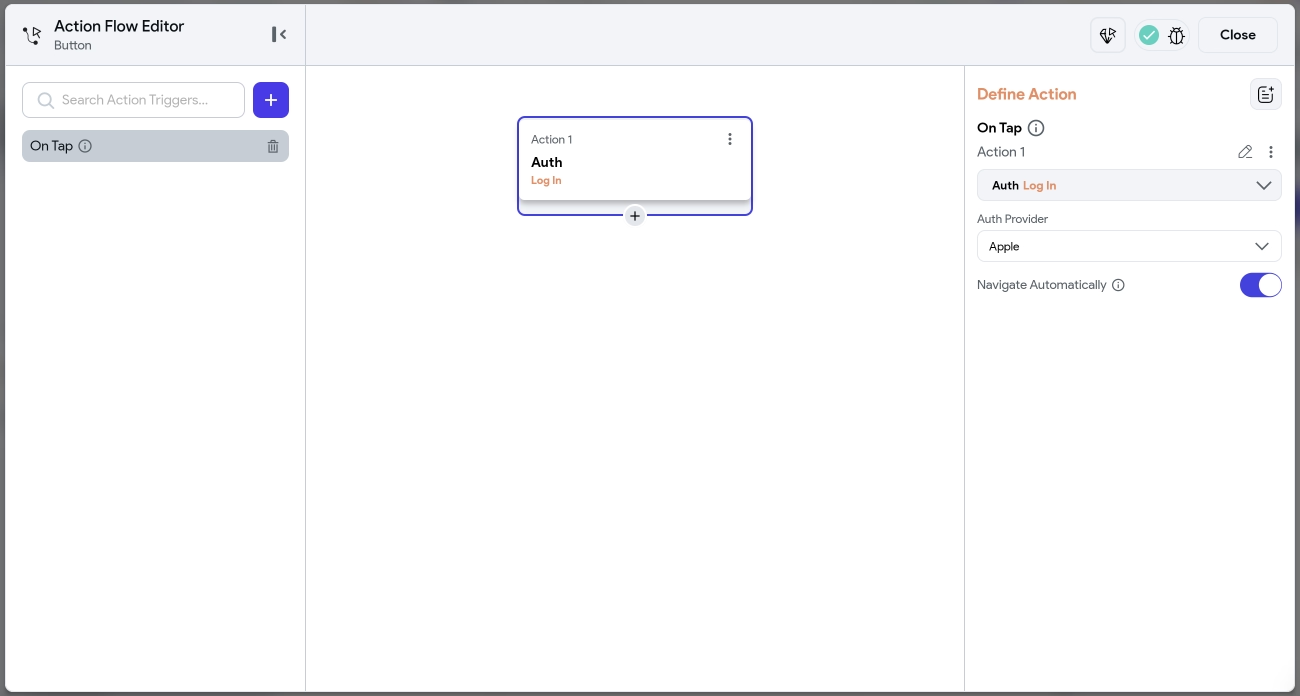
To enable user login, add the Log In action (under Supabase Authentication). When users click on the sign-in button, they will be prompted to log in with their Apple credentials.
Logout [Action]
To let users log out of your app, you can use this action.
Prepare to Test
To test your app on a real device, you must configure the project in Xcode. This includes adding a team to your project and setting an appropriate signing certificate.
Here's how you configure your project in Xcode:
- From the Local Run, open your project in Xcode.
If you are using Android Studio, right-click on the ios folder, find Flutter, and then click on the Open iOS module in Xcode.
- In Xcode, click on Runner (left side menu) and then select the Signing and Capabilities tab.
- We recommend choosing the Automatically manage signing option. This will auto-create the profiles, app ID, and certificates required to build and run your app. If you don't, you'll have to manually create a 'provisioning profile' and then add it in the Xcode.
- Under the Signing section, find the Team dropdown and select your team.
- Now use Local Run to test the app on a real device.
Verify User Creation
To verify that you have successfully added the Apple authentication, you can come over to your Supabase project > Authentication > Users and verify the user entries. Also, verify entries in your public users table.
