RazorPay
Razorpay is a leading online payment gateway widely used by businesses in India to accept and process digital payments securely.
It provides a platform for merchants and businesses to integrate payment solutions into their websites and mobile apps. It allows customers to make online payments using various payment methods such as credit cards, debit cards, net banking, UPI (Unified Payments Interface), and digital wallets.
Currently, publishing to the web with Razorpay enabled is restricted due to some regulations.
Before starting to set up payments, make sure you have,
- Complete Firebase Setup for your project.
- Enabled Firebase Authentication for your project.
- Upgraded your Firebase project to Blaze Plan. We use Firebase Cloud Functions to process a transaction.
Razorpay Integration
Integrating Razorpay in your app comprises the following steps:
1. Setup Razorpay
Setting up the Razorpay payments includes creating an account, enabling test mode, acquiring the keys from your Razorpay account, and adding them to your project.
You should always try out payments in a test mode before releasing them to your production application. Hence, the instructions below will guide you on how to get the test keys.
Here are the steps:
- Create a new Razorpay account from here. If you already have an account, log in.
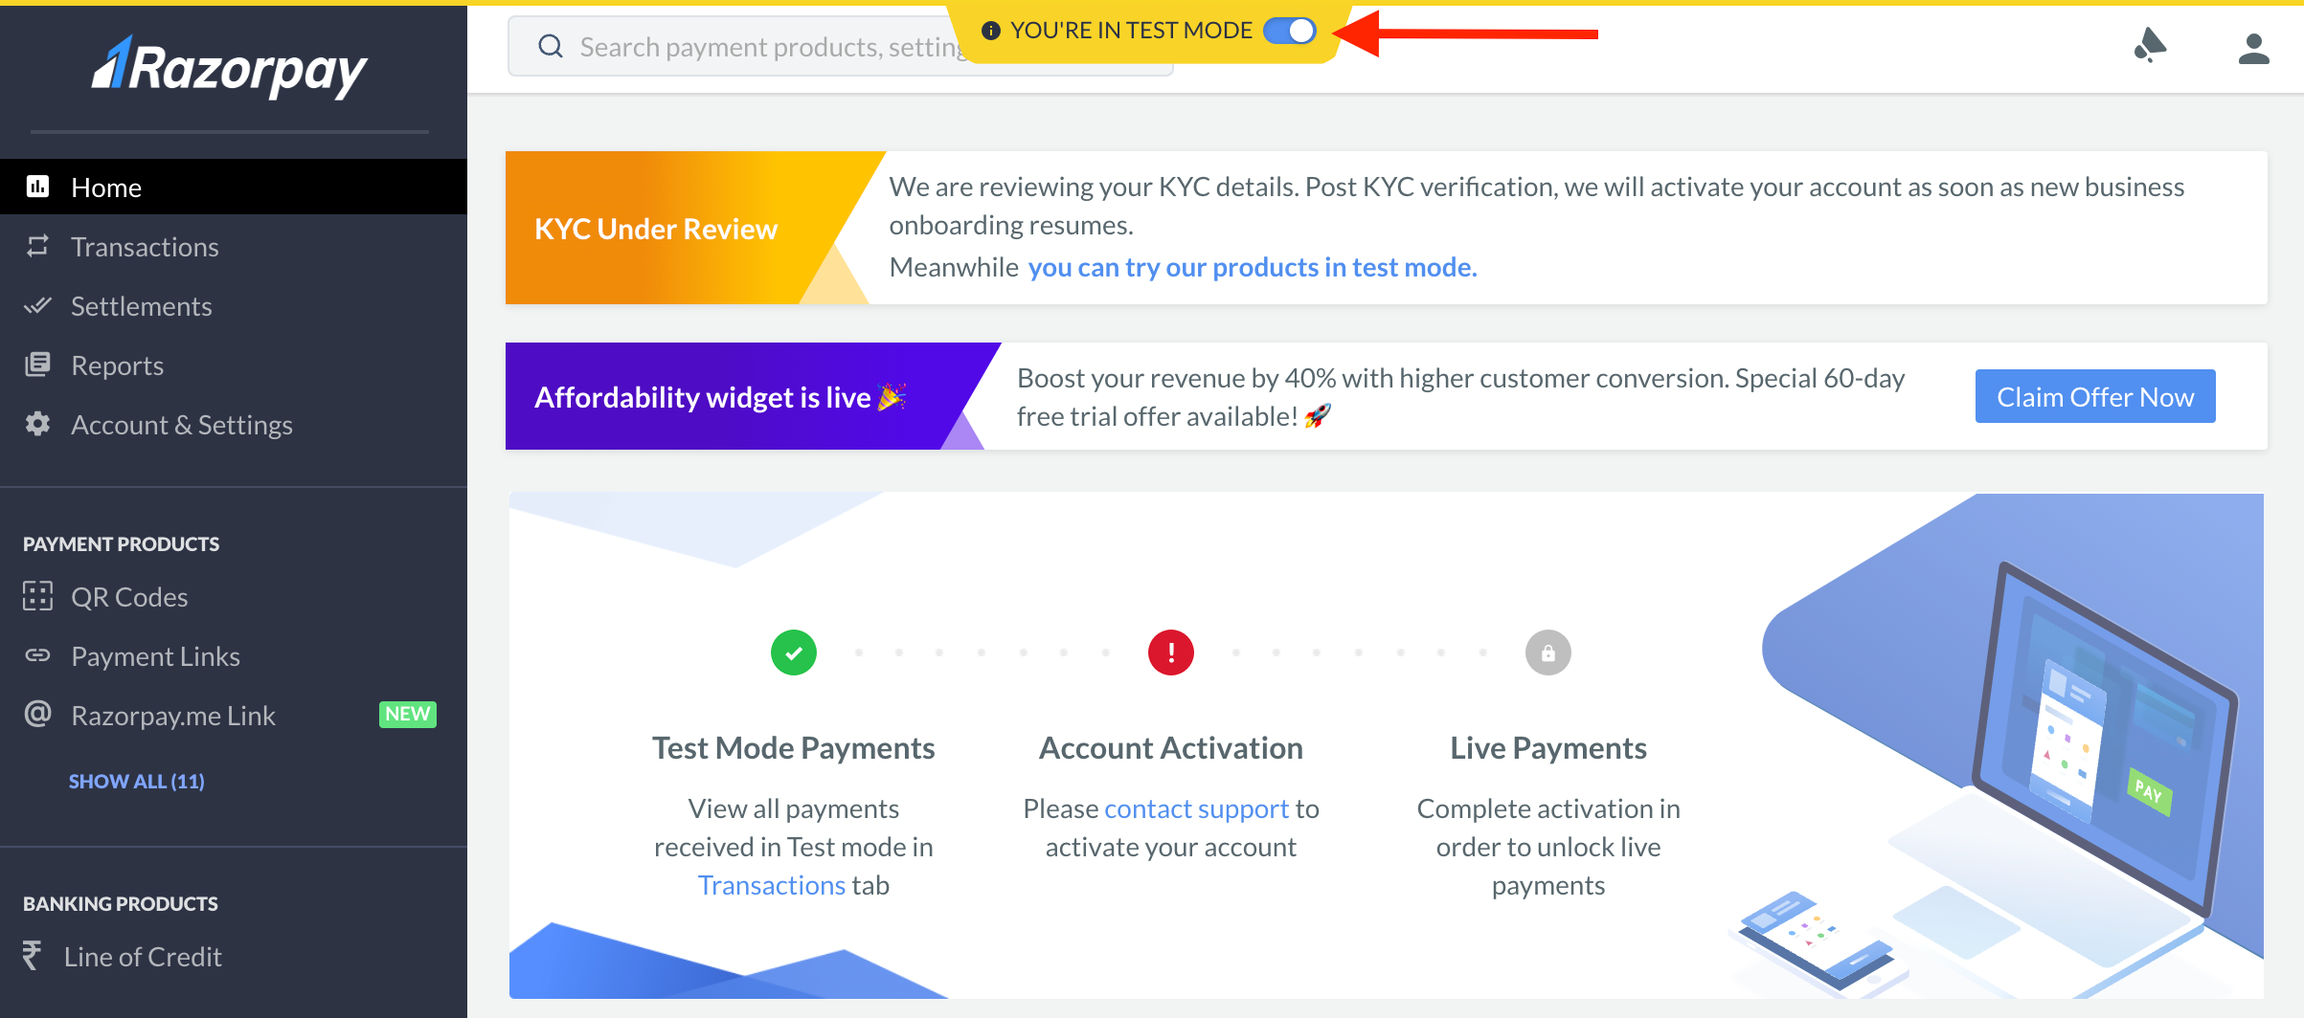
- Once you are logged in, turn on the Test Mode. Test mode helps you simulate the payments without involving real money transactions.
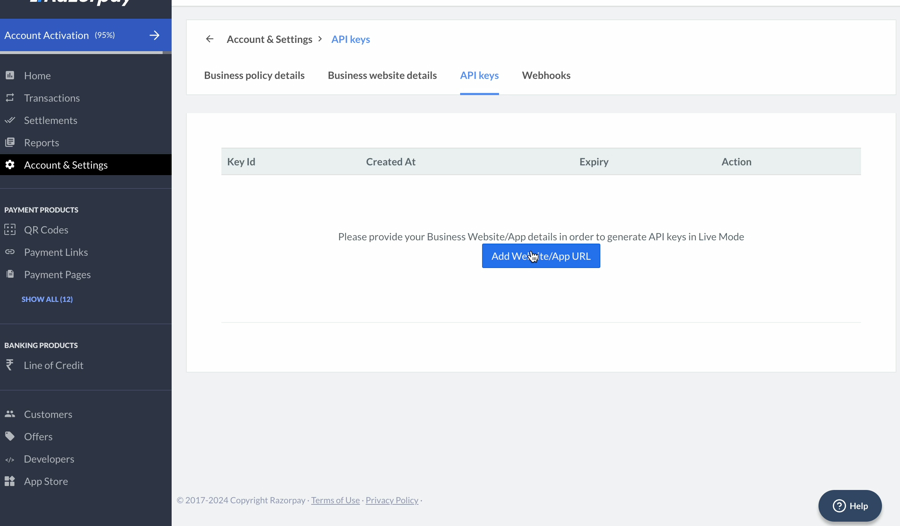
- From the left side menu, select Account & Settings > Under Website and app settings section, select API keys.
- If you're asked to add a website link but your app isn't published yet, you can temporarily publish it to a subdomain using our web publishing feature. Later, you can update this to your actual domain in both FlutterFlow and Razorpay.
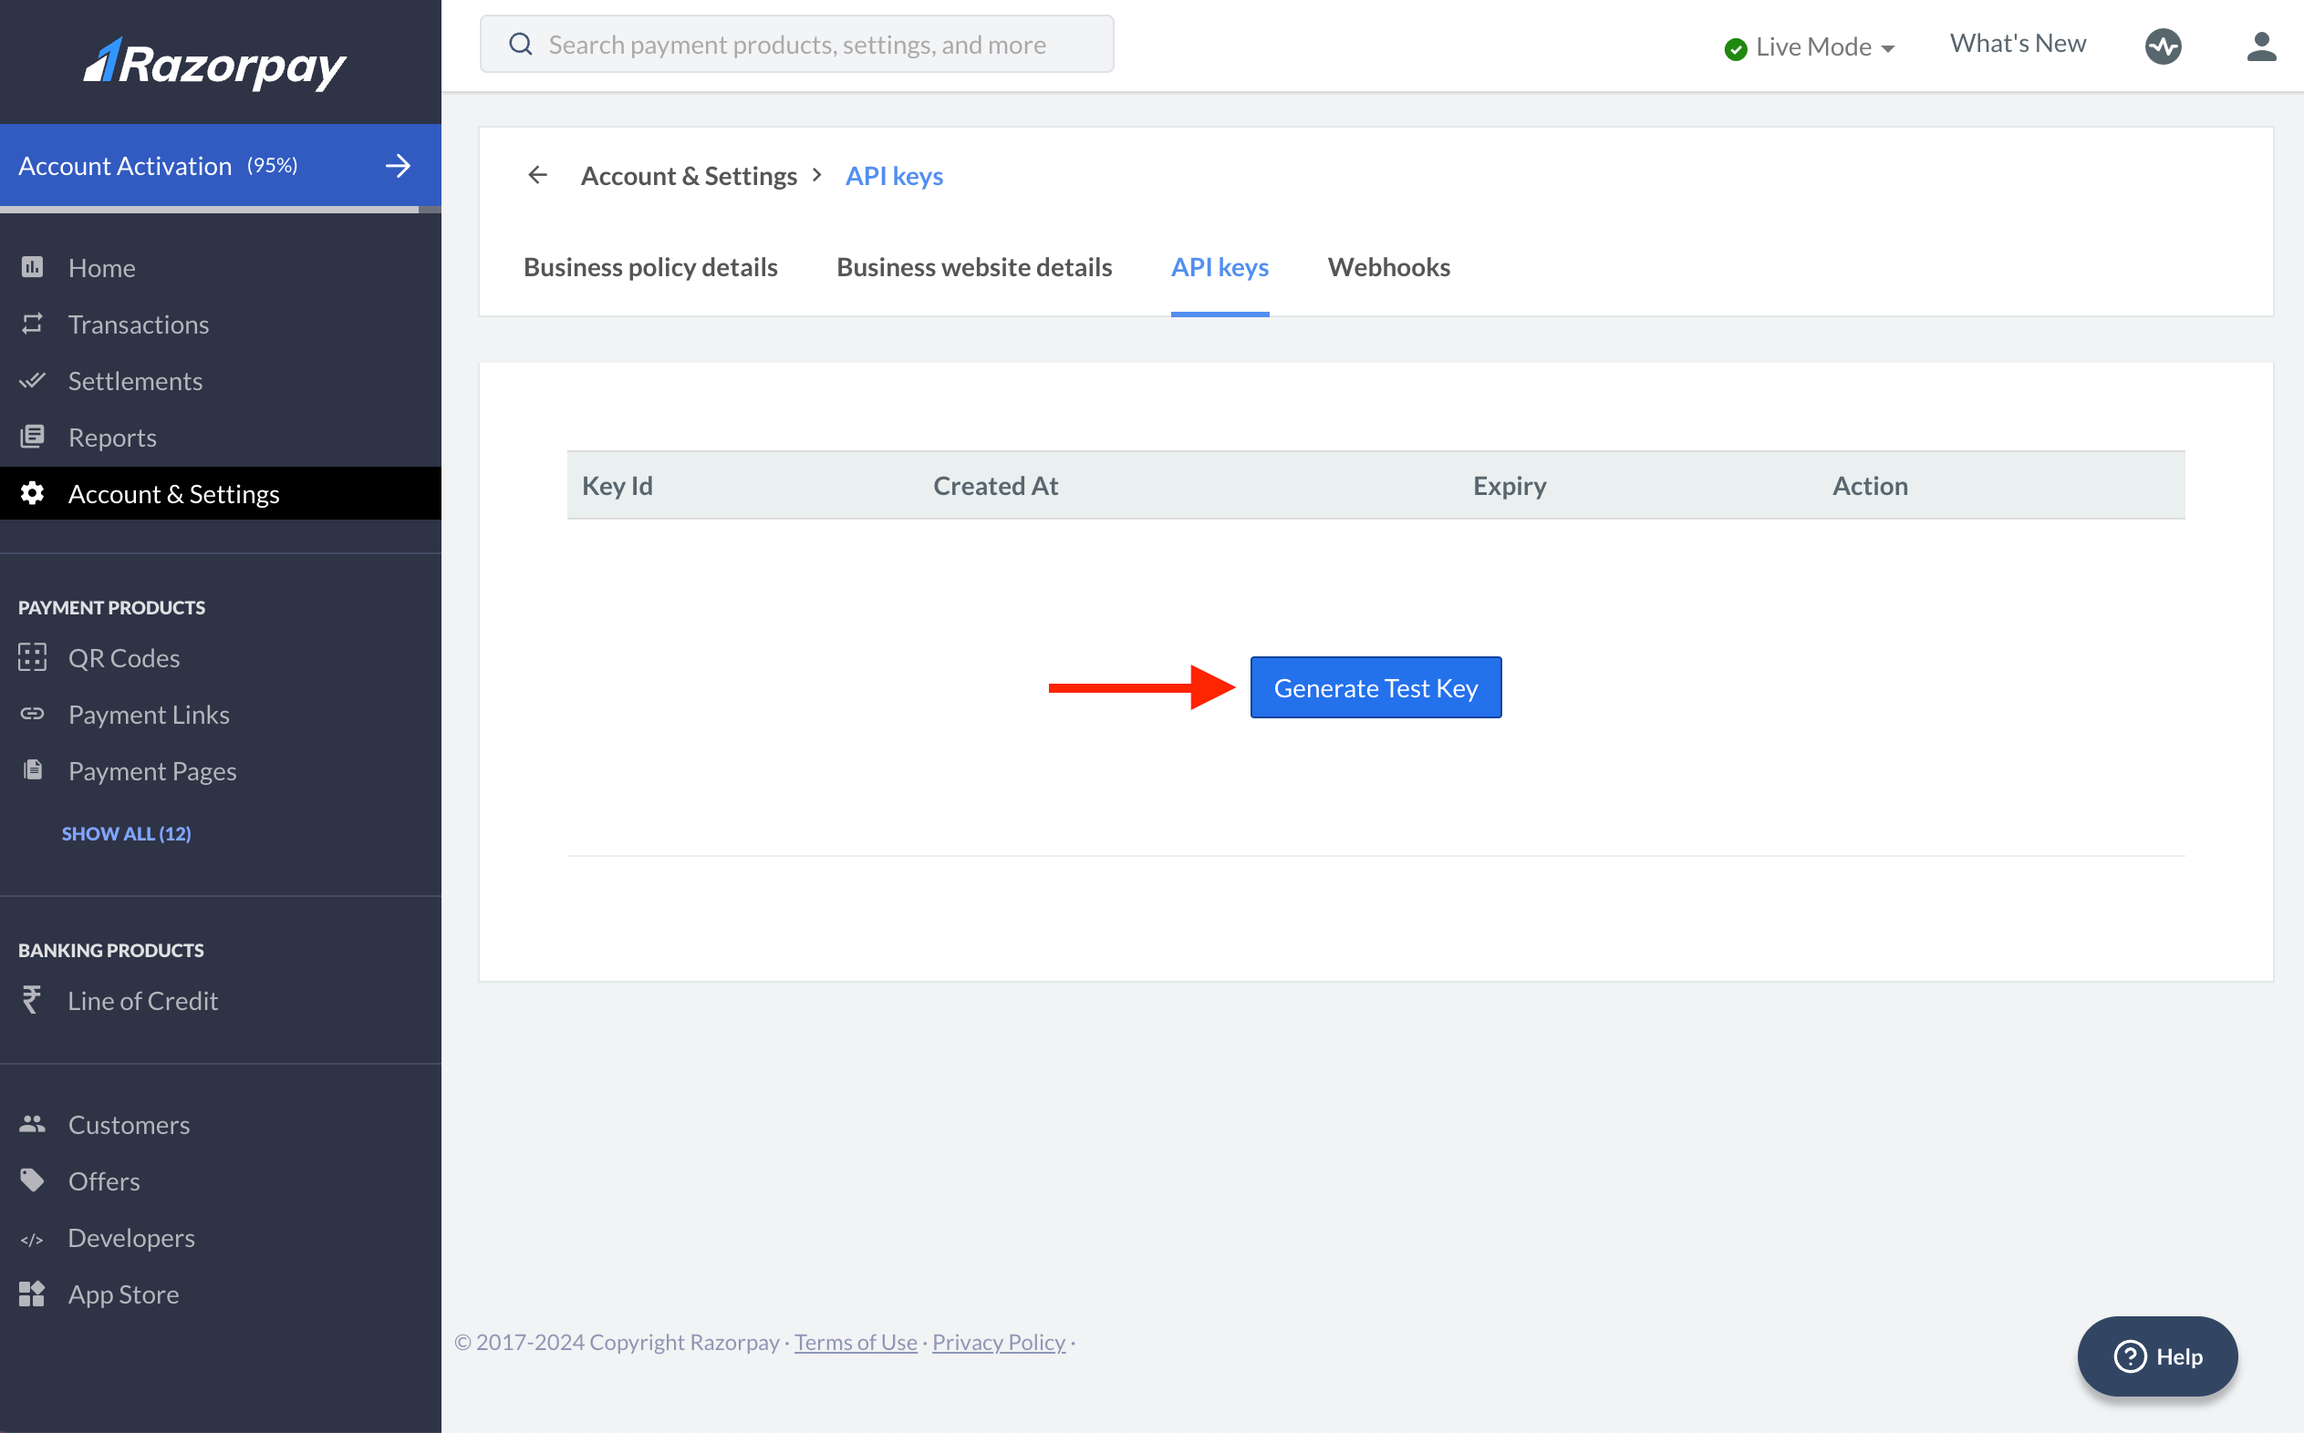
- Click Generate Test Key and copy the Key Id and Key Secret. To regenerate, click on Regenerate Test Key and choose how you want to deactivate the old key.
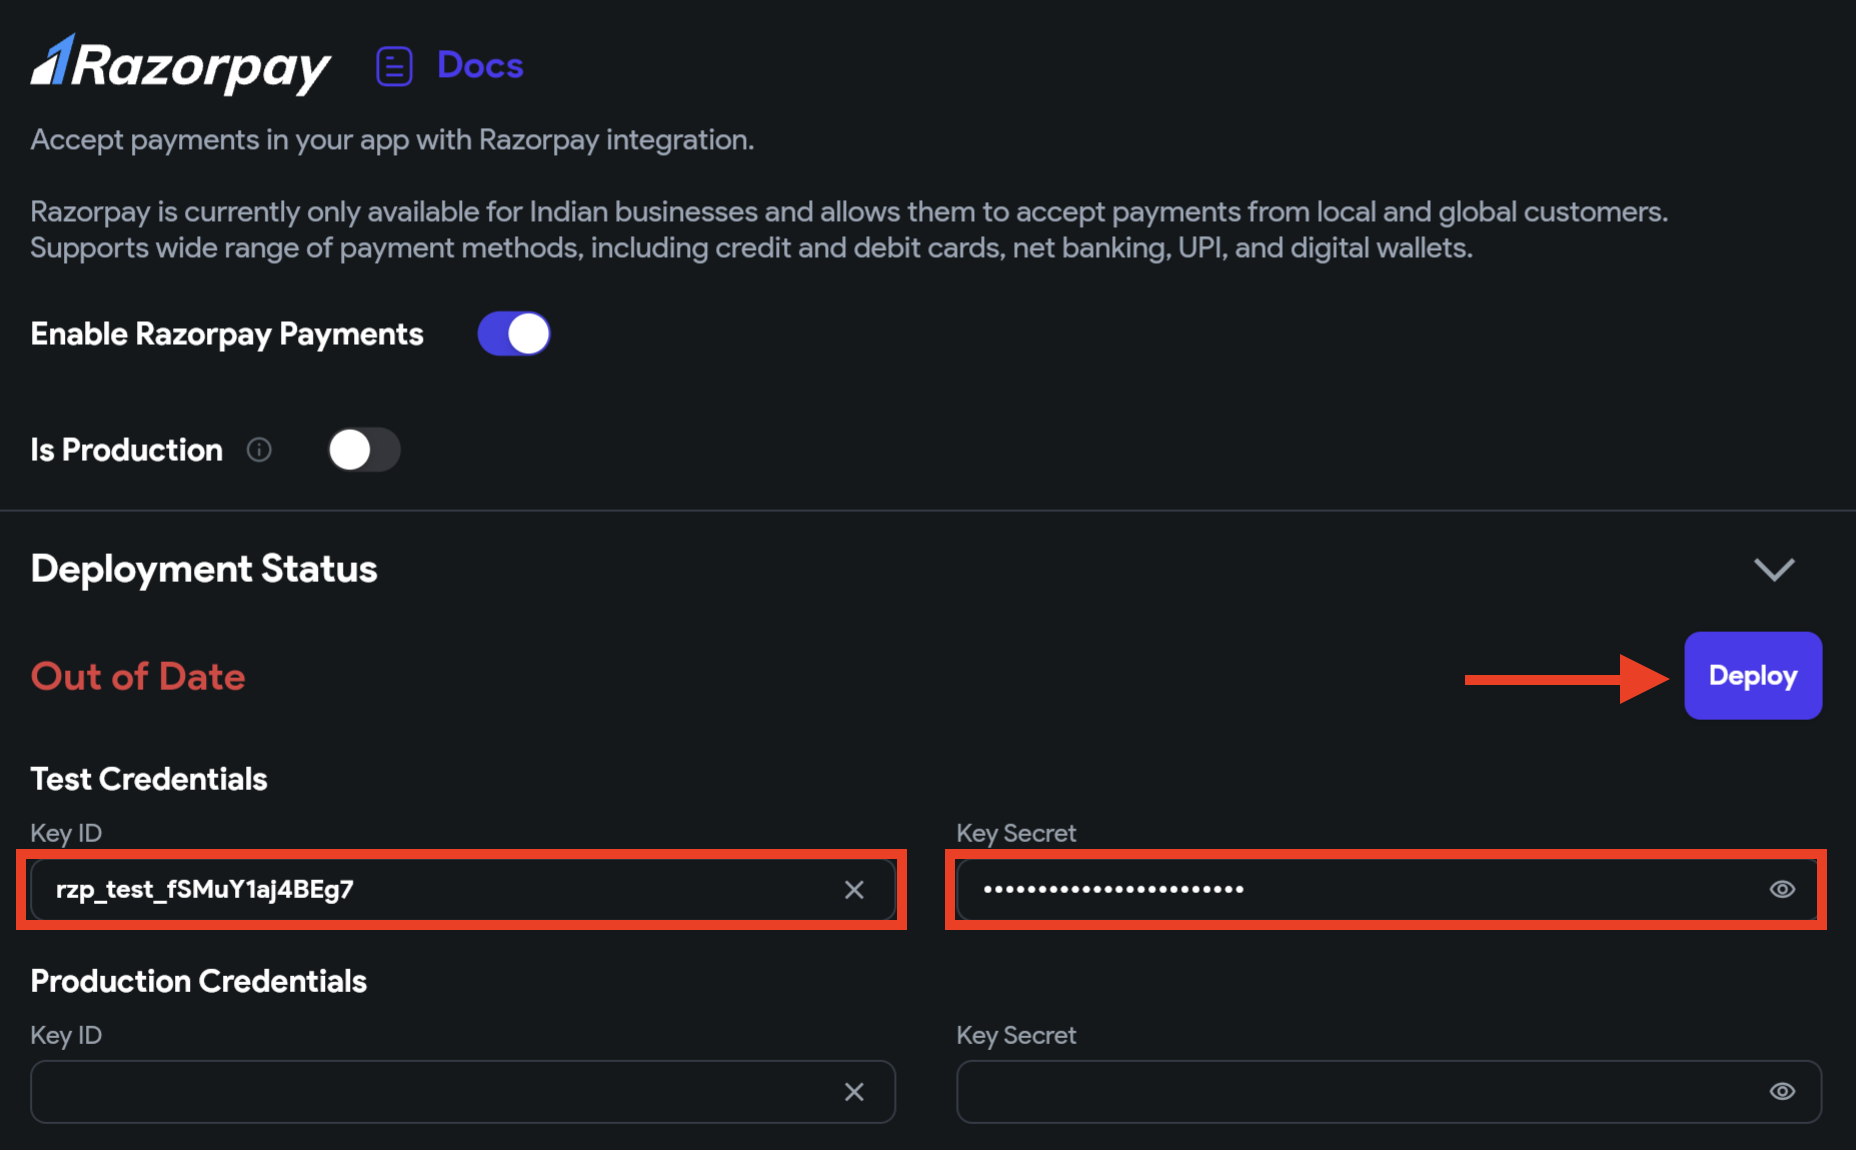
- Return to the FlutterFlow project, navigate to Settings and Integrations > In App Purchases & Subscriptions > Razorpay. Use the toggle to Enable Razorpay Payments.
- Under Test Credentials, paste the Key ID and Key Secret obtained in the previous step.
- Set your Business Name.
- Click the Deploy button.
2. Trigger Razorpay payment [Action]
To initiate a payment using Razorpay, you must use the Razorpay Payment action. This action lets users process a payment inside your app using credit cards, debit cards, net banking, UPI (Unified Payments Interface), and digital wallets via Razorpay.
Follow the steps below to add this action:
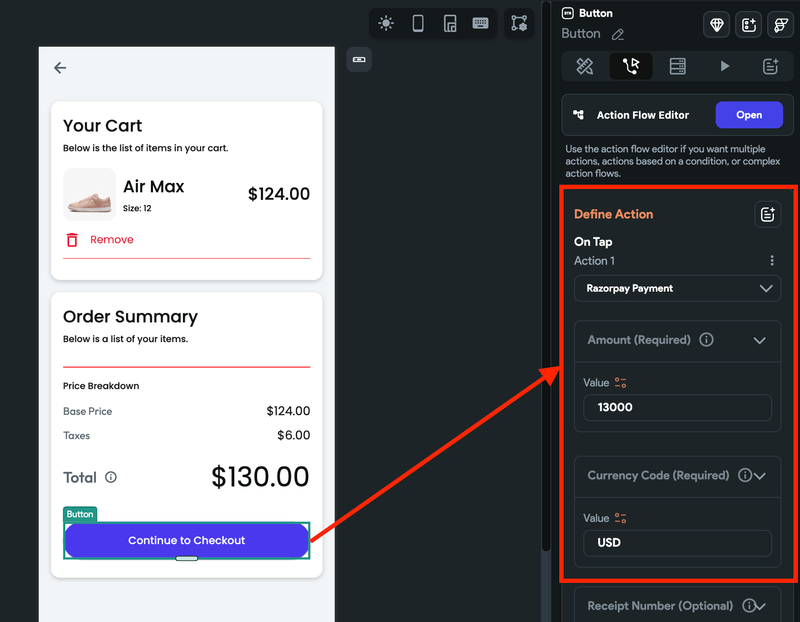
- Select the widget (e.g., checkout button) on which you want to add the action.
- Select Actions from the Properties panel (the right menu), and click Open. This will open an Action Flow Editor in a new popup window. Click on the + Add Action.
- Search and select the Razorpay Payment (under Integrations) action.
- Enter or use a variable for specifying the total amount under the Amount section. Note that the value should be specified in the currency's smallest unit.
- For example, $24.99 should be passed as 2499 (as a round-off integer; otherwise, it would be automatically rounded); similarly, for an amount of ₹120.00, 12000 should be passed.
- Most probably, you'll specify this value from a variable. If you do so, you might need this inline function to convert the total amount in the required format:
amount.toStringAsFixed(2).replaceAll(".", "");
- Enter the Currency Code to be used for the amount, for example, INR, USD, EUR, or BRL. Make sure you enter a valid currency code; otherwise, the transaction won't go through. Download the complete list of supported currencies.
- With this action, you can also add some optional fields, such as Receipt Number, Description, User Name, User Email, User Contact, and Timeout (time for which the checkout dialog should remain active. By default, it is 180 seconds).
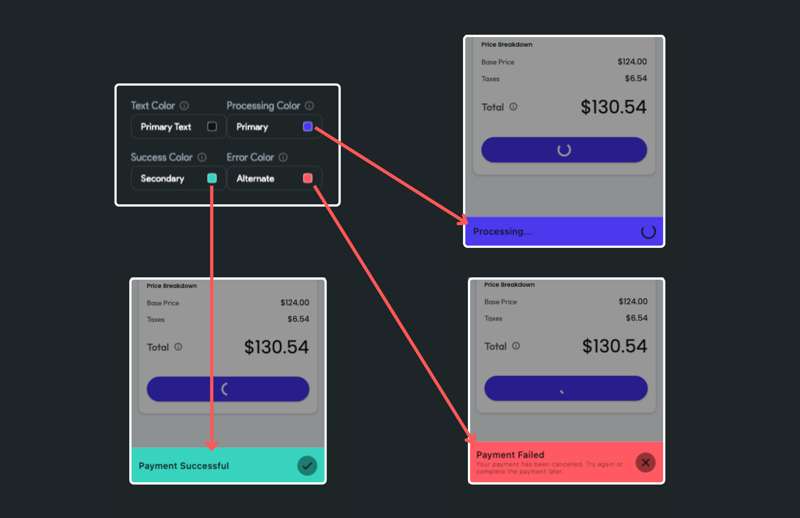
- You can also customize the color scheme for the payment sheet using properties such as Dialog Color, Barrier Color, Text Color, Processing Color, Success Color, Error Color, and more.
- Enter an Action Output Variable Name where the payment ID would be stored on a successful transaction.
- Now you must check if the payment was successful. You can do so by adding the conditional action. To do so, click the "+" button below the previous action tile and select Add Conditional.
- On the right side (Set Condition for Action),
- Select UNSET > Condition > Single Condition.
- First Value > Action Output Variable Name.
- Set the operator to Is Set and Not Empty.
- Under the TRUE section, add an action that will be triggered if the payment is successful.
- Under the FALSE section, add an action that will be triggered if payment is failed.
Ensure the user is authenticated before triggering this action; otherwise, it will result in an error. You can follow the steps on this page to set up Firebase Authentication.
3. Testing
You can test Razorpay payments on Run mode, Test mode, an emulator/Simulator, or a physical device.
To test payments in Test or Run mode:
- In your FlutterFlow project, navigate to Settings and Integrations > In App Purchases & Subscriptions > Razorpay.
- Make sure the Is Production is disabled.
- Make sure you have entered the correct Test Credentials.
- Run your app in Test mode.
- To test the purchase, you can try any method from here.
4. Releasing to production
Once you are done testing your Razorpay integration and you are ready to go live, follow the steps below:
- Complete KYC (or the Activation Form) to access the Razorpay Live API.
- Log into the Razorpay Dashboard and switch to Live Mode on the menu.
- From the left side menu, select Account & Settings > Under Website and app settings section, select API keys.
- Click Generate Live Key and copy the Key Id and Key Secret. To regenerate, click on Regenerate Live Key and choose how you want to deactivate the old key.
- Return to the FlutterFlow project, navigate to Settings and Integrations > In App Purchases & Subscriptions > Razorpay. Turn on the Is Production.
- Under Production Credentials, paste the Key ID and Key Secret obtained in the previous step.
- Click the Deploy button.
- Test your app.