Run your App
Running and testing your app is a crucial part of the app development process. This page provides a comprehensive guide on how to run and test your FlutterFlow app. It covers various modes of testing, including Preview, Test, Run, and Local Run modes, with detailed steps and indications of when to use each mode.
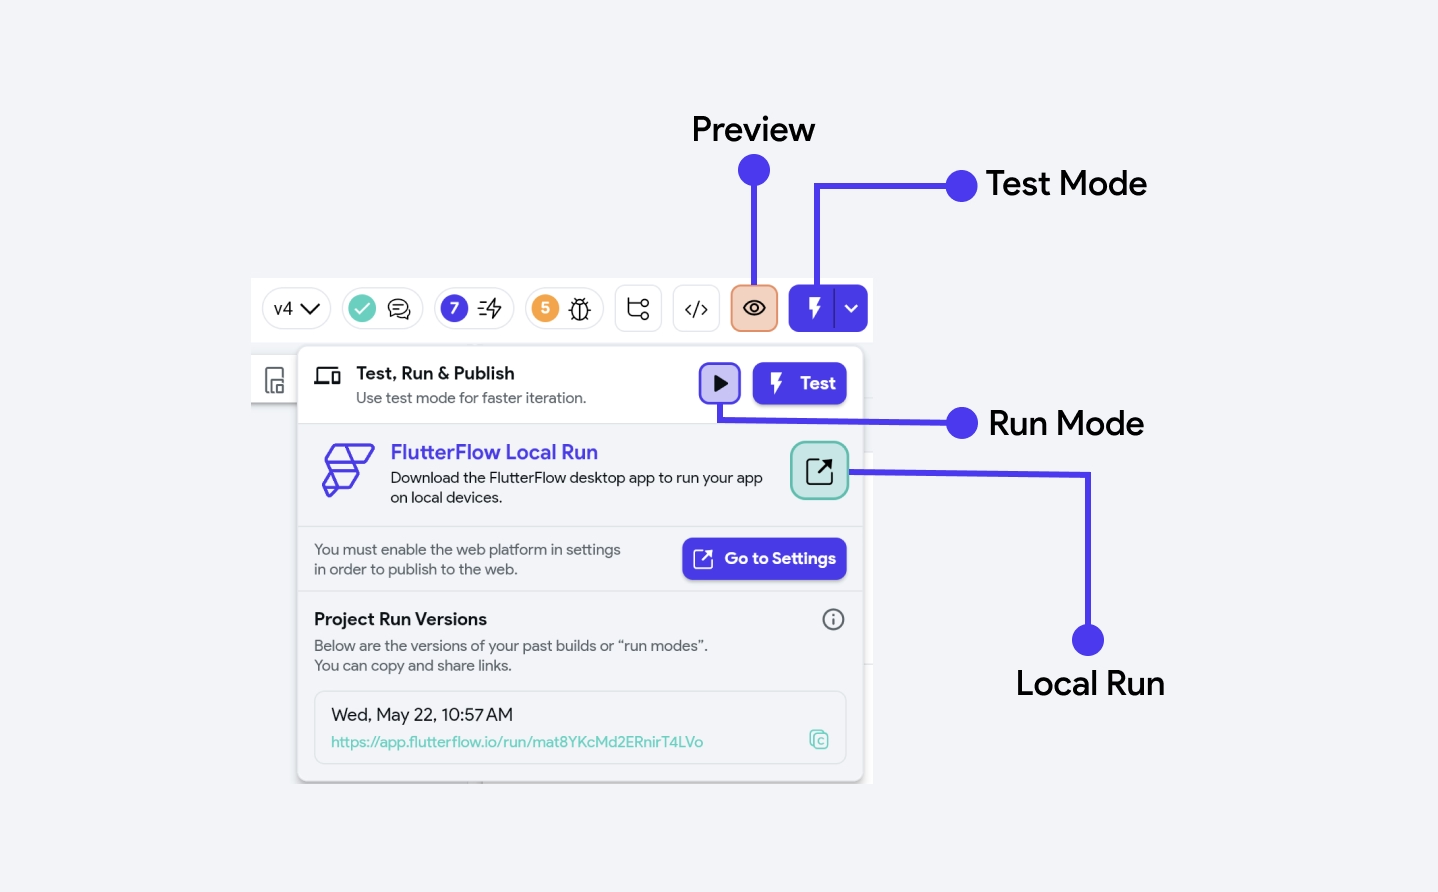
You can access various modes of running your app from the Toolbar.

Preview Mode
You can use the Preview Mode to quickly try out your app on a virtual device without waiting for it to build. This is helpful primarily for navigation and animations. You can also preview your app in the Dark/Light mode and visualize it on various mobile, tablet, and desktop devices.
When to use Preview Mode
The primary benefit of Preview Mode is that it allows your app to load instantly, making it ideal for UI testing. However, most business logic is not included in this mode. As a result, this mode is used less frequently than other testing modes, which provide a more comprehensive evaluation of the app's functionality.
- Actions may not trigger or work properly.
- FontAwesome icons jump around when mouse hovers over certain material widgets.
- Firestore data is not loaded from Firebase.
- Firebase auth flow can't be tested. We always allow log in.
- API Calls can't be run or tested here.
- Refresh if animation actions are not working.
- Refresh if Clear TextFields actions are not working.
- RevenueCat data is not loaded.
- Paywall actions execute as if the entitlement is active.
- Hero Animation may not work on dynamically generated widgets.
- Dropdown disabling does not work in Preview Mode.
- Tooltip does not work for some screen sizes in Preview Mode.
Test Mode
The Test Mode runs a web version of your FlutterFlow app and uses Flutter's Hot Reload feature, which lets you immediately see any changes made to code in an emulator or on-device. Running your app in Test Mode helps you experiment, test UIs, and fix bugs faster.
To run your app in Test Mode:
- Click on the Test icon or press Cmd/Ctrl + I (a keyboard shortcut). This will run your app in a new browser window.
- Switch to the app builder and make some changes, such as changing colors and alignment.
- Now switch to the Test Mode tab and click Instant Reload or press Cmd/Ctrl + J to see the changes in under 10 seconds.
The test mode button color indicates the following status:
- Orange: Building
- Green: Ready
- Yellow: Expiring Soon
- Red: Expired
When to use Test Mode
When designing and developing your app, Test Mode is the second most common testing mode (next to Local Run). Its "Hot Reloading" allows for fast iteration and testing. Its downsides compared to Local Run are its restricted time (30 min.) and lack of access to some features (e.g. camera).
If you see a progress bar at the top of the device running for over 15 seconds, try refreshing the page.
Test Mode has certain limitations because some packages are not supported on the web and because of the way FlutterFlow configures your project to run in the cloud.
- 30 minute testing time. After the 30 minutes has expired, you can start another test mode session.
- If you see a grey "broken" screen with a sad face, it may be a DNS server issue with your network provider. We recommend using CloudFlare's 1.1.1.1 DNS server. Click here to see instructions.
- Lottie animation may not load if you provide a variable path.
- Cookies need to be enabled for Test Mode to function properly. They are only used for functional purposes.
- If you see a progress bar where the phone outline should be that lasts longer than 15 seconds, try refreshing the page.
- The device screen can not be wider than the page's width.
- Copy to Clipboard Action is not supported in Test Mode. Use Run Mode to avoid this issue.
- Widgets with Shimmer or Tint animation might not appear properly.
- Assets used within Custom Code might not appear properly.
- Audio Recording actions do not work in Test Mode; use web publishing in Settings to test recording audio or test it on emulator via Local Run.
Debug info
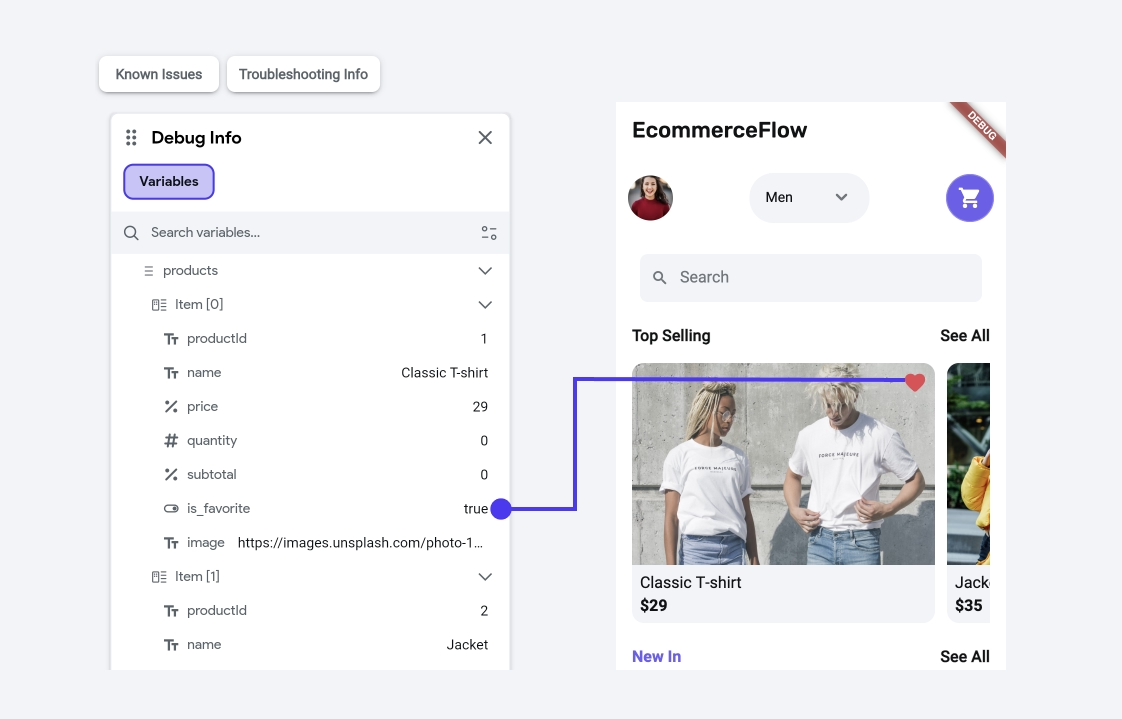
Test mode also includes a Debug Info panel, which provides a real-time view of all variables with their current values. It includes search and filter options, allowing you to find variables based on type or nullability. This is particularly useful for developers who need to track the state of the app and diagnose issues efficiently.

Run Mode
You can test a fully functional version of your app using the Run Mode, including live data. It will build the app, which typically requires around 2-4 minutes - but can be longer for larger projects. You can then interact with your app through your web browser. This is a web version of the app, identical to the version that is run on Test Mode.
To run the app in Run Mode, click on the dropdown next to the Test Mode button and click the play button or press Cmd/Ctrl + E (keyboard shortcut). This will run your app in a new browser window.
When to use Run Mode
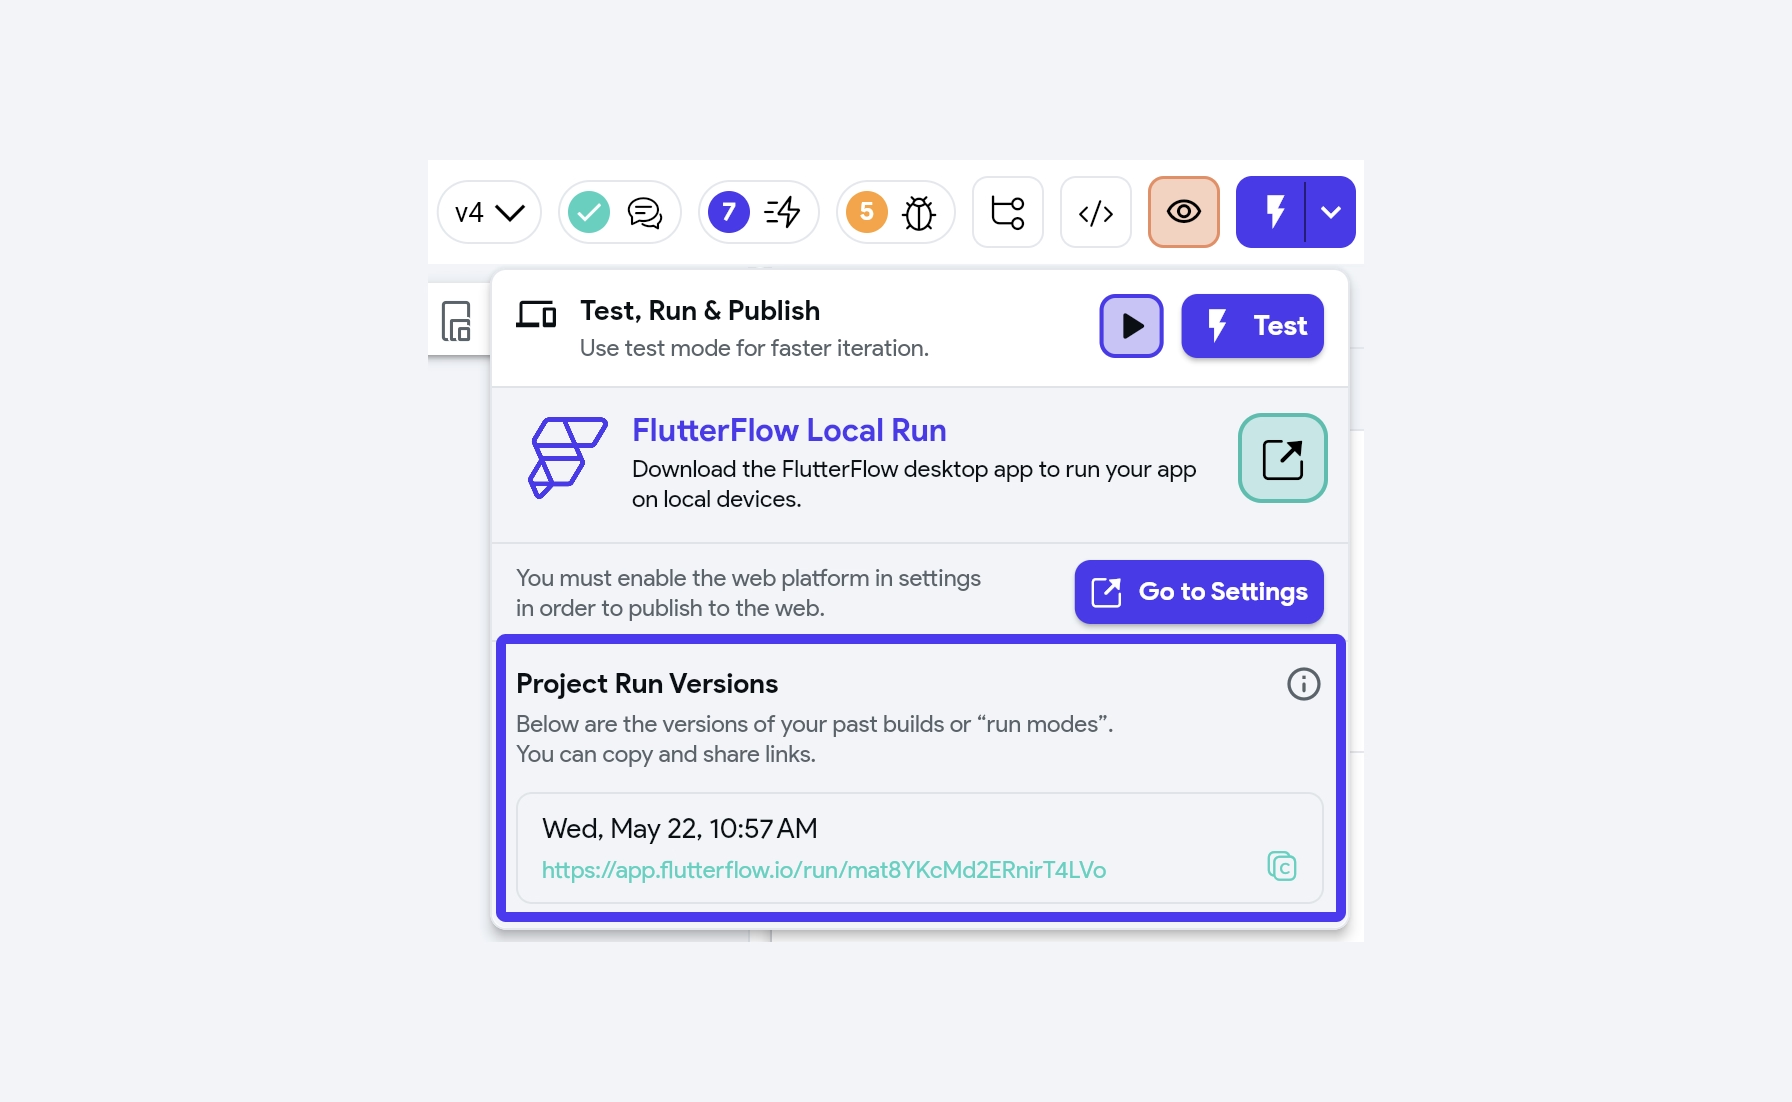
The main benefit of Run Mode is the ability to share a running app within your team via a link. Please note that, Run Mode links are not public; they are only accessible to project members. Even if the project is made public (allowing others to view and clone the project), the visibility of Run Mode links remains restricted to project members.
All Run Mode sessions will persist and can be accessed from the dropdown menu next to the lightning bolt icon in the upper right of the FlutterFlow builder.

Run Mode does not support Hot Reloading, so any changes you make to your app will not be reflected in the Run Mode. In order to see the changes, you would have to create another Run Mode.
Local Run
Local Run downloads the code locally and gives you the option to use Flutter's Hot Reload or Hot Restart to see your changes instantly on a device. See how to setup Local Run here.
Please note that Local Run is currently available only on the Paid Plans.