Enabling Firebase Auth in FlutterFlow
You have already enabled authentication while creating a new project with Firebase setup.
To enable authentication in FlutterFlow:
- Open your FlutterFlow project where you are planning to use Firebase Authentication.
- Open Setting and Integrations > App Settings > Authentication.
- Turn on the Enable Authentication toggle and select Authentication Type to Firebase.
- To ensure that your users are directed to the appropriate pages based on their login status, you must set the Initial Page.
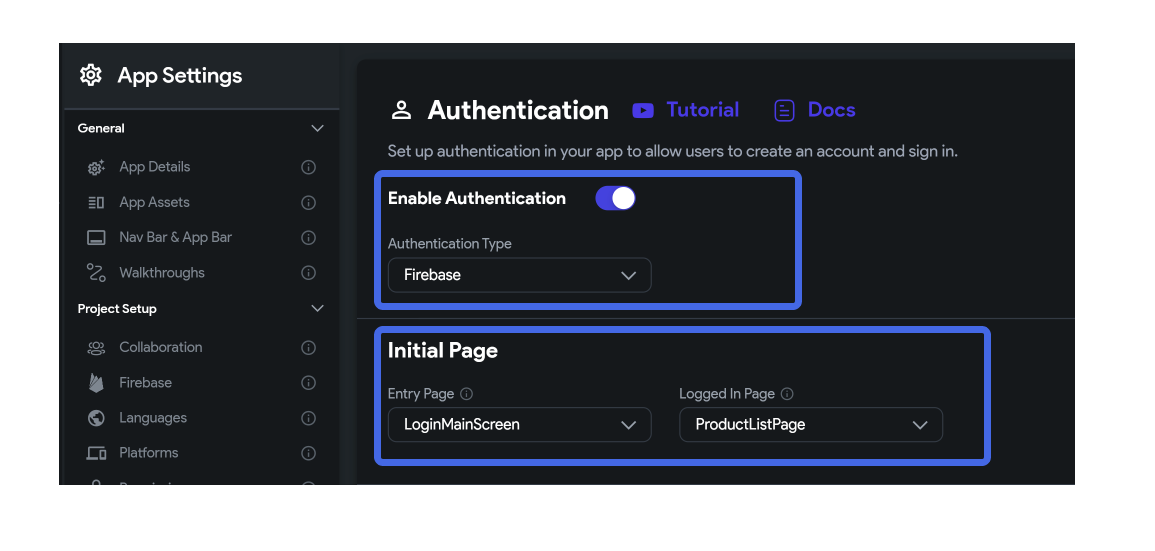
Setting Initial Pages for Authentication
You can specify your app's Entry Page and Logged In Page from this section.
-
Entry Page : This page will be displayed if the user is not logged in. This is typically used to display the onboarding flow or to provide the login/sign-up page.
-
Logged In Page: This page will be displayed if the user is already logged in to your app. Users are automatically navigated to the page you specify here on a successful sign-in attempt.
Creating the 'users' collection
To allow FlutterFlow to create user documents during authentication steps, it is important to enable Firestore Access in Firebase. Follow this section to enable it first.
The 'users' collection stores the information for authenticated users.
You have already enabled 'Create User Collection' while creating a new project with Firebase Setup.
- Click on the Firestore tab from the Navigation Menu.
- Click on the + Create Collection button. If you have any other collection already added, you can click on the Plus button.
- Enter a collection_name (this can be anything, but we recommend 'users') and click on Create button.
- If you enter 'users' a popup will open which asks you to populate this collection with default fields. You can click Yes, and we will add all the fields.
Follow the quicklink to see the steps
- Click on the Settings icon in the Firestore tab.
- Find the Users Collection switch and enable it.
- Find the Collection dropdown below, click on the Unset, and select the name of the collection you just created.
- Now switch to the Collection tab. Now you should see all the default fields.
To store and collect additional information or modify the default fields list, see how to add fields.
You do not need to create a password field. This is handled internally by Firebase.
Setup for Google or Phone sign-in setup for Android Apps
If you aren't planning to use Google or Phone Sign-In, you can skip these steps.
Generate the SHA-1 key
An SHA-1 key (aka the 'Secure Hash Algorithm') is required if you want to use Google Sign-in and Phone Sign-in. To learn more about the SHA-1 key, see this link.
While releasing the app, make sure to get the key from Play Console.
- Open a terminal window:
-
Mac: Use the Launchpad or press (⌘ + Spacebar) for Spotlight search, type 'Terminal', and open it.
-
Windows: Click the Windows icon, navigate to the 'Windows System' folder, and open 'Command Prompt' either by clicking or right-clicking it.
- Copy the following command (based on your operating system) and select Enter.
Windows
keytool -list -v -keystore C:\Users\leon\.android\debug.keystore -alias androiddebugkey
If you get the following error while trying the above command:
ERROR:'keytool' is not recognized as an internal or external command
You might not have JAVA installed on your machine. Here is the helpful link to install JAVA and remove the above issue.
Mac/Linux
keytool -list -v \ -alias androiddebugkey -keystore ~/.android/debug.keystore
- After being prompted for the key password, type 'android' and press 'Enter'. Note: For security reasons, you won't see the password as you type it.
- Copy the SHA1 key.
Add the SHA-1 key in the Firebase Console
- Open the Firebase console > Project Overview > Project Settings and scroll down to Your App section.
- Select your Android App from the left side menu.
- Find the SHA certificate fingerprints section and click on the Add fingerprint.
- Enter the copied SHA-1 into the input box and click on Save.
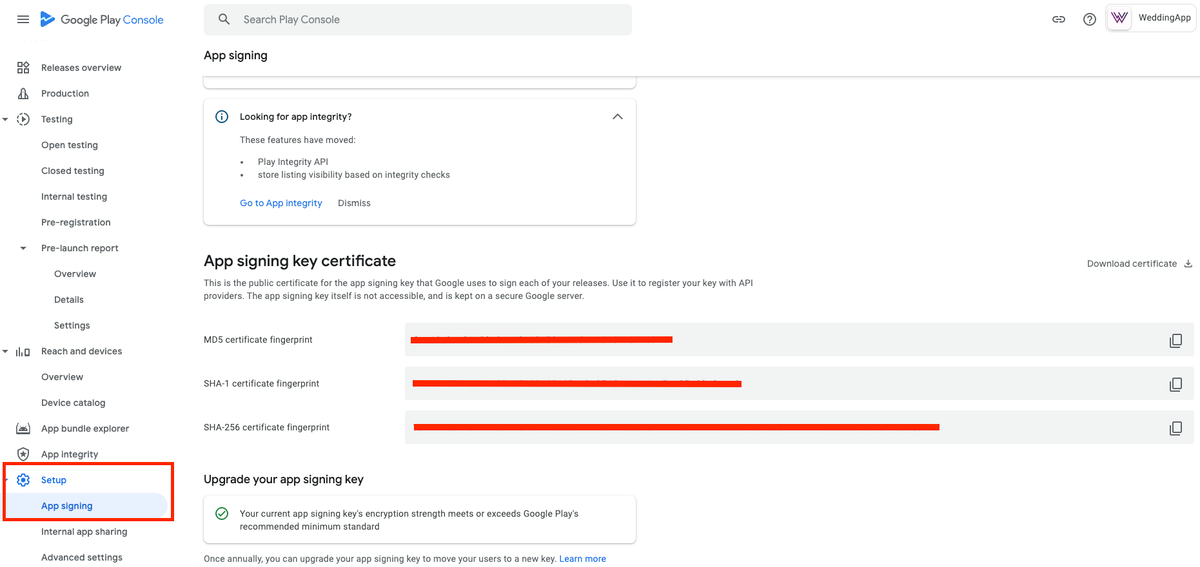
Getting SHA keys for release mode
If you're releasing your app to the Play Store, you must add the SHA certificate fingerprints from the Play Console.
To get the keys for the release app, navigate to Play Store Console > Your project > Release Setup > App Signing and copy the SHA-1 and SHA-256 keys.
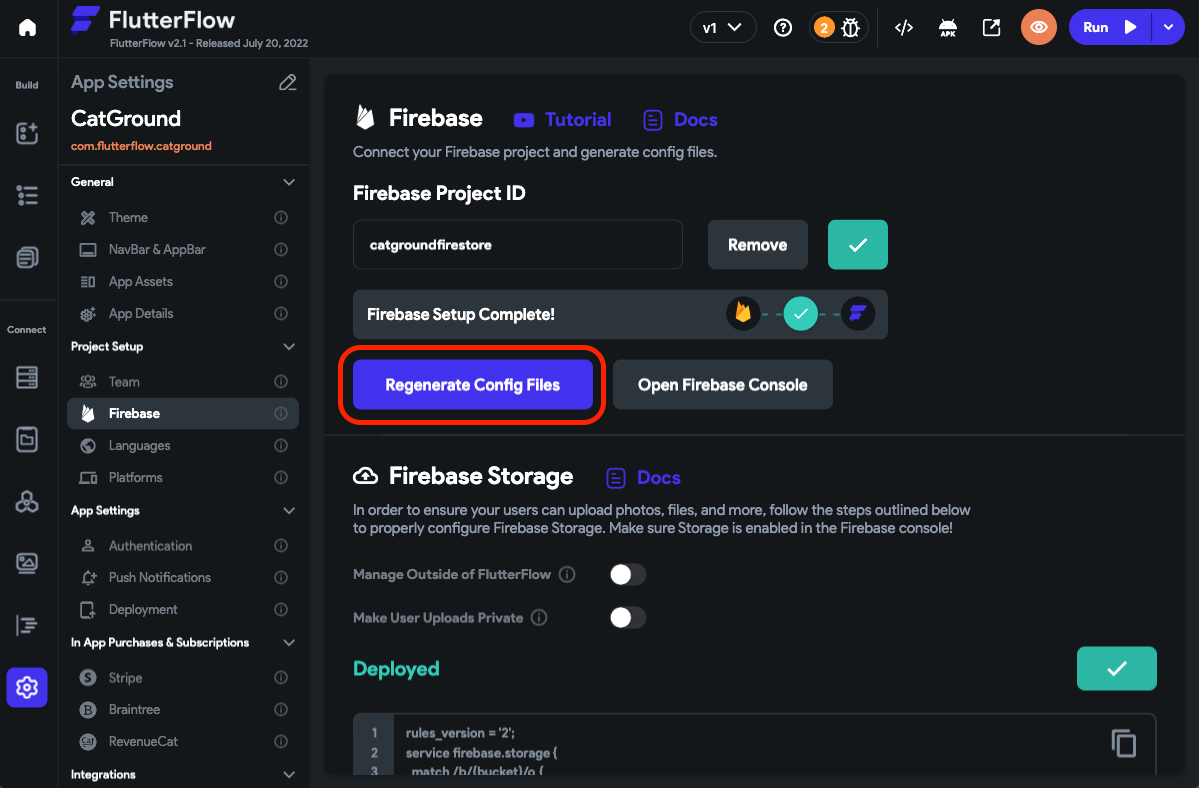
Regenerate config files
After adding the SHA-1 key you must re-generate the config files in FlutterFlow.
To regenerate the config files:
- Return to FlutterFlow. From the Navigation Menu, select Settings & Integrations > Project Setup > Firebase.
- Click on the Regenerate Config Files.