Google Login
Google Authentication with Supabase offers a secure and convenient method for users to sign up and log in to your app using their Google accounts.
Before getting started with this section, ensure you have,
- Completed all steps in the Supabase setup
- Completed Initial setup required for authentication.
Adding Google authentication
Let's see how to add a Supabase Google authentication by building an example that looks like this:
The steps to add Supabase Google authentication are as follows:
1. Create and configure Google Cloud project
To begin adding Google auth, you must first have an active Google Cloud Platform account. You'll need to either set up a new project or use an existing one within this account.
Here's how you do it:
- If you haven't already, create a new project in Google Cloud Console.
- If you haven't already, configure the OAuth consent screen. This helps Google display a consent screen to the user, including a summary of your project and its policies and the requested scopes of access.
- Now, you must create credentials so that your app can access Google data. To do so:
- Head over to credentials page, click + CREATE CREDENTIALS and select OAuth client ID.
- Set Application type to Web Application.
- Below, under the Authorized redirect URIs, click + ADD URI. To get this URI, open your Supbase project > Authentication > Providers. Open the Google section, copy the Callback URL, and paste it here.
- Click CREATE.
- Copy the Client ID and Client secret; you'll need this in the next step.
- For Android, you'll need to create a new credential with the Application Type set to Android. While creating, you'll need to provide the package name and SHA-1 key. Note that after your app goes live, you must replace the SHA-1 key with the key from the Play Console.
- Similarly, create credential for iOS platform as well. Note that after your app goes live, you must specify the App Store and Team ID.
2. Configure Google auth in Supabase
This step involes enabling Google login and providing the client IDs and secret in Supabase. Here's how you do it:
- Head over to Supabase project dashboard > Authentication > Providers.
- Open the Google section and turn on the Enable Sign in with Google.
- Paste the Client ID and Client secret from the Web credential.
- Paste the Authorized Client IDs from the Android credential.
- Turn on the Skip nonce checks to support iOS platform.
- Now, you must specify the redirect URL in Supabase project dashboard > Authentication > URL Configuration. It is the URL to which a user is sent after successful authentication. Here's how you do it for both web and mobile.
3. Enable Google auth in FlutterFlow
To enable Supabase Google auth in FlutterFlow:
- In FlutterFlow, navigate to the Setting and Integrations > App Settings > Authentication.
- Open the Supabase Authentication section and turn on the Enable Google Authentication toggle.
- Paste the iOS and Web Client ID obtained in step 1.
4. Add a Google sign-in button
To allow users to authenticate, you need a login page with a button. You can create your own or use the one from the widget template or page template.
Here's how you can add the Google sign-in button from our page template:
5. Adding create account action
Now, you can proceed to add an account creation flow, which basically consists of two actions in the following order:
- Supabase create account action. Here's how you add it:
- Select the widget (e.g., Button) on which you want to add the action.
- Select Actions from the Properties panel (the right menu), and click Open. This will open an Action Flow Editor in a new popup window.
- Click on the + Add Action.
- Search and select the Log in (under Backend/Database > Supabase Authentication) action.
- Set Auth Provider to Google.
- Supabase insert row action
The first one creates an account in Supabase and adds the user details at Supabase Dashboard > Authentication > Users. However, this action does not create an entry in the "users" table you created here. To do so, you need to add another action called Supabase insert row action with the user's details, such as email.
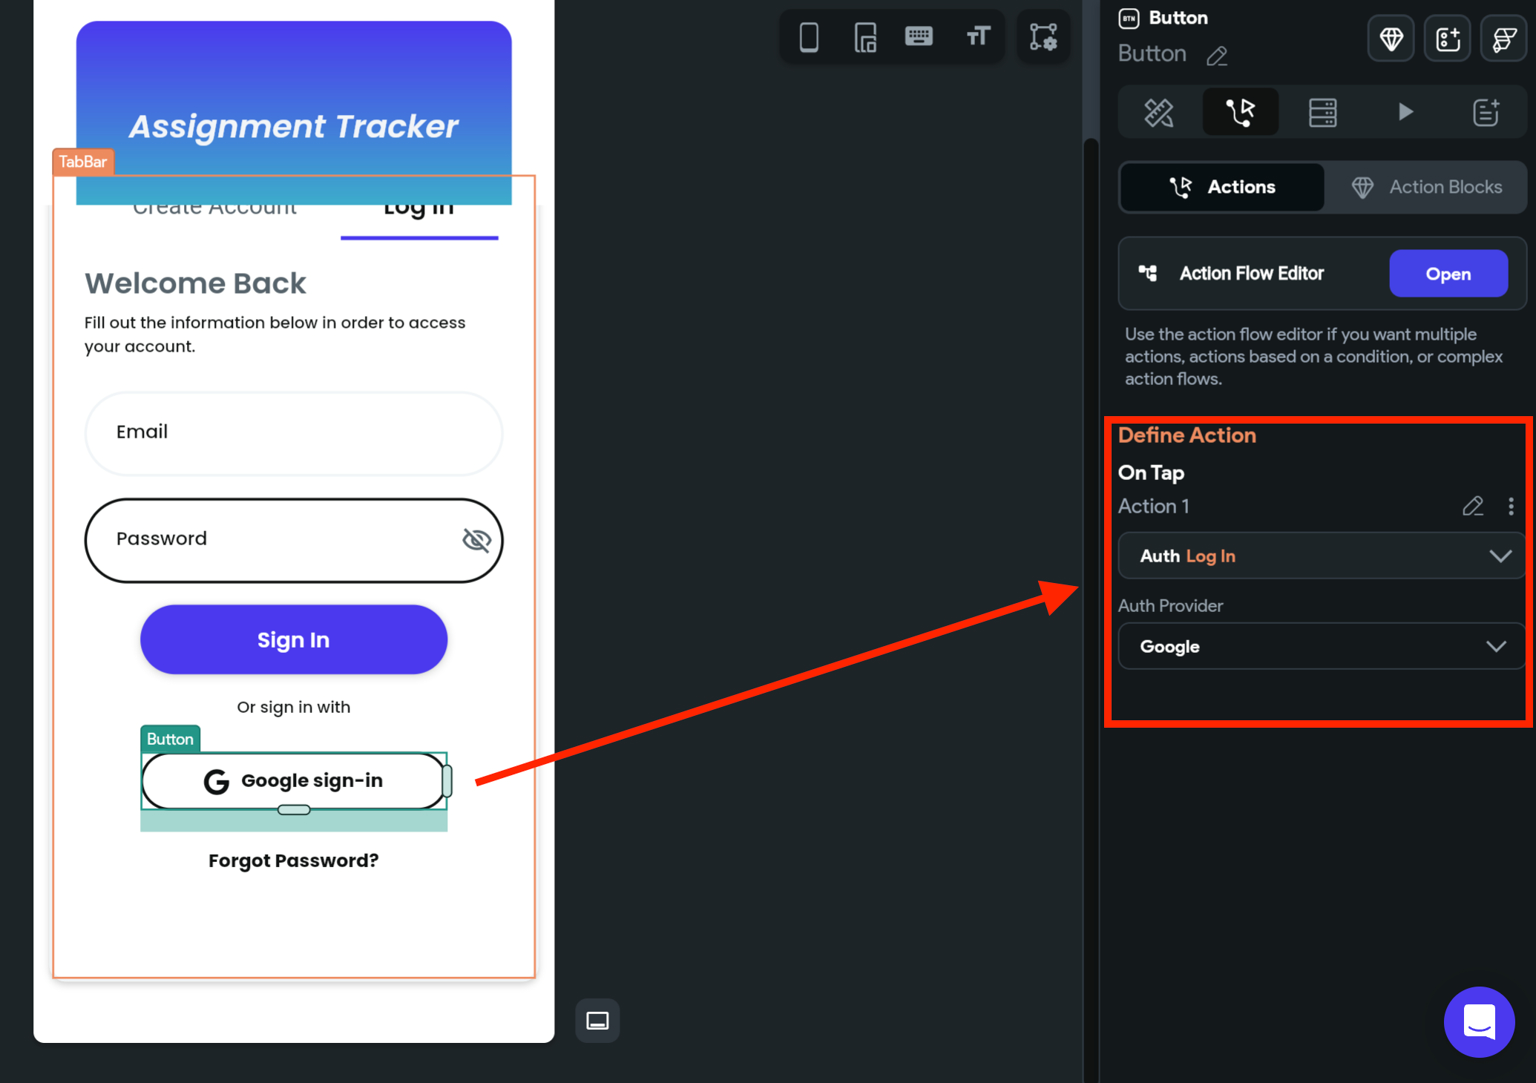
6. Adding login action
When you click the Google sign-in button, it will trigger the 'Log In' action, prompting a Google sign-in popup for users to input their credentials.
To add login action:
- Select the widget (e.g., Button) on which you want to add the action.
- Select Actions from the properties panel (the right menu) and select Add Action.
- Search and select the Log in (under Backend/Database > Supabase Authentication) action.
- Set Auth Provider to Google.
7. Adding logout action
To let users log out of your app, you can use this action.
8. Preparing to test the app
Currently, testing the Supabase Google login feature isn't possible in Run or Test modes due to certain restrictions. But, for web platform testing, you can publish your app with a subdomain using our web publishing feature.
You can test your app on a real device or emulator using FlutterFlow’s Local Run. Follow the Local Run documentation and see how to set up a physical device to start testing.
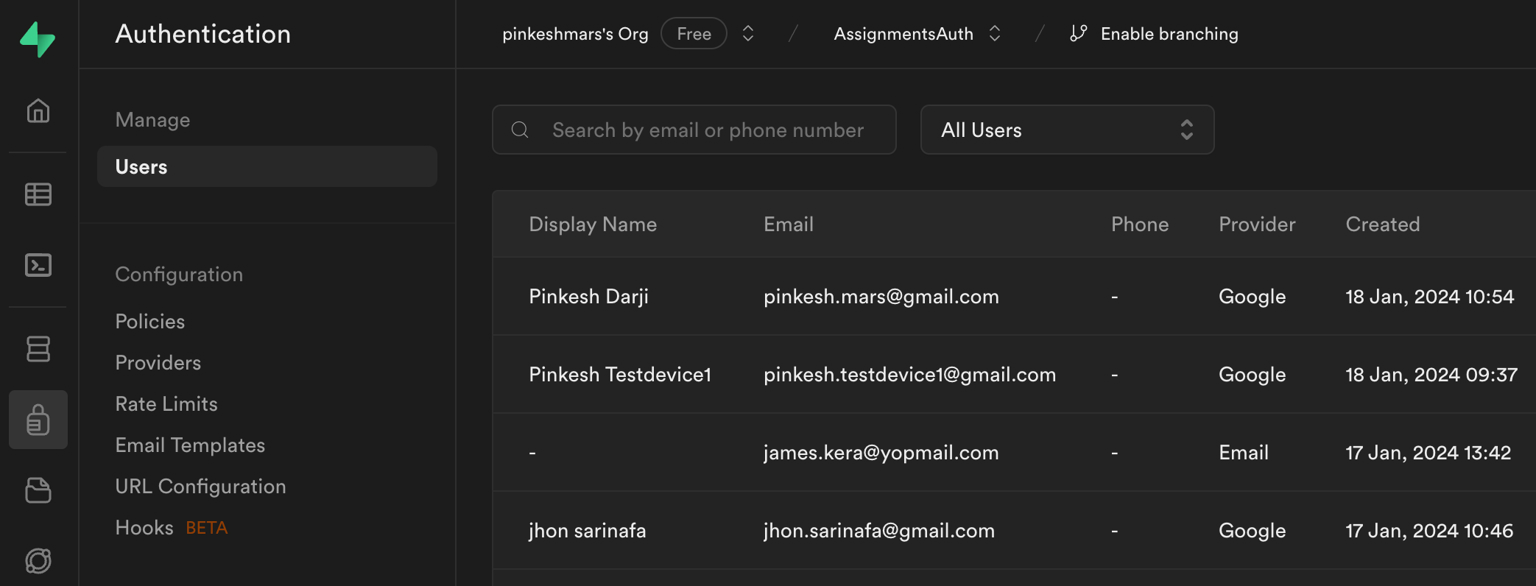
9. Verify user creation
To verify that you have successfully added the Google authentication, you can come over to your Supabase project > Authentication > Users and verify the user entries.