Web Publishing
FlutterFlow supports web publishing, allowing you to build and publish web applications in addition to your mobile apps. This guide provides details on how to use FlutterFlow for web publishing. From enabling web support and making design adjustments to deploying your app and adding custom domains.
- You can ship your existing mobile app as a web app with little or no change to the current setup.
- We offer free hosting and custom subdomains for all users.
- We've rebuilt some of the components to work better on the web.
Publish to Web
Publishing to the Web comprises of the following steps:
- Enabling web support
- Make design adjustments (optional)
- Resolving errors
- Adding general information
- Deploy
- View live web app
1. Enabling web support
By default, FlutterFlow allows you to run your app on Android and iOS without any additional effort. But, to run and deploy your app on the Web, you need to add platform support for the Web.
To add platform support, navigate to the Setting and Integrations > Project Setup > Platform > turn on the Web toggle.
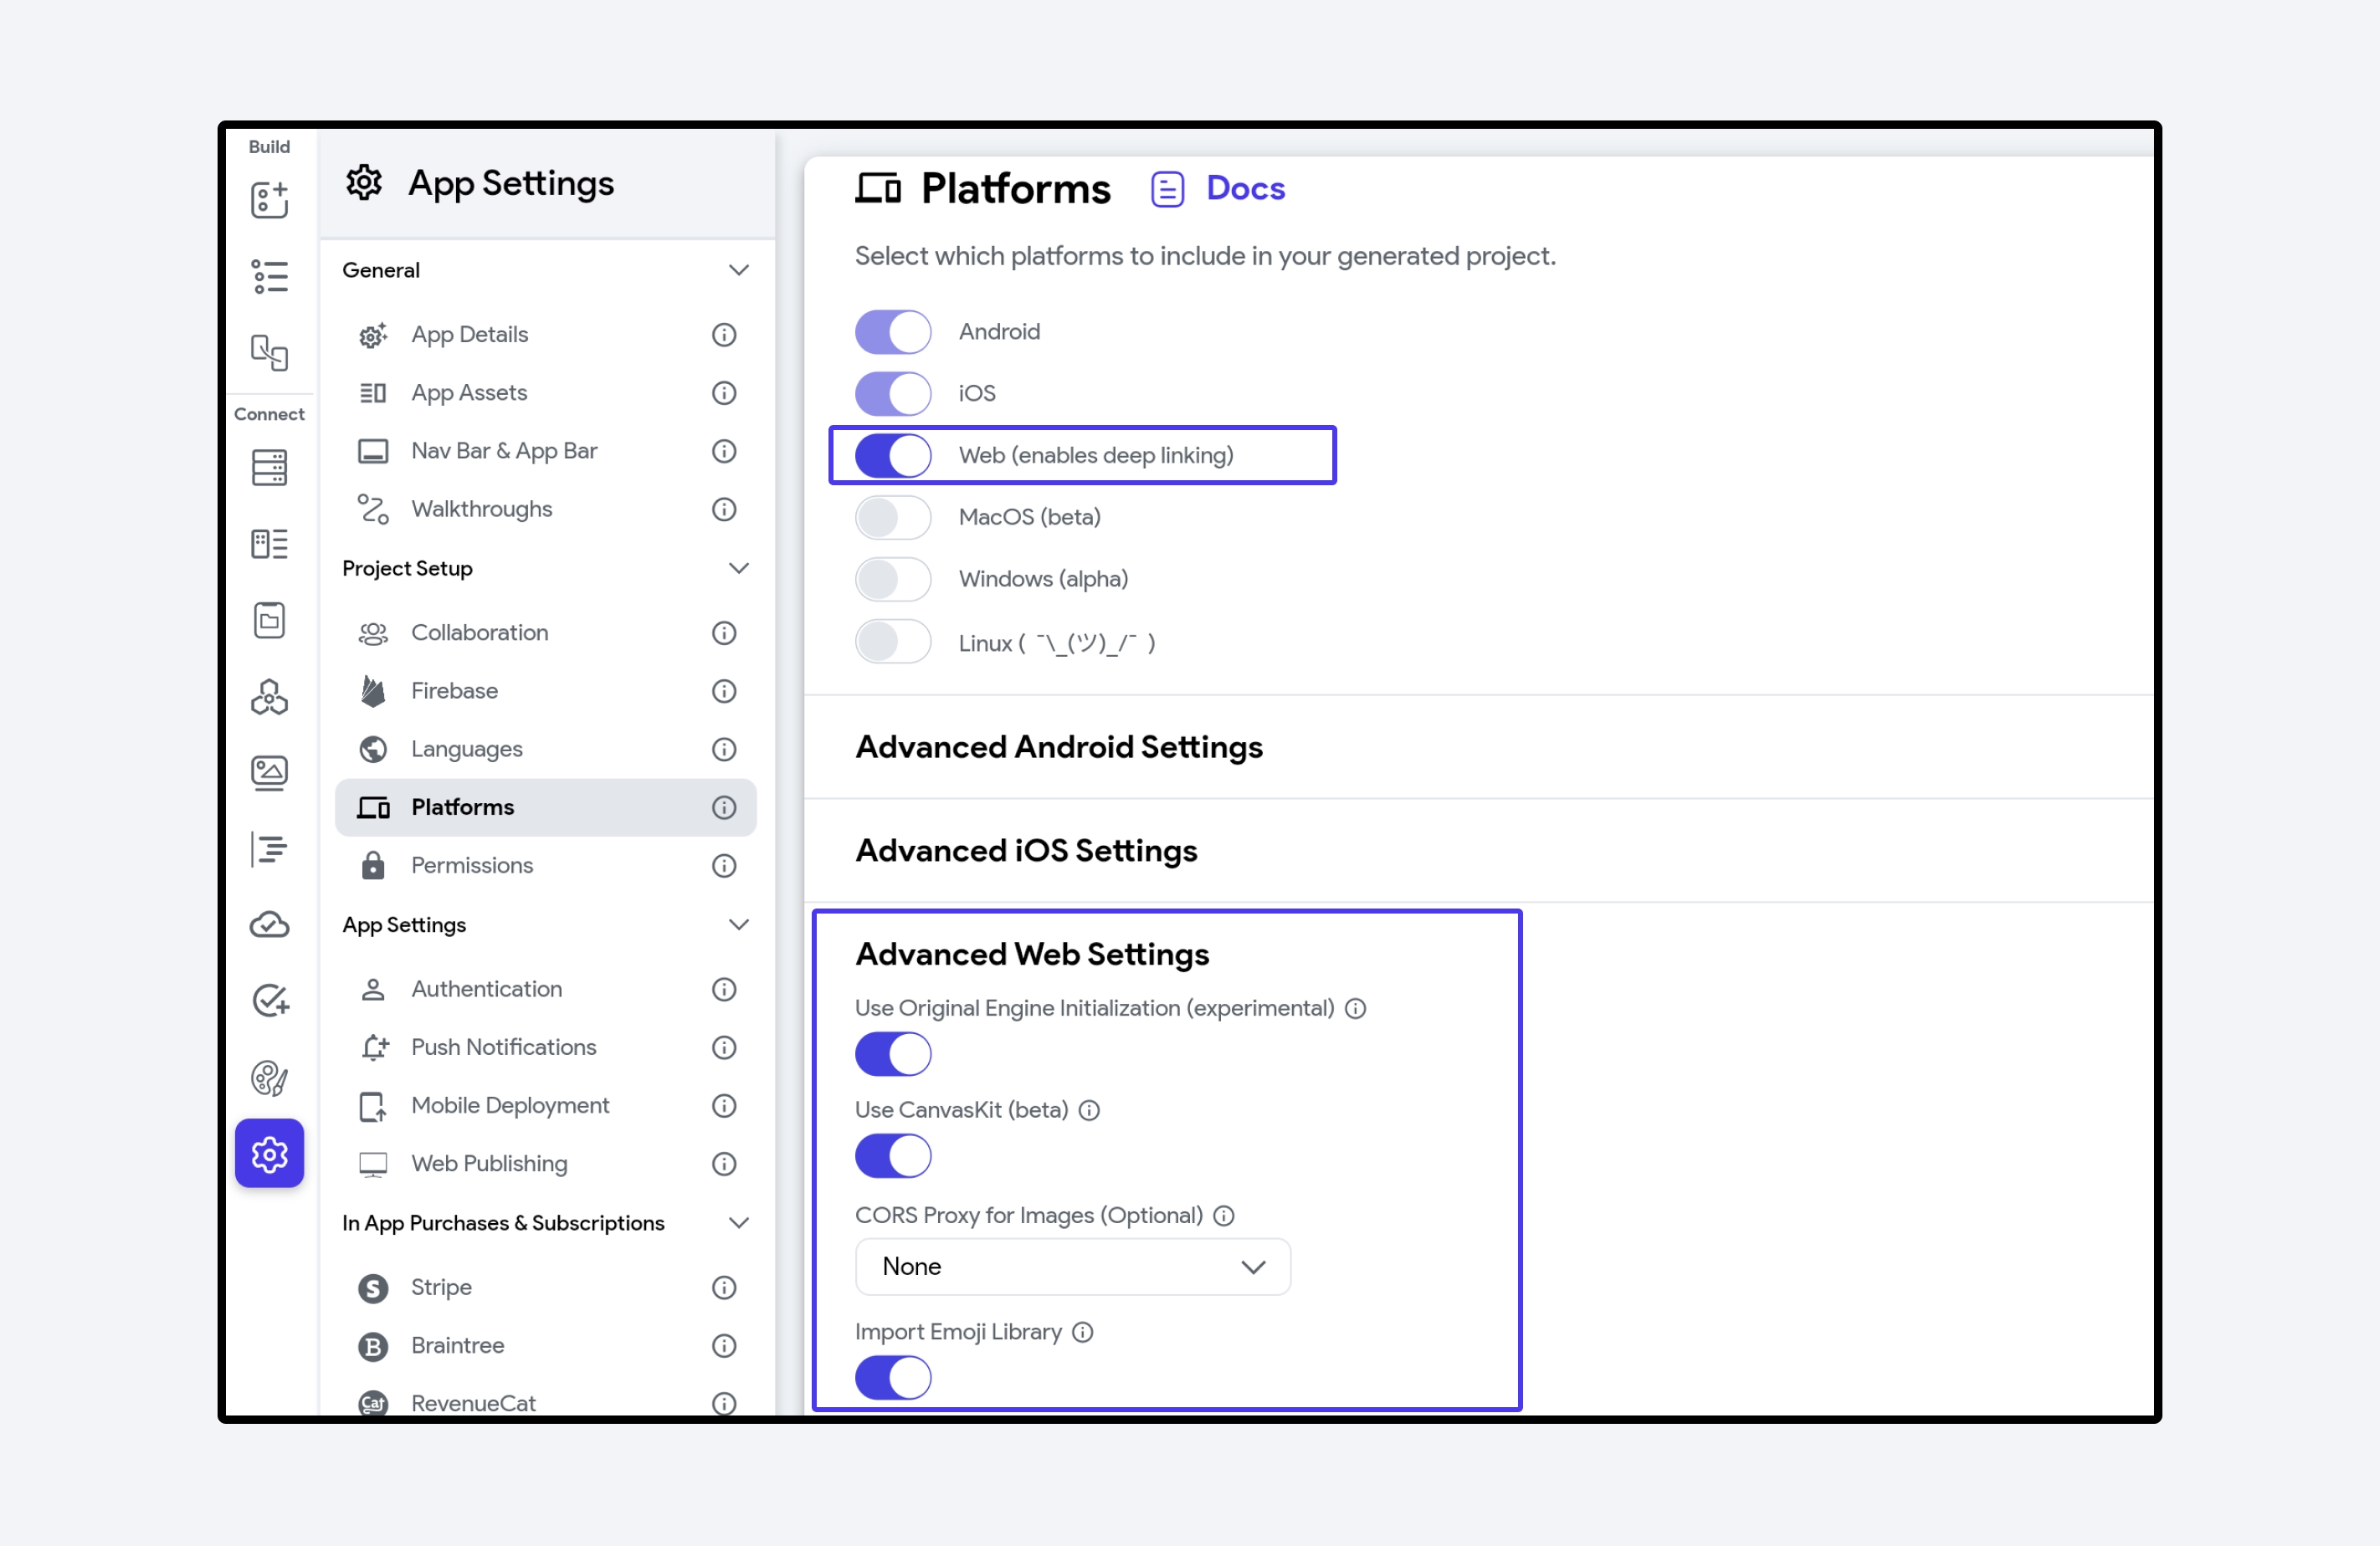
Enabling web support automatically enables deep linking for your project. This helps in creating URLs for every page of your app.
Advanced Web Settings
-
Use CanvasKit: Enabling this option can provide high-quality graphics and text rendering on web platforms.
-
CORS Proxy for Images (Optional): When using CanvasKit, some images can be blocked from loading if the server is not configured to allow loading them from other websites. This happens because Flutter web uses WebGL for rendering, which requires access to raw image data and is subject to browser security restrictions called Cross-Origin Resource Sharing (CORS).
Choose the appropriate option based on where your images are hosted:
-
None: If you are only loading images from your Firebase Storage, select this option and configure Firebase Storage for web access. FlutterFlow automatically excludes Firebase Storage images from CORS proxy requirements.
-
Deploy with Firebase: If images are hosted on external servers (not Firebase Storage) but you use Firebase for your app, choose this option. FlutterFlow will automatically deploy a regional CORS proxy function to your Firebase project for optimal performance. Simply click the Deploy button that appears below this option.
-
Custom Proxy URL: If you're not using Firebase or prefer to manage your own CORS proxy, specify your custom proxy URL here. If you don't have one, you can create one using services like cors-anywhere or CloudFlare Workers.
warningPerformance Note: Using a CORS proxy adds a network hop for external images, which may slightly increase loading times. For best performance, host images on Firebase Storage or a CORS-enabled CDN when possible.
-
-
Import Emoji Library: Importing the Emoji library is necessary if your app may use emojis anywhere in any text widget. However, this will increase the size of your app on web.
-
Use Wasm (Beta): Enabling this option will build your app using Flutter’s Wasm (WebAssembly) web renderer. For more details, see the Flutter Documentation on Wasm.
warning- This feature is currently in Beta, so it should be used with caution.
- Wasm is not supported in Test Mode.
Troubleshooting CORS Issues
If you're experiencing image loading issues on web:
- Check browser console: Look for CORS-related error messages
- Verify image sources: Ensure external image servers allow cross-origin requests
- Test proxy configuration: Verify your custom proxy URL is accessible and functioning
- Firebase Storage setup: Confirm Firebase Storage rules allow public read access for web
2. Make design adjustments (optional)
If you're creating a web-only application, setting the canvas size to desktop and building pages accordingly can work well. However, if you plan to target both mobile and web users, some design adjustments may be necessary to ensure that the UI is optimized for both platforms.
You can create separate widgets for different platforms and control their visibility using Responsive Visibility.
3. Resolving web compatibility warnings
If you have previously built a mobile app and have recently enabled web support, you may encounter warnings regarding web compatibility. Due to the distinct nature of mobile and web platforms, some of the widgets and actions in FlutterFlow, including AdMob, RevenueCat, Share action, and Launch Map action, or your custom widgets may not function as expected because they are not yet supported on the web.
Any known Web Support Issues will be displayed as a Platform Support Warning. This won't stop you from deploying your app to the web, but it can result in poor user experience and unexpected app behavior.
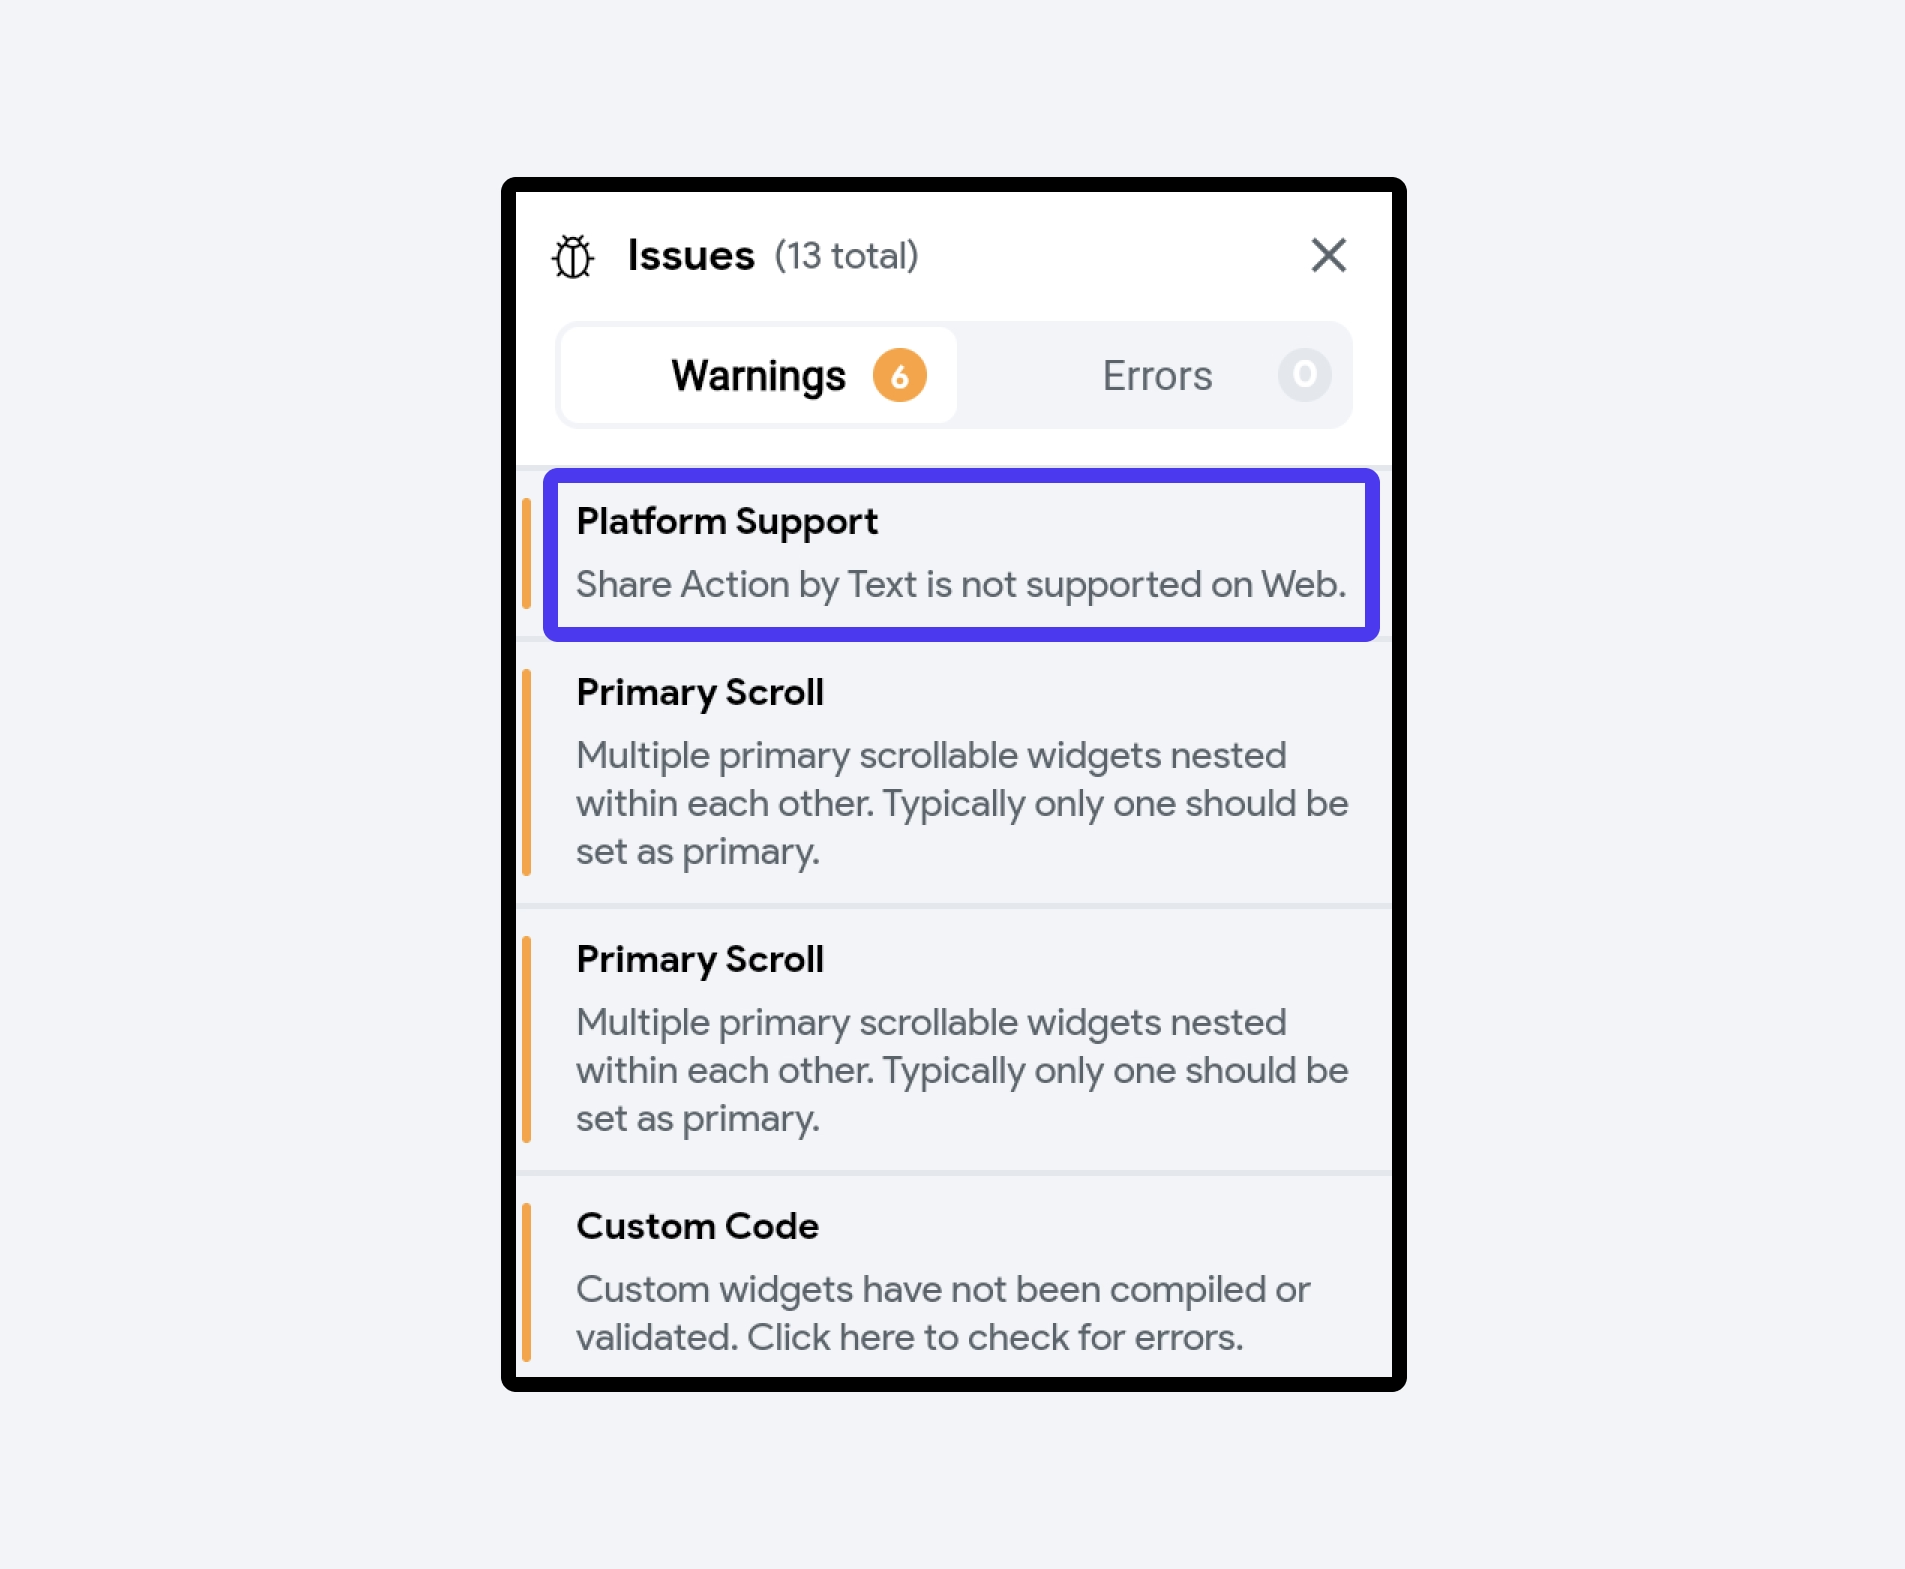
In such a situation, you can try to find a replacement package on pub.dev (considering it meets your requirements and has a good score).
Important: Make sure to double-check any pub.dev packages you are using have Web Support.

4. Adding general information
In this step, you must provide general information about your web app by following the steps below:
- Navigate to the Setting and Integrations > App Settings > Web Deployment.
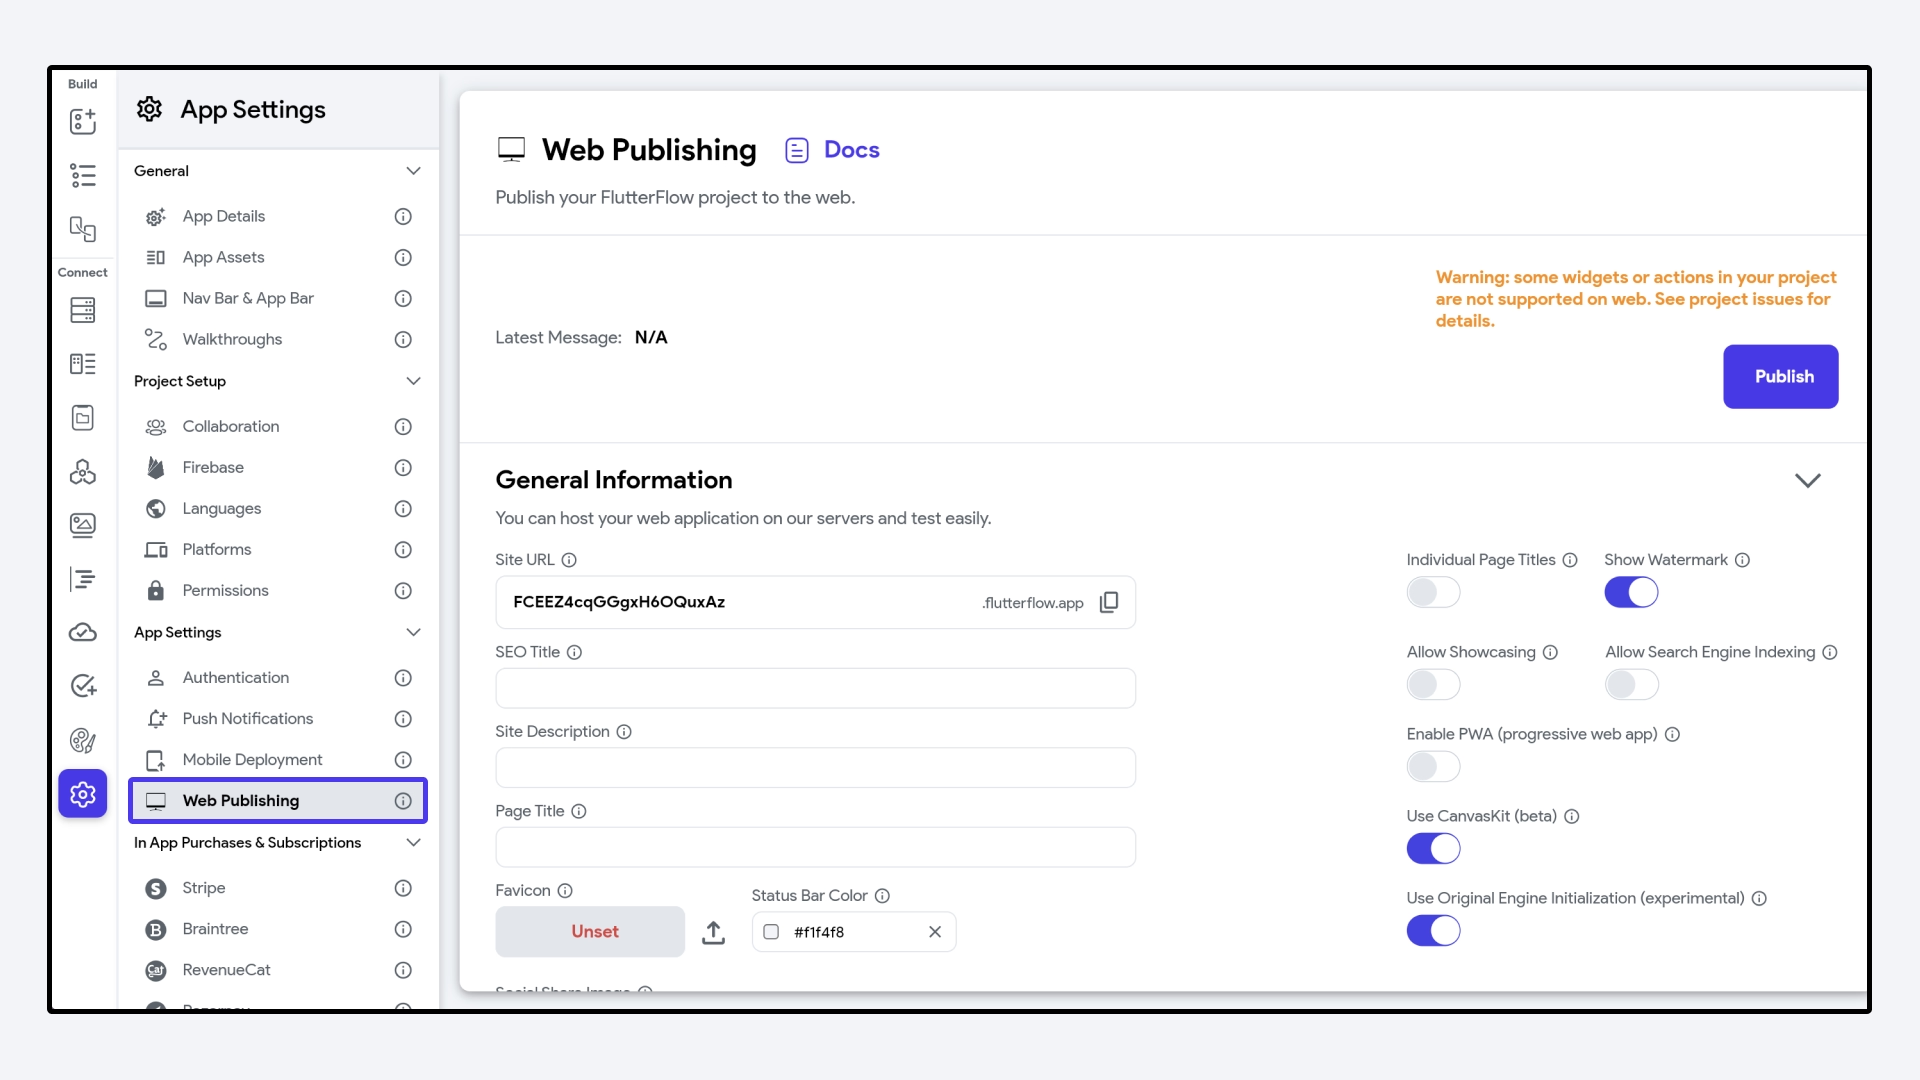
Inside the General Information section, enter the following details:
-
Site URL: You can define the Site URL by adding the subdomain, for example, mywebapp.flutterflow.app. You can only change the subdomain, i.e., the part before flutterflow.app.
warning- You can remove or change the existing subdomain by simply entering the new one and hitting the publish button. Note that when you change your subdomain, it only takes effect the next time you deploy.
- Old addresses can stop working anytime and be given to another user.
- There is a limit on the number of subdomains you can register per user. Paying users can register up to 20 subdomains. You will receive an in-app warning if you are approaching the limit.
-
SEO Title: This appears in social sharing previews and search results.
-
Site Description: A text that you would like to appear in the social sharing preview card and search results.
-
Page Title: This appears in the browsers tab for all pages of your app.
-
Favicon: An icon that typically appears before the web app name inside the browser's tab. To change it, click on the Upload Favicon + and upload the icon. You can generate it for free from here.
-
Status Bar Color: This is to change the status bar color when viewed on the Safari browser on iOS and installed as a PWA on mobile devices.
-
Social Share Image URL: The image from this URL will be displayed inside the social share preview card (e.g., OpenGraph and Twitter card).
-
Individual Page Titles: Enabling this will display the current page name in the browser tab. If you do so, ensure you provide the Page Title under Page > Properties Panel > Route Settings.
-
Show Watermark: By default, a button with 'Built in FlutterFlow' text appears as a watermark at the bottom right side of your page. To remove, disable the Show watermark toggle.
-
Allow Showcasing: If enabled, we may feature your project on our website.
-
Allows Search Engine Indexing: This is to let people discover your site via search engines.
-
Enabling PWA: Enabling this can provide an app-like experience right in the browser. PWA app can be installed on the device, supports offline functionality, sends push notifications, and can be accessed without the need to go through an app store.
-
Use CanvasKit: Enabling this can provide high-quality graphics and text rendering on web platforms. CanvasKit can be used as an alternative to the default HTML renderer when higher graphical fidelity is needed in Flutter web apps.
-
Use Original Engine Initialization: This uses original Flutter web engine initialization, which sometimes helps in better loading time in the deployed web app.
Tip: Only users on the paid plans can remove the FlutterFlow watermark.
5. Deploy
When you are ready to deploy, click Publish. This will take approximately 2-3 minutes.
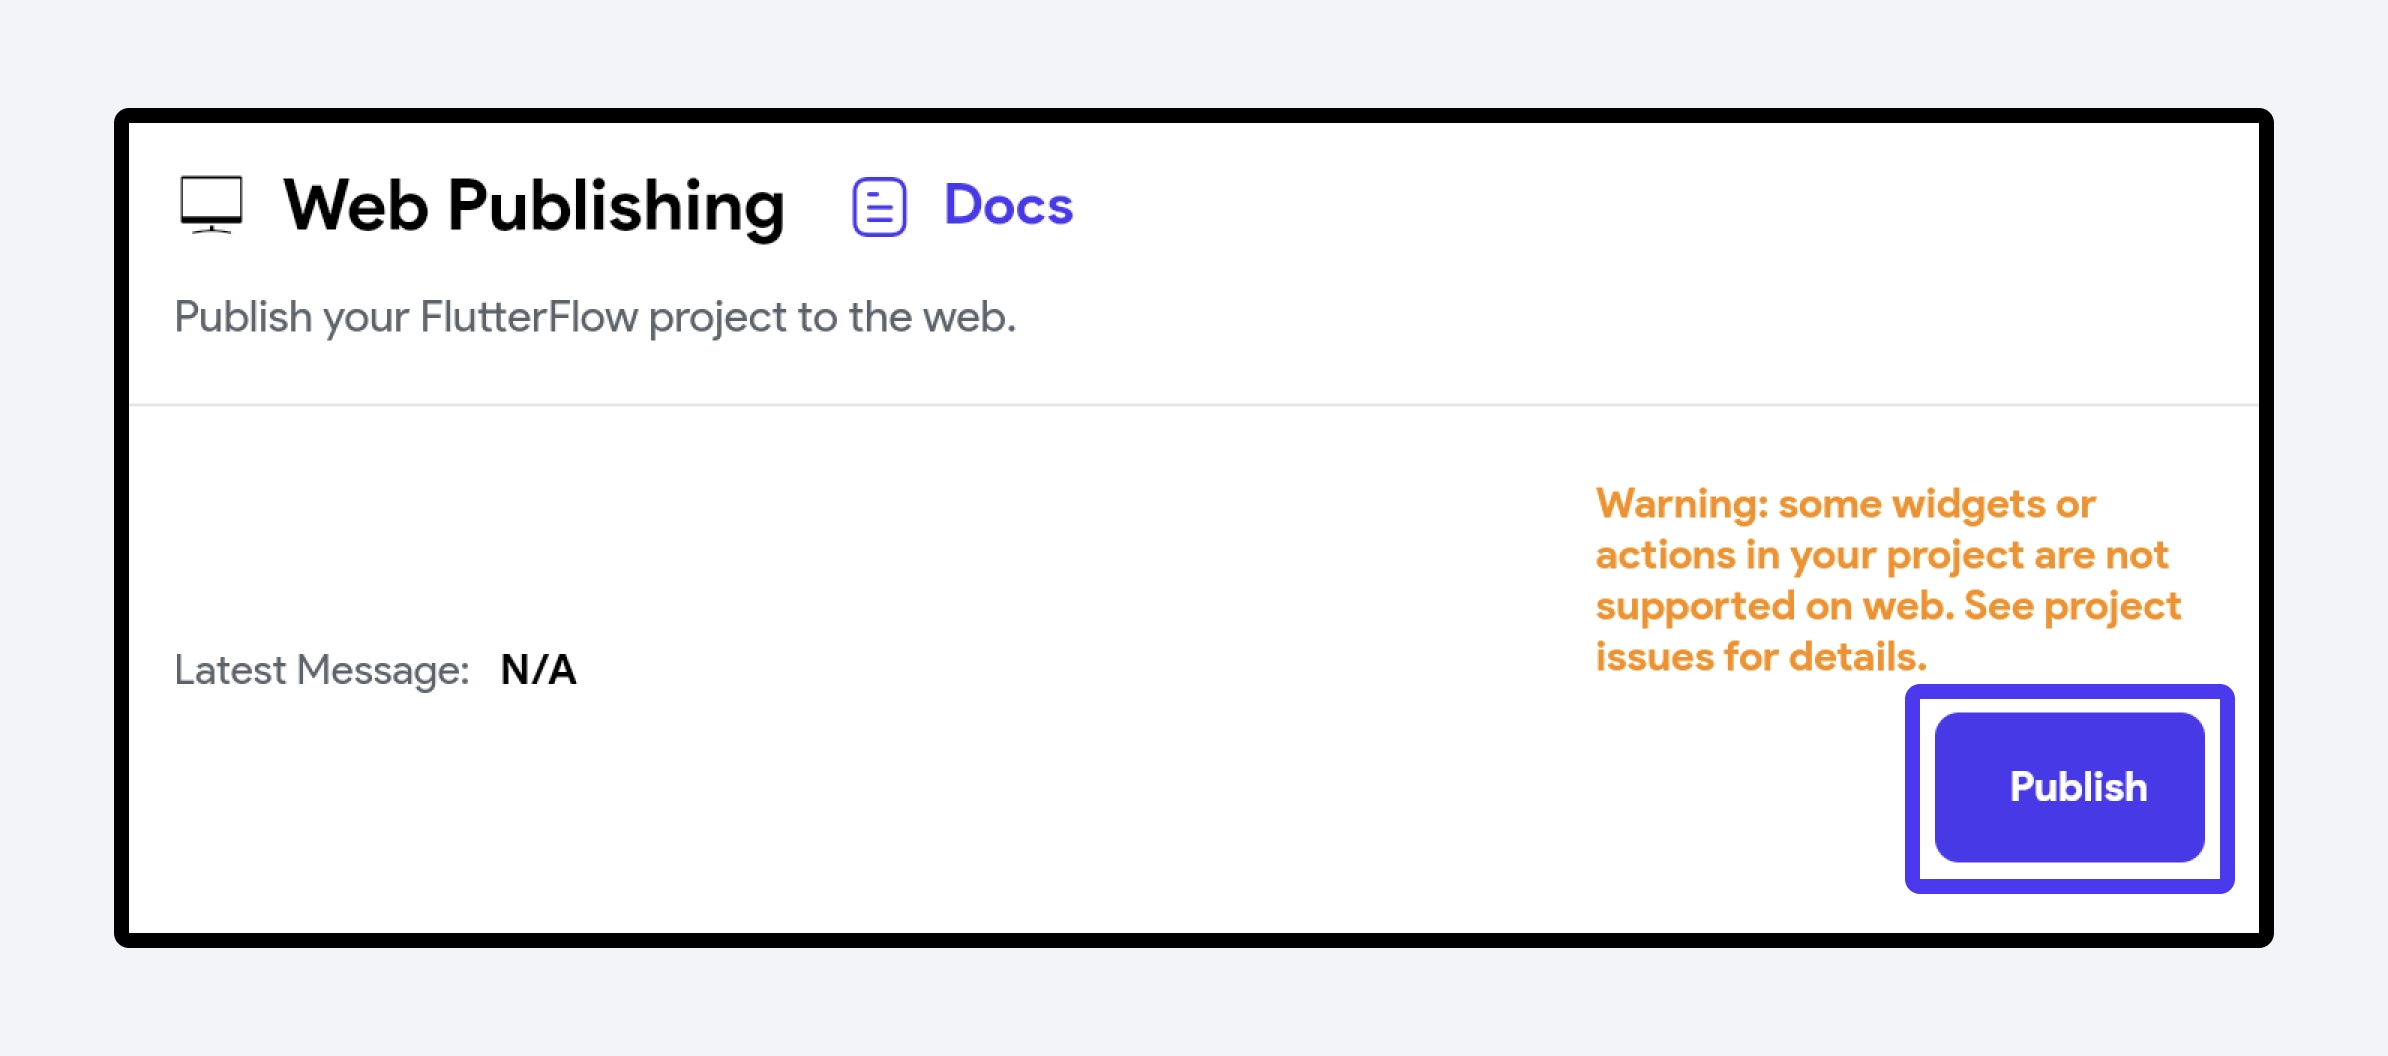
By default, you will publish to a subdomain based on your project id. These default subdomain addresses do not count toward the subdomain quota, and you can deploy as many projects as you'd like. The URL would look like this: your-project-id-1234.flutterflow.app
You can also modify the address by specifying a custom subdomain address, in the Settings > Web Publishing tab's Site URL field, as long as it's available. You can have up to 2 custom subdomain URLs on the Free plan, up to 20 on any of our Paid plans, and unlimited custom subdomain URLs on the Enterprise plan.
Once it is published, you can make any changes live to your users by clicking the Publish button again.
If you try to publish to a domain that is already taken, you will receive a warning like ‘Error reserving subdomain: Subdomain your-domain-name is already used by another project.’ To overcome this, enter a different subdomain inside the Site URL and select Publish again.
In case you want to unroll your web app, hit the Unpublish button at the bottom.
6. View live web app
To view the live version of your app, click the eye icon next to the 'Publish' button.

Adding custom domain
Adding a custom domain to your web app can give it a more professional look and feel and make it easier for your users to remember and find. FlutterFlow allows you to connect your own domain name to your web app and have it up and running in no time. This feature is perfect for those wanting to establish a strong online presence and increase brand awareness.
- All our paid plans include one free custom domain, with the option to purchase more if needed.
- A single custom domain slot can be linked to only one domain or subdomain.
- You can connect only one domain to a project, which can be either a root domain (like 'myapp.com') or a subdomain (such as 'beta.myapp.com'). That means if you connect a root domain, none of the subdomains under it will connected to the project. This leads to the rule of 'One project => One domain OR subdomain'.
To add a custom domain:
- Enter your Custom Domain URL. Ensure you only enter the domain name (without www) and extension (e.g.,mywebapp.com and not www.mywebapp.com).
- Now, you must set up the DNS. To do so:
- Visit the website from where you bought the domain.
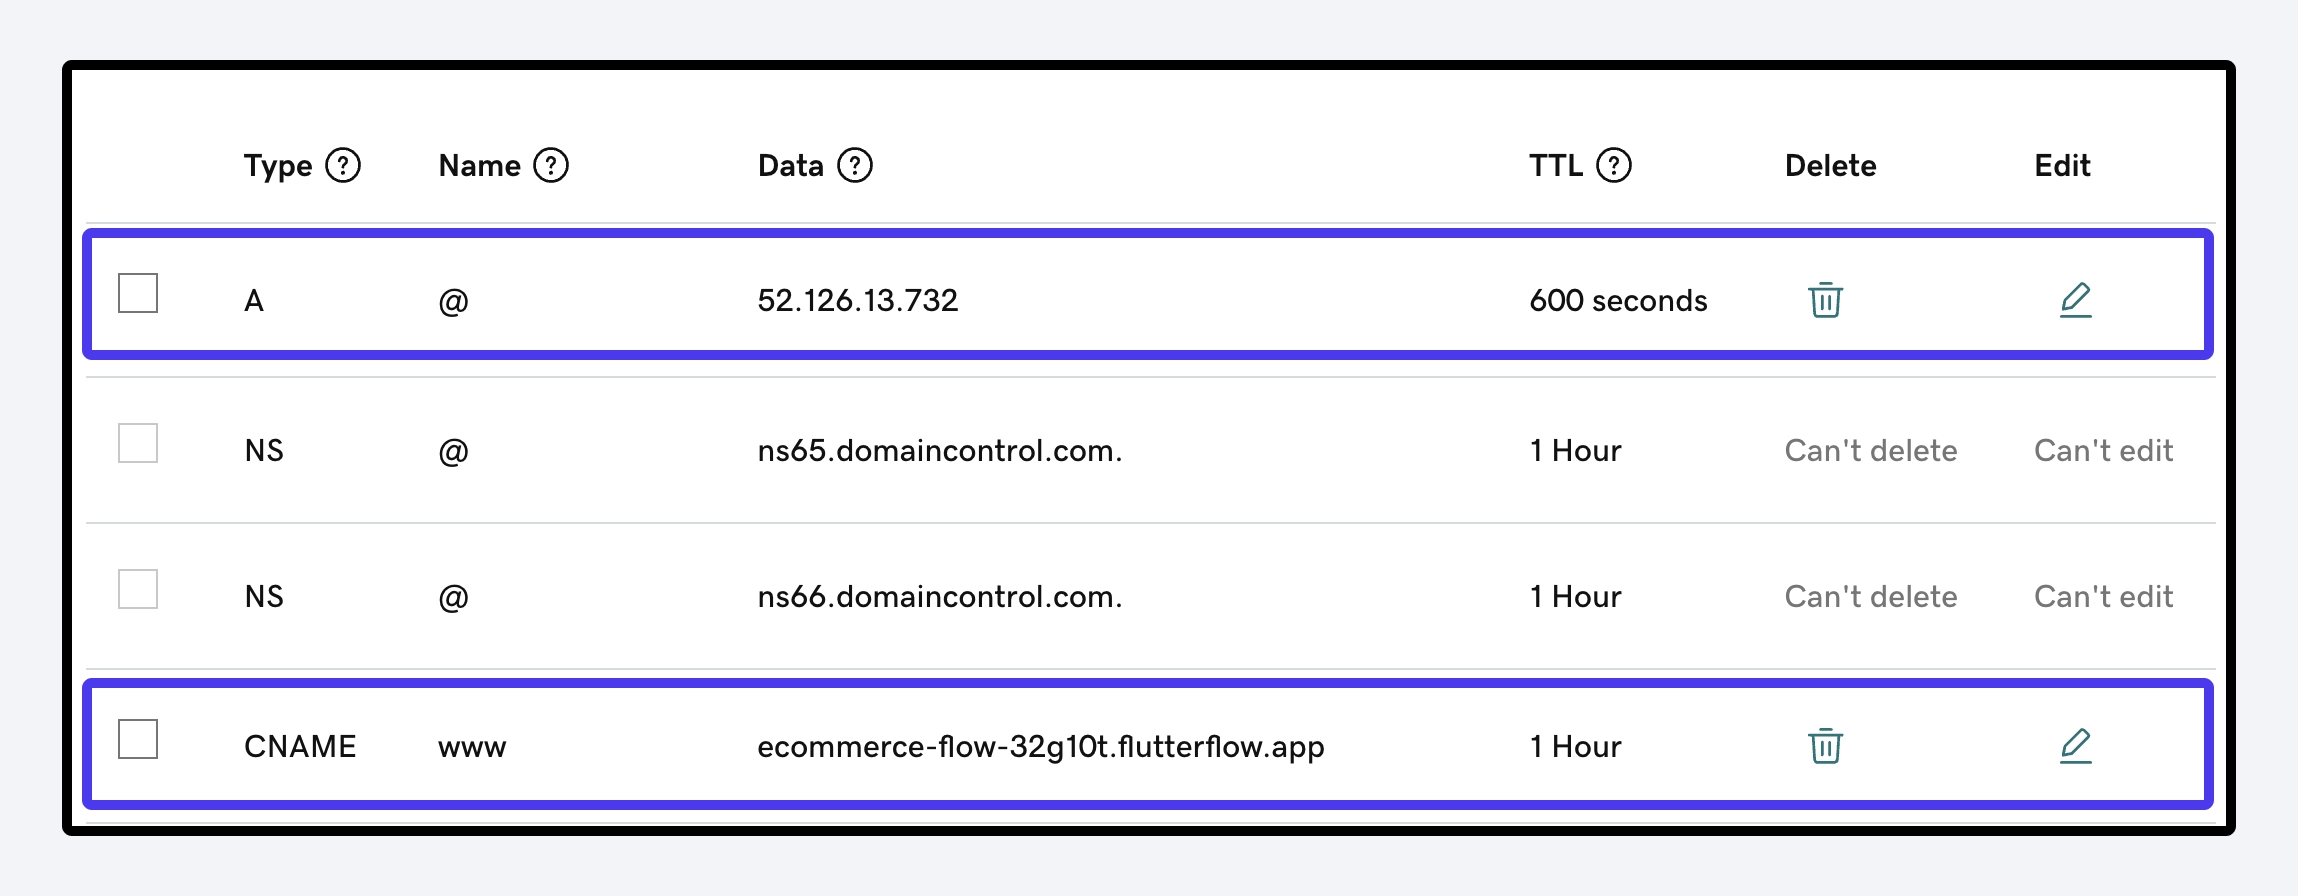
- Open the DNS manager and create the records as per displayed in UI. Note that there should not be other A or AAA records after adding this. Here are quick links on how to do this on popular domain-selling websites. 1) Godaddy 2) Namecheap 3) Google Domains. Here's an example of how it looks in Godaddy.
- Click Connect.
- Once the domain is connected, hit the Publish button again.

Add custom headers
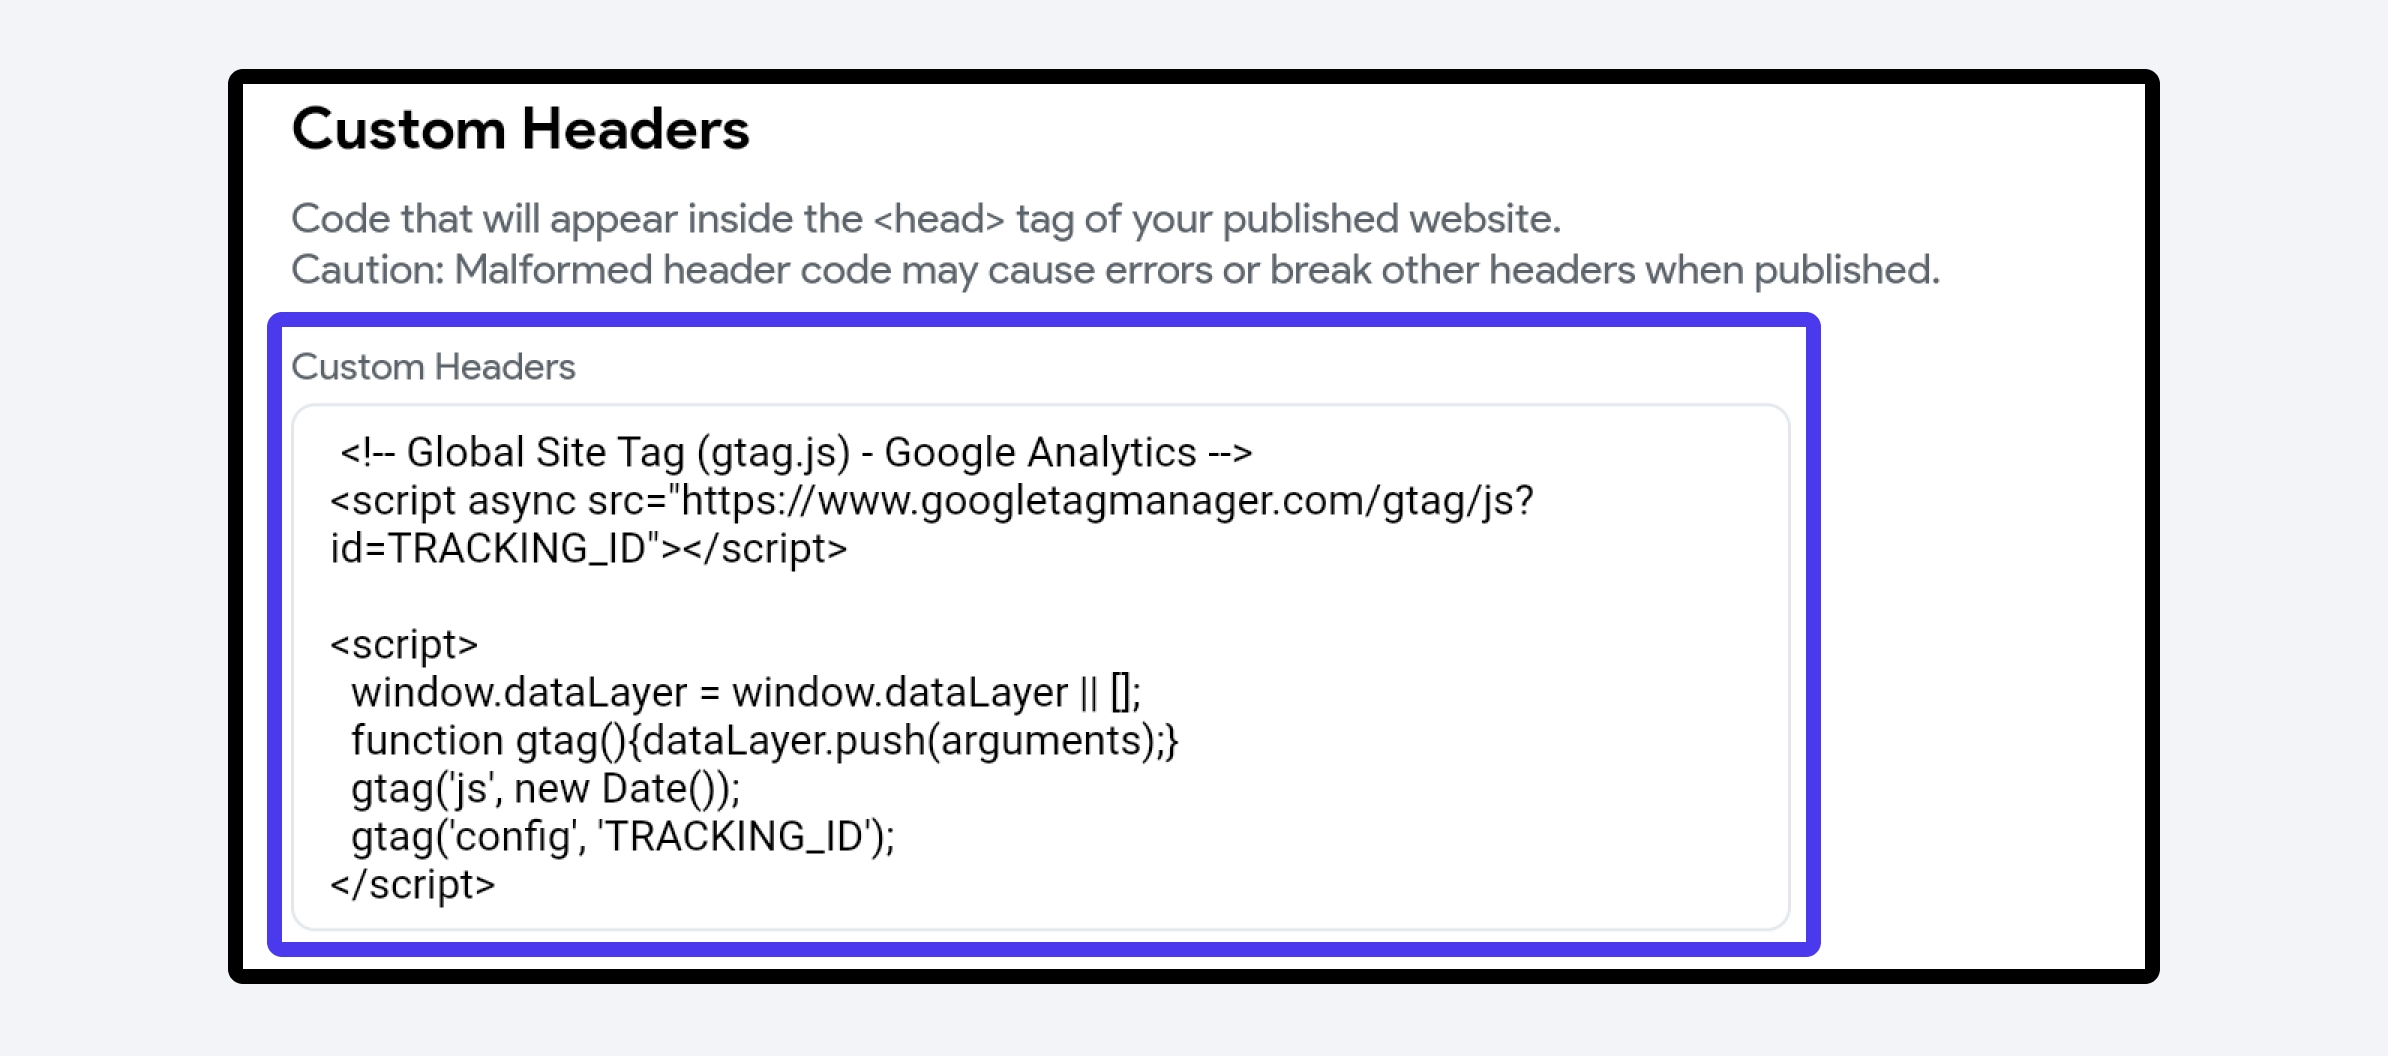
If you are familiar with HTML, you may set any additional headers (e.g., style and script) that you would like to be used in your published web app. For example, adding inline or external javascript. This will appear inside the head tag of your published app.
These headers are used directly in the index.html of your site, so malformed headers may cause unexpected behavior (just as directly editing index.html would).
To add a custom header, enter your tag inside the Custom Headers input box and publish the web app again.
You can verify the added custom header by opening the inspect element window (Command+Option+i on Mac or F12 on PC) and finding your tag inside the head tag.
Changing Firebase dynamic link
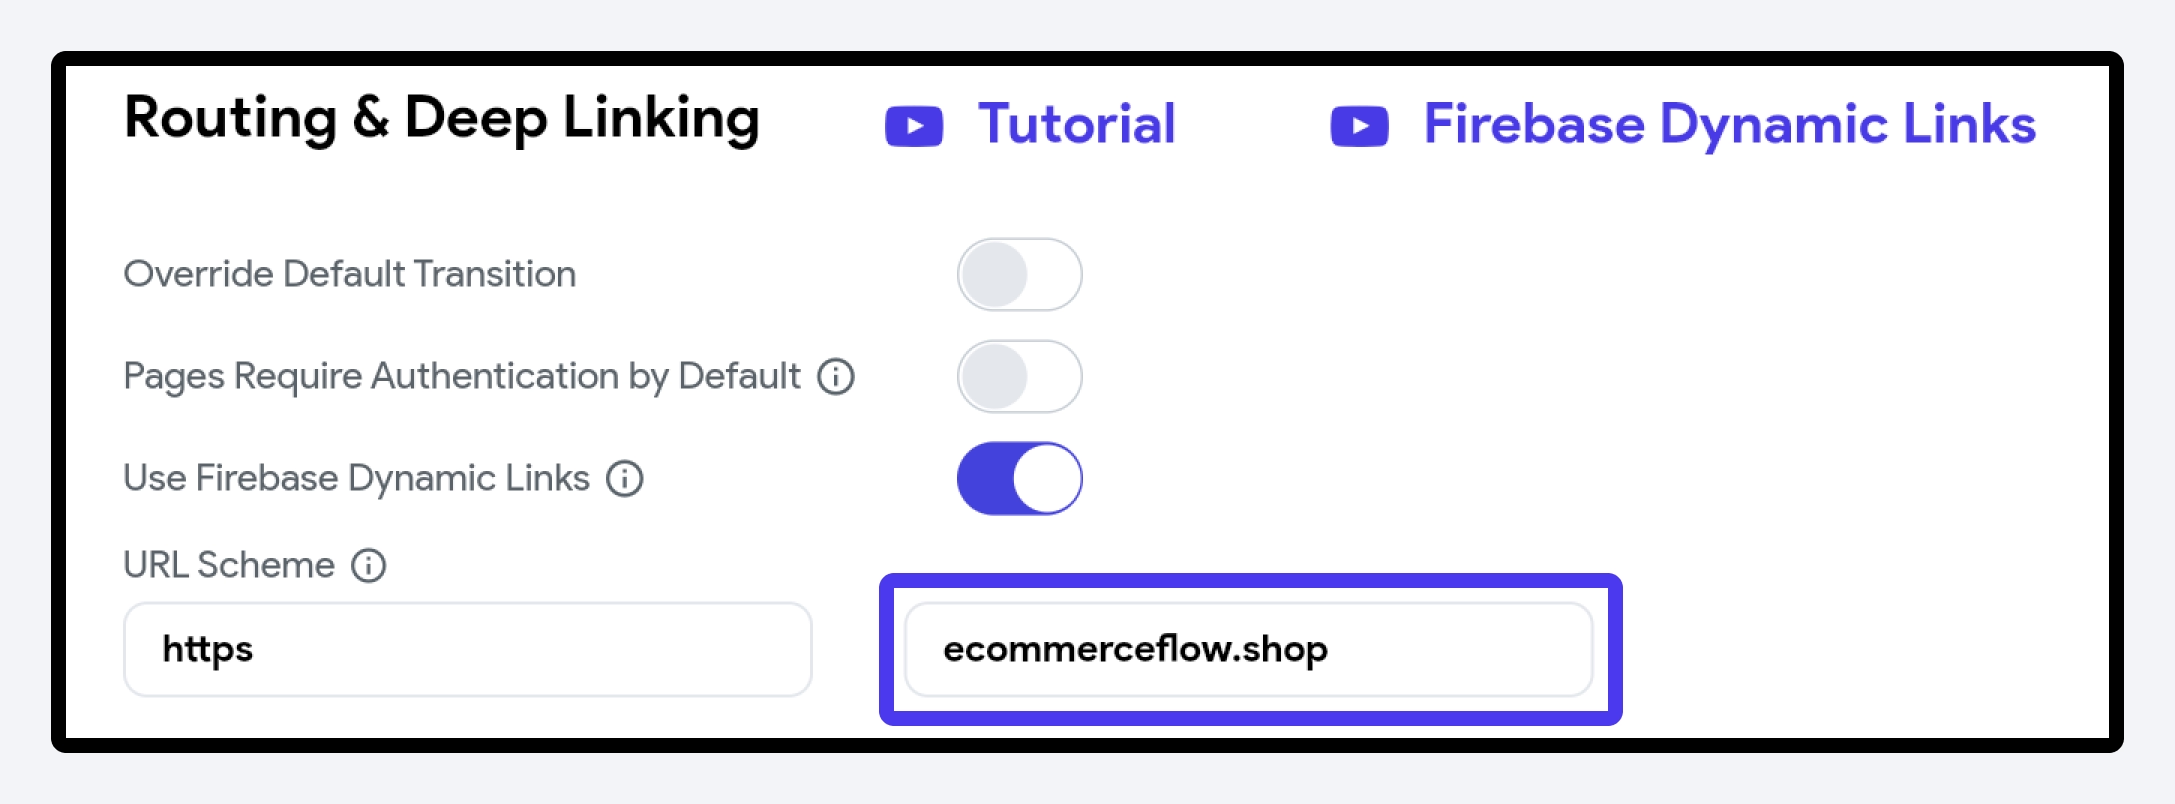
If you do web deployment and utilize Firebase dynamic links in your app, it's recommended that you update your Firebase Dynamic Links URL scheme. This adjustment is necessary to ensure shared links open correctly on the web. By doing so, your dynamic links will function properly for users across all platforms.
Adding subdomain as Authorized domain (Firebase)
If you are using Firebase Authentication, you must add your custom subdomain as an authorized domain in the Firebase console. Otherwise, social and phone sign-in will not work.
To enable your subdomain as an authorized domain:
See deployment history
Deployment history is essential for maintaining transparency, accountability, and a clear understanding of how a web application has evolved over time. Each deployment entry in the history includes a timestamp indicating when the deployment occurred.
It also display the status of each deployment (e.g., successful, failed). This helps in quickly identifying whether a deployment was completed without issues.
Click View Full History to review the previous successful version.
