Push to GitHub Repo
This guide provides instructions on how to connect your FlutterFlow project to a GitHub repository and manage custom code.
Connect a GitHub repo
In this section, we'll learn how to connect your FlutterFlow project to a GitHub repository. This includes creating a new repository, installing the FlutterFlow GitHub App, and pushing your code to the repository.
Here’s how you do it:
- First, go to your GitHub account and create a new repository.
- Once the repository is created, install the FlutterFlow GitHub App in your GitHub account.
- You can now push your code to the repository.
- FlutterFlow always pushes changes to a branch named
flutterflow. Avoid making direct changes to this branch, as your changes will be overwritten by the next push from FlutterFlow. - If you need to modify the code, make changes in a separate branch. Learn more about managing custom code.
Manage Custom Code on GitHub
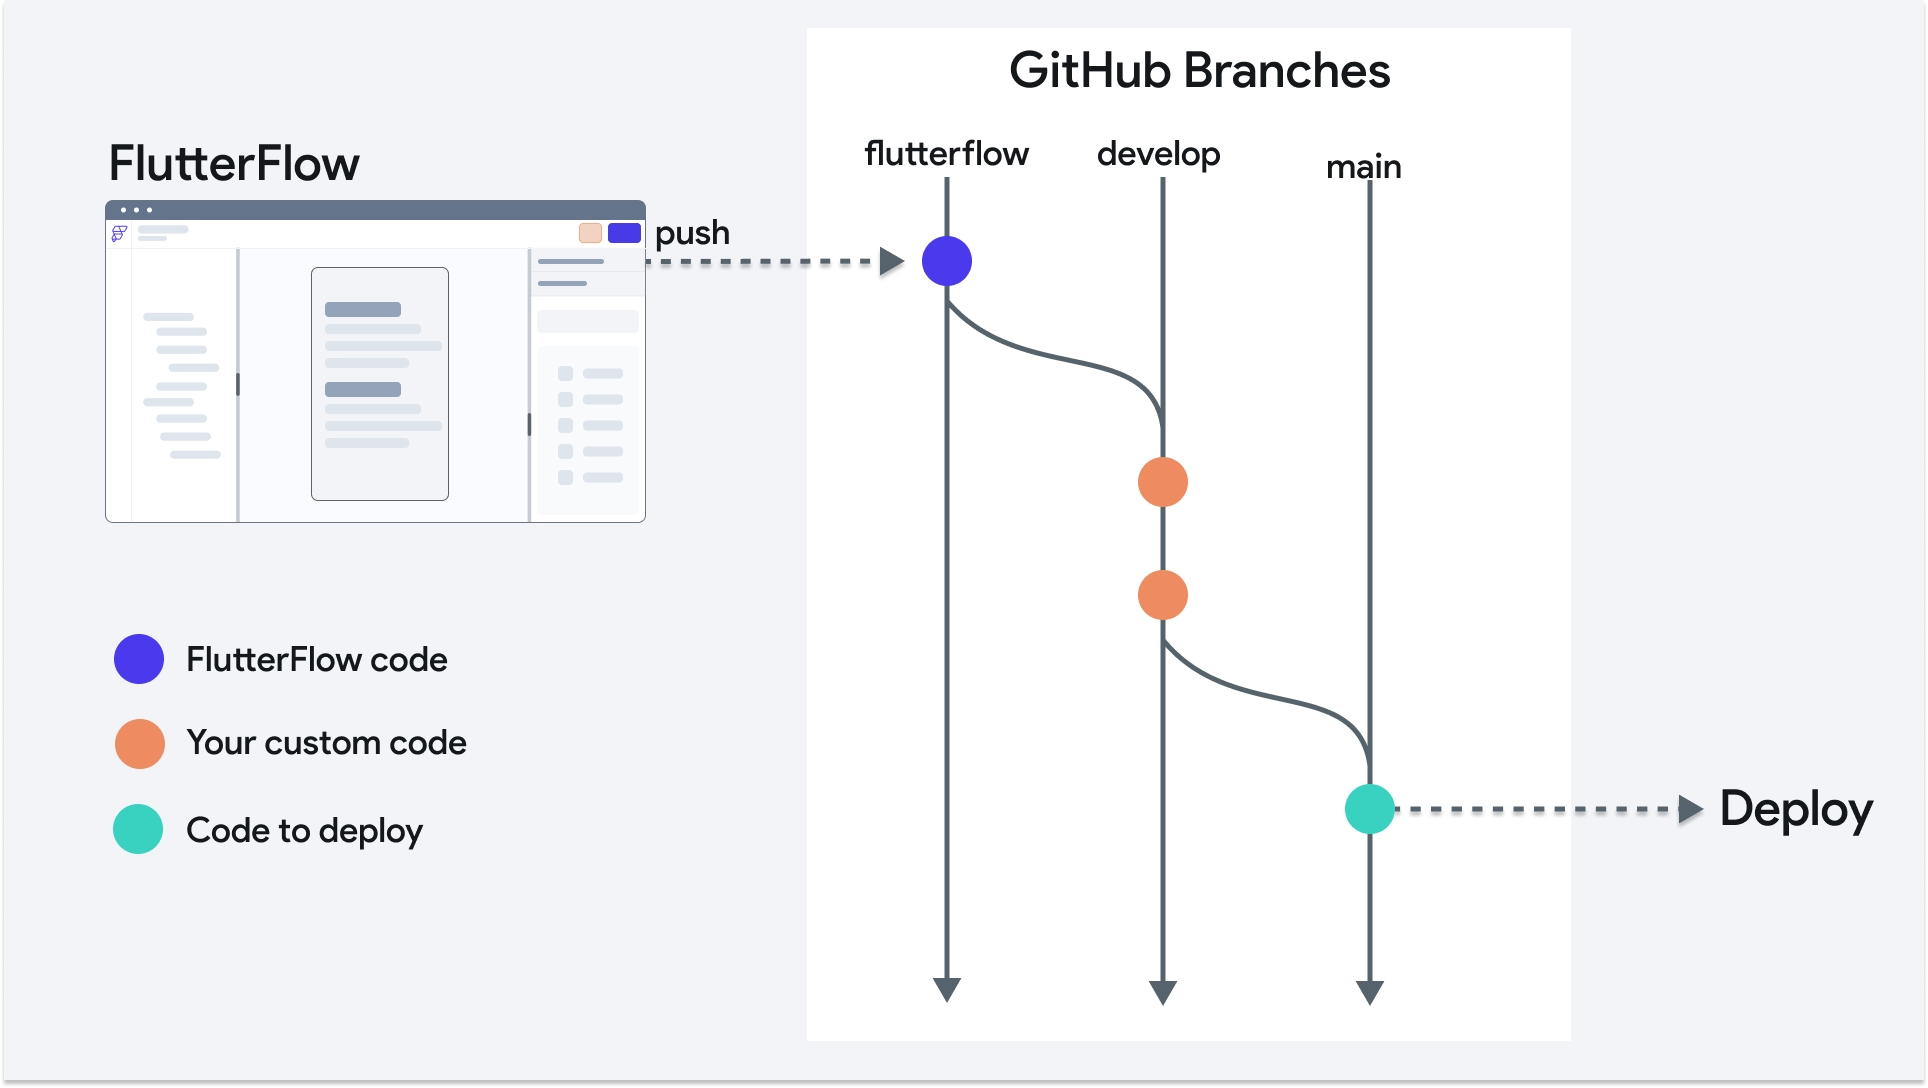
Writing custom code allows you to add features that are not supported by FlutterFlow's current functionality. This section outlines how you can manage custom code using GitHub to prevent FlutterFlow from overriding it.

The diagram illustrates the flow or process of managing code in GitHub. This process allows you to leverage all the features from FlutterFlow and deploy your app with a custom code.
Here's a step-by-step explanation:
1. Connect FlutterFlow to GitHub
First, set up the connection between your FlutterFlow project and GitHub repository. Follow these steps if you haven’t already done so.
2. Establish a custom code branch
After pushing your FlutterFlow code to GitHub, it lands in the flutterflow branch. To safeguard your custom modifications from being overwritten by future pushes, create a develop branch.
- Navigate to your GitHub repository.
- Switch from
maintoflutterflowin the branch dropdown. - In the branch creation field, enter
developand create the branch fromflutterflow.
3. Add custom code
Once your develop branch is ready, clone the repository to your local machine. Open the project in your IDE, switch to the develop branch, and add your custom code.
After making changes, commit and push them back to the develop branch.
4. Merge changes from FlutterFlow
To integrate the latest updates of your FlutterFlow project into your custom code:
- Create a pull request on GitHub from
flutterflowtodevelop. - Review and merge the changes, resolving any conflicts if necessary.
5. Final testing and deployment
After testing the changes in develop:
- Merge
developintomainvia a new pull request on GitHub. - Once reviewed and merged, deploy your application from the
mainbranch using FlutterFlow’s deployment features.
Also, see how you can download the code using FlutterFlow CLI and Local Run.