Automated Tests
Automated Tests allow you to test the behavior and appearance of your app to ensure all features are working as expected. It’s essentially like testing a real application without human intervention.
Internally, when you write tests, FlutterFlow generates code for the Flutter integration testing framework, which you can download and test locally or through services like Firebase Test Lab.
FlutterFlow doesn’t support running tests on the platform yet.
- Free and Basic plans: Automated testing is not available.
- Growth plan: Includes 1 test per project.
- Business plan: Allows up to 3 tests per project.
- Enterprise plan: Supports unlimited automated tests.
Basics
Before you add and run any tests, it's crucial to understand the workflow. When creating a test, you essentially map out a series of steps that dictate how the test will engage with the app. Each step can serve a distinct purpose and can be categorized as:
Step Type
1. Interact with Widget
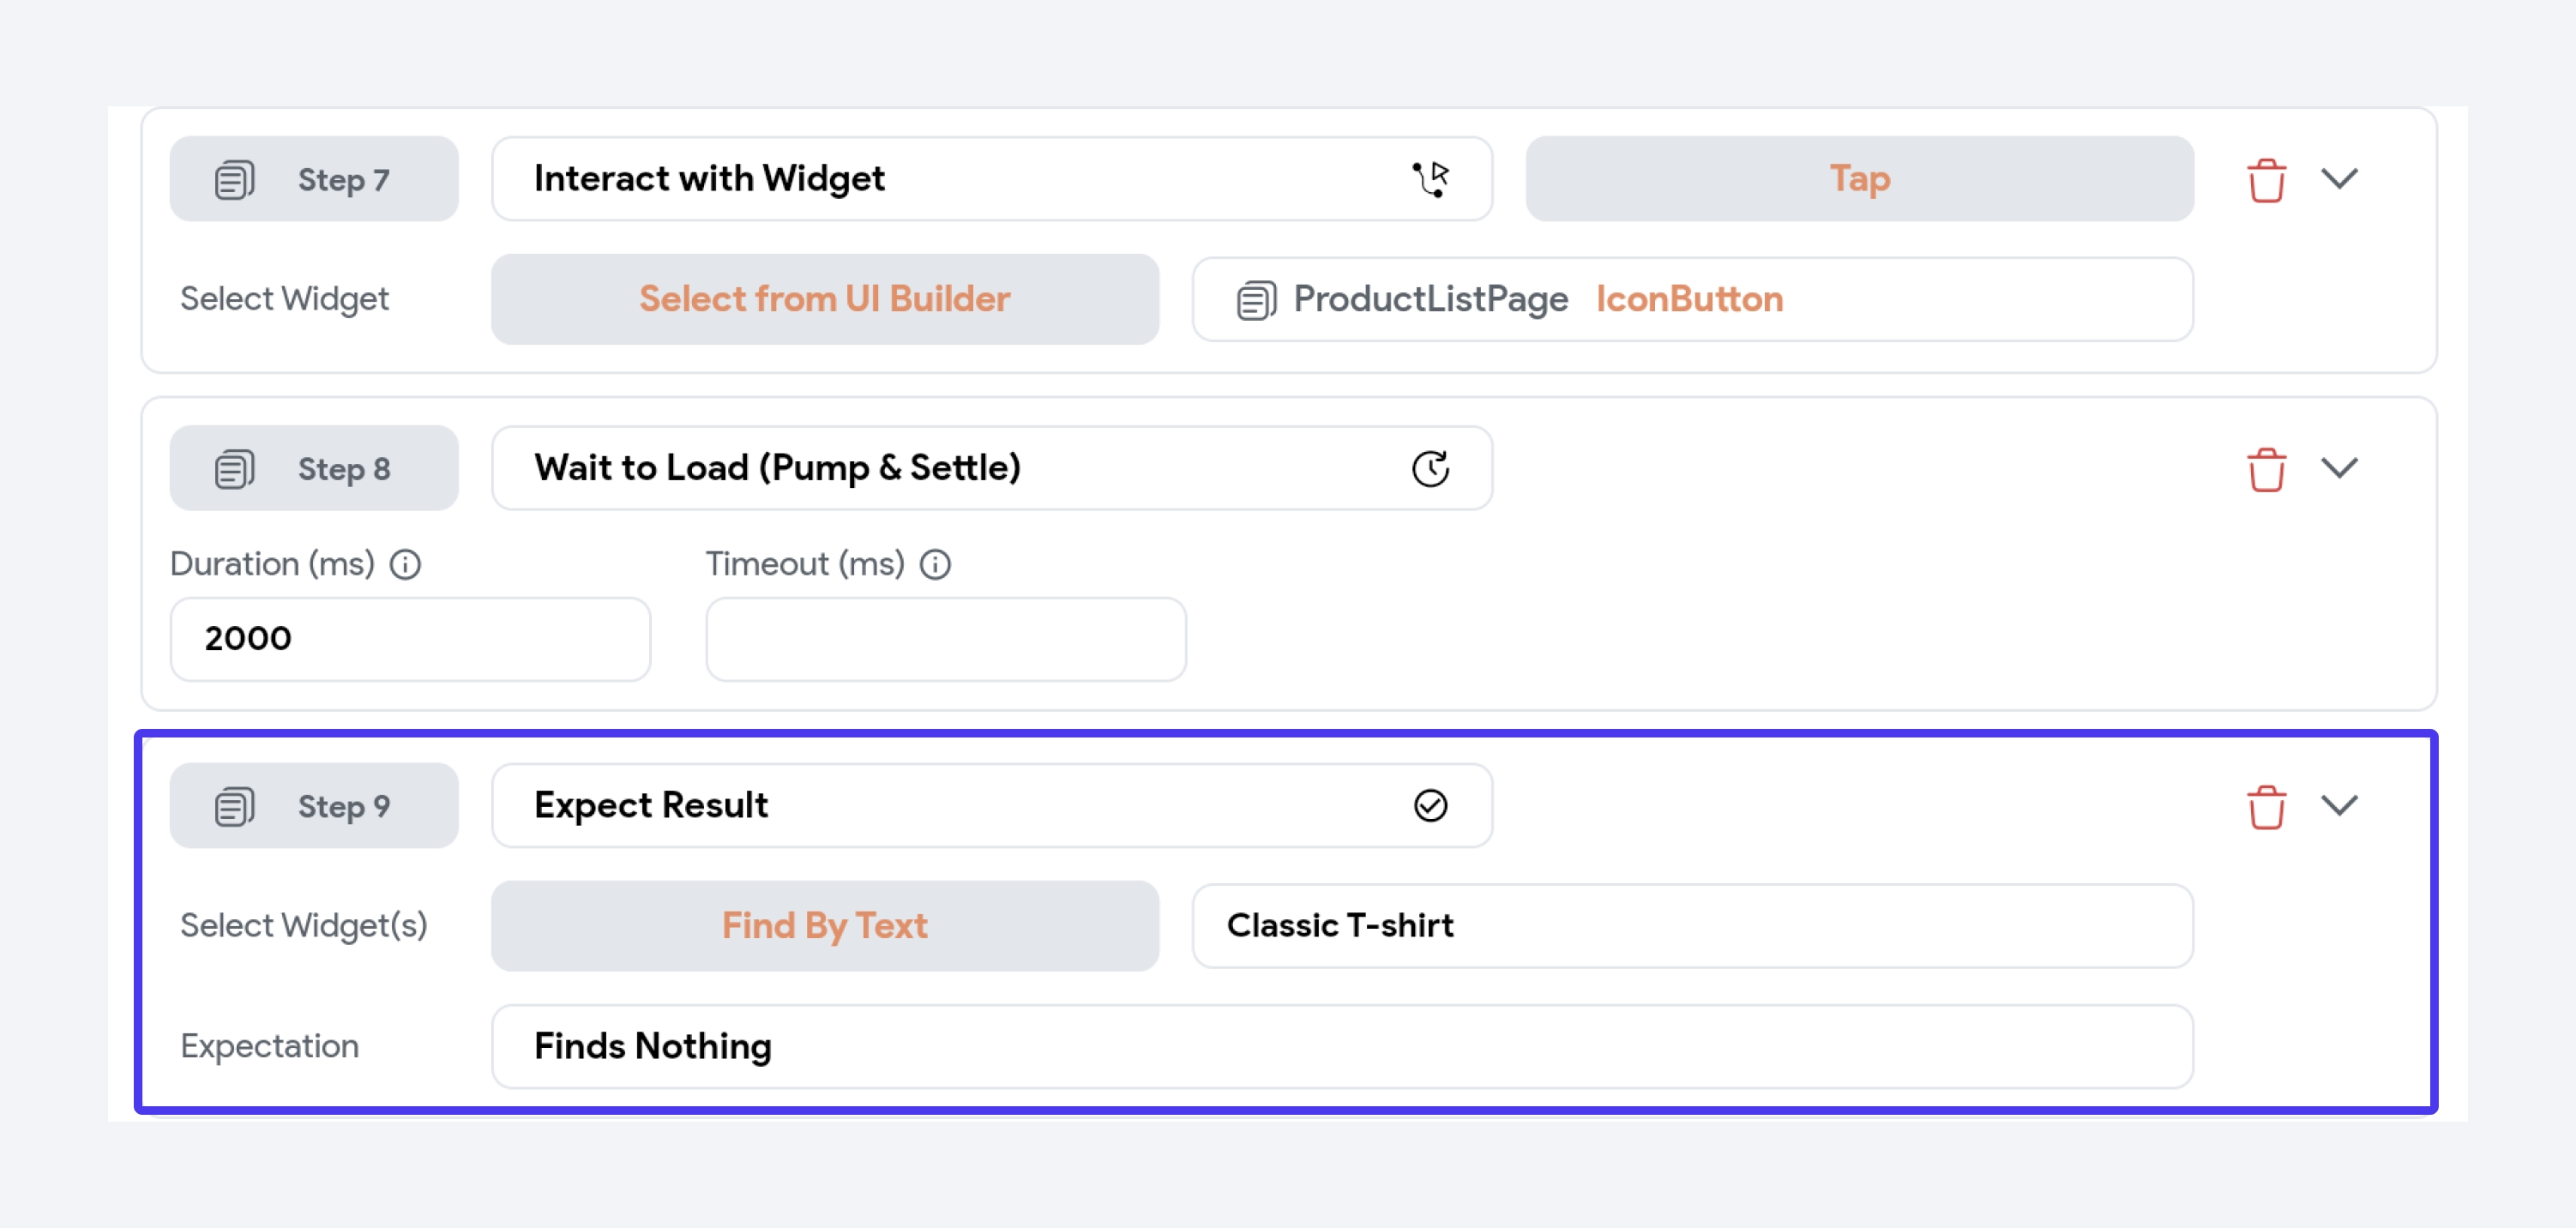
This step simulates user interactions with your app, such as tapping on a button or entering text into a field. When you add this step, you can specify what kind of action type you would like to simulate and on which widget.
Action Type
- Tap: Acts like a single tap or click.
- Double Tap: Imitates tapping twice quickly.
- Long Press: Imitates pressing and holding for a moment.
- Enter Text: Input the exact text you want to simulate entering.
- Scroll Until Visible: When this is selected, you can specify the Delta 'number of pixels' you want to repeatedly scroll until the widget is visible. If you have more than one scrollable widget, select which one you want to scroll using the Scrollable property.
2. Wait to Load (Pump & Settle):
After an interaction, your test might need to pause momentarily, allowing the app to process the interaction, load something, or update its state. This is where the 'Wait to Load' mechanism comes into play, ensuring the app has had enough time to reflect any changes.
When this is selected, you have options to adjust:
- Duration: How long do you want to wait? The default value is 100ms.
- Timeouts: Maximum amount of time to wait, after which the test will fail.
- Start your test with this step for about 3 seconds (i.e., 3000ms).
- After every "Interact with Widget" step, it's usually wise to add another "Wait to Load".
3. Expect Result
After performing an action in your app, it's important to verify that the result matches your expectations. This is the verification step where you confirm that the app behaves as expected after the interaction. Here, you confirm whether a particular widget is present on the screen.
When this is selected, you have to locate a widget that you want to verify and set what you expect to find using any of the below options:
- Find Nothing: Ensures that the specified widget is not present on the screen.
- Finds Num Widgets: Expect a certain number of widgets to be present.
- Finds One Widget: Confirms that exactly one widget is present.
- Finds Widgets: Expect multiple widgets to be found.
- Is Enabled: Verifies that the widget is not only visible but also functional.
- Is Disabled: Verifies that the widget is in a disabled state, meaning it is inactive and will not respond to user interactions.
- Has State: Confirms that a widget is in a specific state, such as True or False. For example, verify whether a checkbox is checked.
Selection Method
This is the method by which you locate the widget you want to select or verify. FlutterFlow offers the following ways to identify widgets:
- Select from UI Builder: Use the UI Builder's interface to visually select the widget you want to verify.
- Find By ValueKey: Locates the widget by its unique ValueKey. Tip: To add a ValueKey to a widget, use the 'Value Key' property located under the 'Testing' section on the widget properties panel.
- Find By Type: Search for a widget based on its type, like
TextorButton. - Find By Semantics Label: Useful for locating widgets that have a specific semantics label.
- Find By Text: Locate a widget that displays specific text.
- Find By Descendent: Search for a widget that has a specific child or ancestor.
Add Tests
Let's see how to add tests with an example that will ensure that users can add and remove items from their favorites list.
Here are the step-by-step instructions on adding tests:
- Create a test to verify if the page is visible on the screen.
- Next, find and simulate on tap event on the favorite button with the 'ValueKey' as the product id. Important: By using the 'ValueKey', we precisely target the favorite button for a specific product. Without this specificity, the test will encounter multiple favorite buttons and become uncertain about which one to tap, leading to a failed test.
- Similarly, you can now duplicate the test and make changes for the 'RemoveFromFavorites' test. Tip: While doing so, ensure that in the last step (i.e., Expect Result), you set the Expectations to Finds Nothing. This ensures that the removed item is not visible on the favorites list.

Run Tests
You can run tests on local devices or use the services like Firebase Test Lab.
To run the tests locally:
- Download the project code.
- Go to
your_project/integration_test/test.dart. - To run a specific test, click the play button next to it. To execute all tests at once, double-click the play button next to
void main. - Alternatively, you can use the terminal and enter the command:
flutter test integration_test/test.dart."
To run the tests on Firebase Test Lab, you can follow the instructions here.