FlutterFlow Visual Studio Extension
The Visual Studio Code (VSCode) extension allows you to work with your FlutterFlow project’s custom code directly in Visual Studio Code (a local code editor). This extension facilitates easy editing, pushing, and pulling of custom code changes between FlutterFlow and your local development environment.
While you can edit custom code inside FlutterFlow's in-app code editor, editing the code in Visual Studio Code may be preferable for a few reasons:
-
Access to the Entire Codebase: When writing custom code in Visual Studio Code, you'll have full access to your app's entire codebase, making it easier to reference component widget classes, custom data types, enums, and more.
-
Real-time Autocomplete and Error Detection: Working on a local machine typically provides more reliable access to real-time error detection and autocomplete features within the code editor, which can make your development process more efficient.
-
Leverage Flutter & Dart Tooling: Using Visual Studio Code allows you to take advantage of existing Flutter and Dart tools, making it easier to develop and refactor your custom code.
-
Leverage the AI Ecosystem: Additionally, you can easily utilize AI tools available in the Visual Studio ecosystem, such as Copilot.
The VS Code extension is only available on the Growth plan and higher. Check out our pricing section.
Installation
To fully leverage the Flutter, Dart, and AI tools in Visual Studio Code while editing your FlutterFlow custom code files, you can install the FlutterFlow: Custom Code Editor extension. Here are a few easy methods to set it up.
Install from Marketplace
You can install the FlutterFlow extension from the Visual Studio Code marketplace site.
To install the extension directly from Visual Studio Code, open the editor, click on the Extensions icon (or press Ctrl + Shift + X / Cmd + Shift + X), search for "FlutterFlow: Custom Code Editor," and click Install to add the extension to your workspace.
Add API Keys
To use the extension, you must set your API key in the editor's Extension Settings. You can generate an API key from the FlutterFlow account page and then add it to the extension settings page in Visual Studio Code. Here’s exactly how you do it:
You can configure optional settings such as specifying the Project ID and Branch to pull and update code from. Additionally, you can set a Download Location to determine the initial directory where the code will be downloaded.
Downloading Code
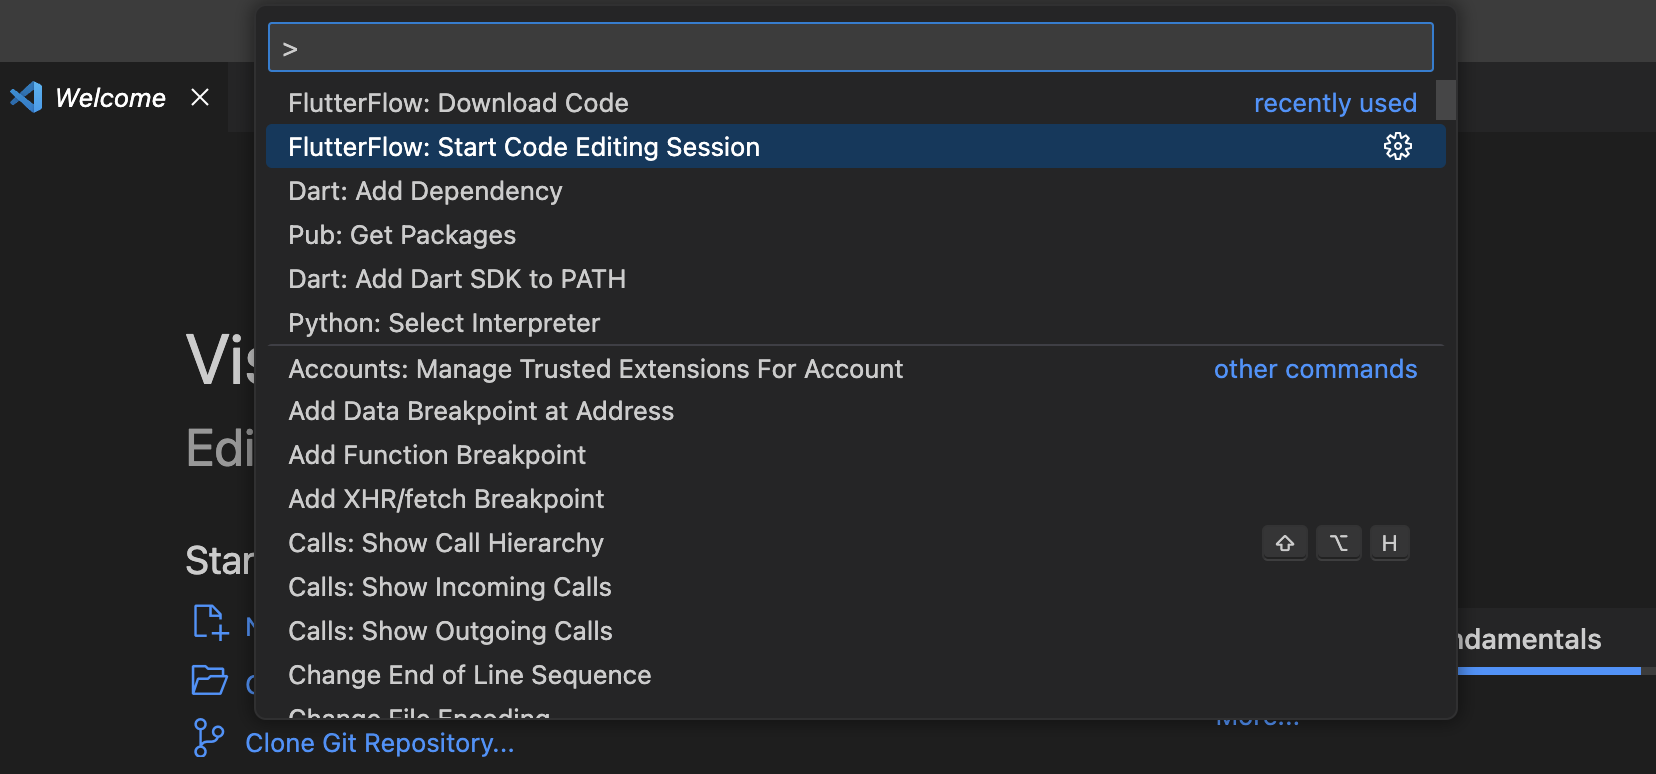
The first step in editing custom code for your FlutterFlow project is to download its code. To download the code for your project, use the Visual Studio Code command palette (cmd + shift + p or ctrl + shift + p).
In the command palette, you can use the FlutterFlow: Download Code command.
This command will prompt you for three pieces of information:
- Project ID: This is the Project ID, or unique identifier, for your FlutterFlow project. You can find the Project ID by hovering over the Project Name in the top left corner inside the FlutterFlow builder.
- Branch Name: The name of the FlutterFlow project branch you want to work on. You can leave this blank to work on the main branch.
- Download Location: A file picker will be presented for you to choose where to download your project code, the code will be downloaded to
thisdirectory/projectID.
Initializing a Code Editing Session
After the code has been downloaded, you will need to initiate a Code Editing session using the extension. When a Code Editing session has been initiated, you’ll be able to pull and push code from Visual Studio Code to FlutterFlow.

To start a Code Editing session, run the command FlutterFlow: Start Code Editing Session from the Visual Studio Code Command Palette.
This command will also automatically run flutter pub get.

It’s recommended that you install the Flutter & Dart Extensions which will make it easier to edit Flutter and Dart code.
Editing Custom Code
After successfully installing the Visual Studio Code extension and downloading the code, you can initialize your session to start adding or editing custom code.
Currently, the following resources are available for customization:
- Custom Actions: in the
lib/custom_code/actionsdirectory - Custom Widgets: in the
lib/custom_code/widgetsdirectory - Custom Functions: in
lib/flutter_flow/custom_functions.dart - Package Dependencies: in
pubspec.yaml
Testing Changes Locally
When working with custom code, it's important to test your implementations. We recommend integrating your Custom Function, Action, or Widget directly within your FlutterFlow project—for example, by adding the Custom Widget to a FlutterFlow Page.
You can then choose to test your app from FlutterFlow, using a Test Mode session or Local Run, or run your app locally from Visual Studio Code.
Before testing from FlutterFlow, ensure you’ve pushed your changes.
To run your project from Visual Studio Code, make sure the Flutter extension is installed. Once set up, you can simply click the Run (play) button. For further details, refer to Flutter’s official documentation.
Push Changes to FlutterFlow
To make your custom code available in FlutterFlow, you need to push your changes.
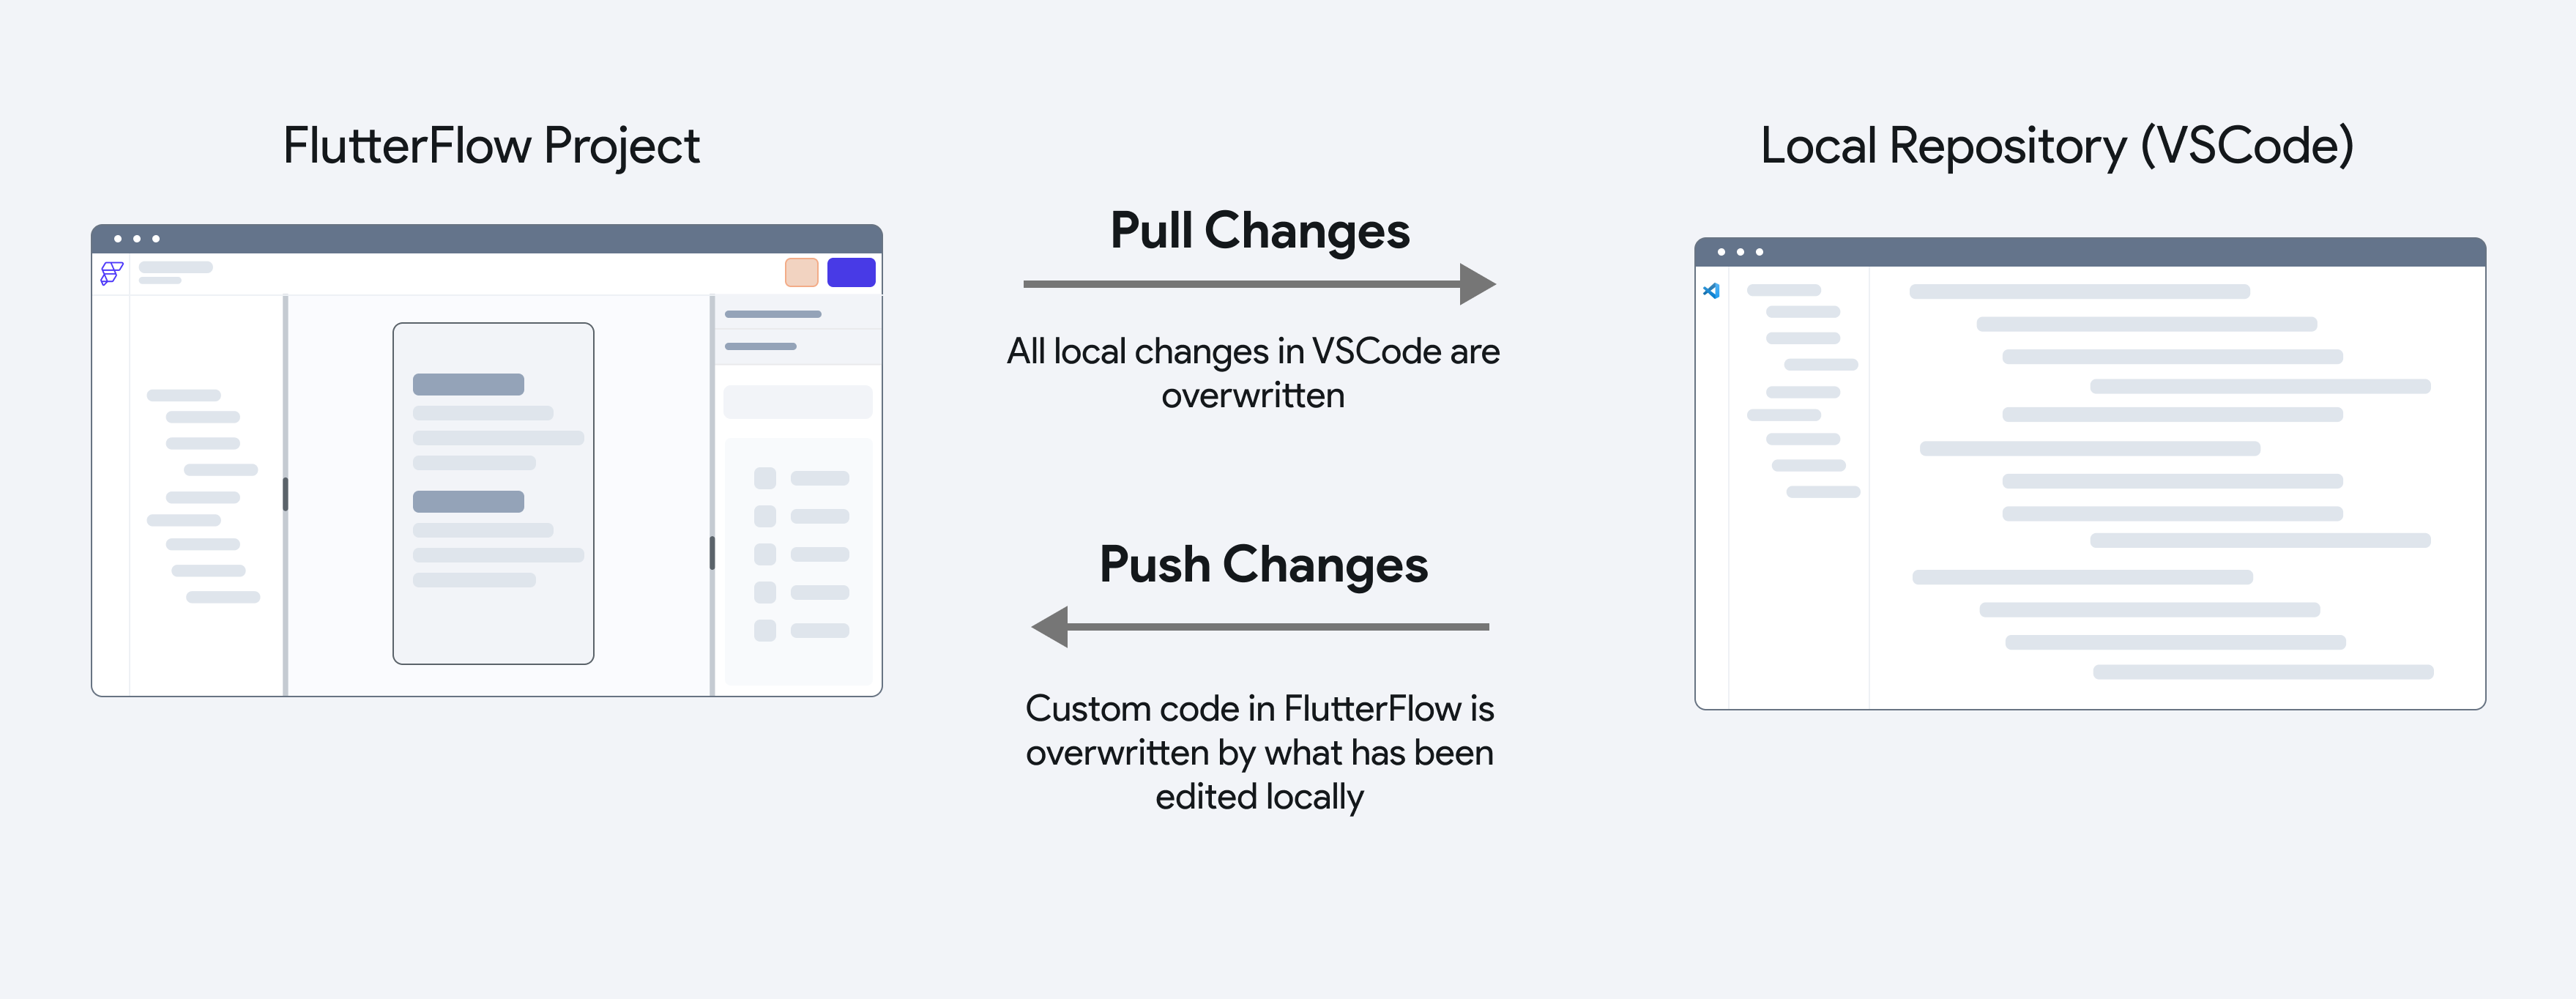
When you push changes, all the files you've edited in Visual Studio Code will be updated in FlutterFlow.
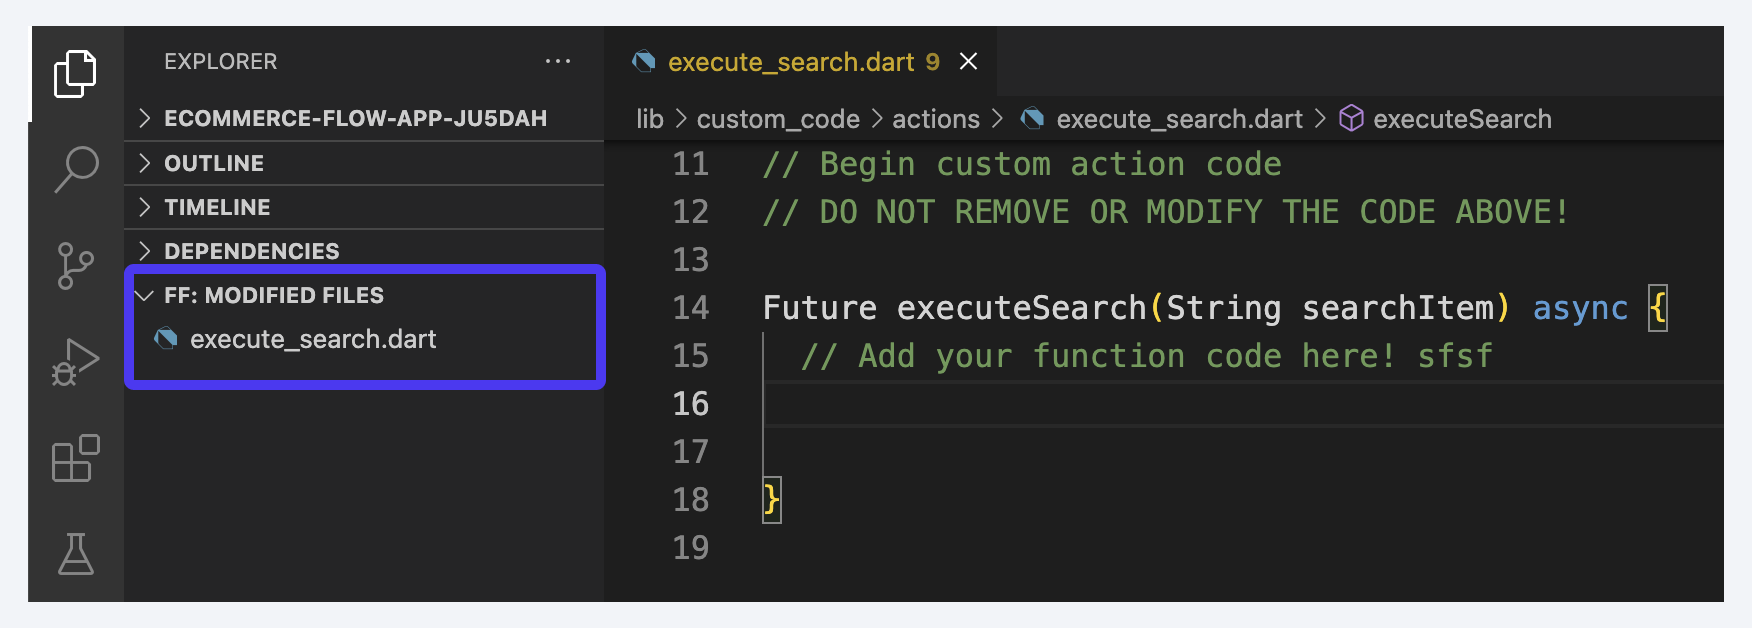
You can see which files have been changed in the FF: Modified Files section of the Explorer. This section updates whenever you save a file, showing what has been added, removed, or changed.

To push changes click the Push to FlutterFlow status bar icon, or run the FlutterFlow: Push to FlutterFlow command in the command palette.

This action can’t be undone. Make sure you don’t overwrite any changes in FlutterFlow that you want to keep.
To avoid this, pull the latest changes from FlutterFlow before editing in Visual Studio Code, and push your updates once you're done.
Pull Latest Changes from FlutterFlow
Before editing any custom files, it's important to pull the latest changes from FlutterFlow into your local repository. This ensures you have the most up-to-date components, app state variables, and custom data types/enums that you might need to reference in your custom code.
To pull the latest changes, click the Pull Latest icon in the lower status bar, or run the FlutterFlow: Pull Latest Changes command.

Pulling changes will also overwrite any local modifications made in the code editor.
Updating Files
The VSCode Extension allows you to update custom code resources, including entire files or specific Dart/Flutter functions.
For Custom Actions and Custom Widgets, there’s a one-to-one relationship between each action/widget and its corresponding file. If you create a new file in the lib/custom_code/actions or lib/custom_code/widgets directory, it will automatically add a new action or widget to your FlutterFlow project.
For Custom Functions, all functions are contained within a single file: lib/flutter_flow/custom_functions.dart. You can add, edit, or delete custom functions directly within this file.
For Package Dependencies, you can add new dependencies in the pubspec.yaml file, but you cannot modify the existing ones. When you add a new dependency, it will appear in Settings and Integrations > Project Dependencies > Custom Code Dependencies section.

Renaming Files
To rename Custom Actions or Custom Widget, use the Visual Studio Code rename symbol functionality. Simply, right-click the name of a Custom Action or Widget and select Rename Symbol, then type the new name.
If you change the name without doing this, you’ll need to update the name in the file where the Widget or Action is defined, as well as the index file that exports the Widget (lib/custom_code/widgets/index.dart) or Action (lib/custom_code/actions/index.dart).
Creating New Resource
To add a new Custom Action or Widget, create a new Dart file in the lib/custom_code/widgets or lib/custom_code/actions directory and the boilerplate should appear within the new file.
To add a new Custom Function, simply create a new Dart function in the lib/flutter_flow/custom_functions.dart file. We do not have automatic support for Custom Function boilerplate code in Visual Studio Code at this time.
Deleting Files
To delete a Custom Action or Widget, delete the associated file.
Adding New Dependencies
You can add custom pub.dev package dependencies with the Dart: Add Dependency command from the Visual Studio Code command palette. This will update the pubspec.yaml file.
Using Flutter Version Management (FVM)
If you want to manage Flutter versions with Flutter Version Management (FVM), you need to install it and add it to your system’s PATH. Follow these steps to get started:
Install FVM
To install FVM, run the following command in your terminal. This installs FVM globally using Dart’s package manager.
dart pub global activate fvm
Add FVM to Your System’s PATH
After installation, you need to add the directory containing FVM’s executables to your PATH variable so that it can be accessed globally.
For macOS & Linux
-
Open the Terminal and run the following command. It adds the
~/.pub-cache/bindirectory to your system'sPATHpermanently by updating your~/.zshrcfile. This ensures that the FVM installed in~/.pub-cache/binis accessible from anywhere in the terminal.echo 'export PATH="$PATH":"$HOME/.pub-cache/bin"' >> ~/.zshrc # For Zsh
echo 'export PATH="$PATH":"$HOME/.pub-cache/bin"' >> ~/.bashrc # For Bash -
Restart your terminal or run
source ~/.zshrc(orsource ~/.bashrc) to apply the changes.
For Windows
-
Locate the FVM executable path, typically:
C:\Users\YourUsername\AppData\Local\Pub\Cache\bin -
Add this path to your System’s PATH variable:
- Open System Properties → Advanced system settings.
- Click Environment Variables.
- Under System variables, select Path → Edit.
- Click New and add the above path.
- Click OK and restart your terminal.
Verify the Installation
To check if FVM is correctly installed and accessible, run:
fvm --version
If this command prints the installed version of FVM, it means FVM is successfully installed and added to PATH.
Configure FVM in Your Flutter Project
Once FVM is installed, navigate to your Flutter project folder and set up FVM:
cd your-flutterflow-project
fvm init
fvm install <flutter_version>
fvm use <flutter_version>
(Replace <flutter_version> with the required Flutter version.)
FAQs
How do I download code from the Beta or Enterprise version of FlutterFlow?
If you're using a different version of FlutterFlow, such as Beta or Enterprise, you can override the URL by modifying the Extension Settings > settings.json file.
For example:
- For the Beta version, set the
flutterflow.urlOverridevalue tohttps://api-beta.flutterflow.io/v1. - For the Enterprise version, set the
flutterflow.urlOverridevalue tohttps://api-enterprise-[region].flutterflow.io/v1(replace [region] with your specific region).