OneSignal
Integrating OneSignal lets you send emails and SMS (text messages) to your users. This can help you get more engagement, make more sales, and keep users coming back. After you set up OneSignal, you'll be able to easily add users to or remove them from OneSignal's subscription list.
- Before you begin, make sure the project is on Blaze plan on Firebase.
- Create an Account on OneSignal
Initial Setup
Here's a detailed, step-by-step guide to help you integrate OneSignal:
Setup in OneSignal
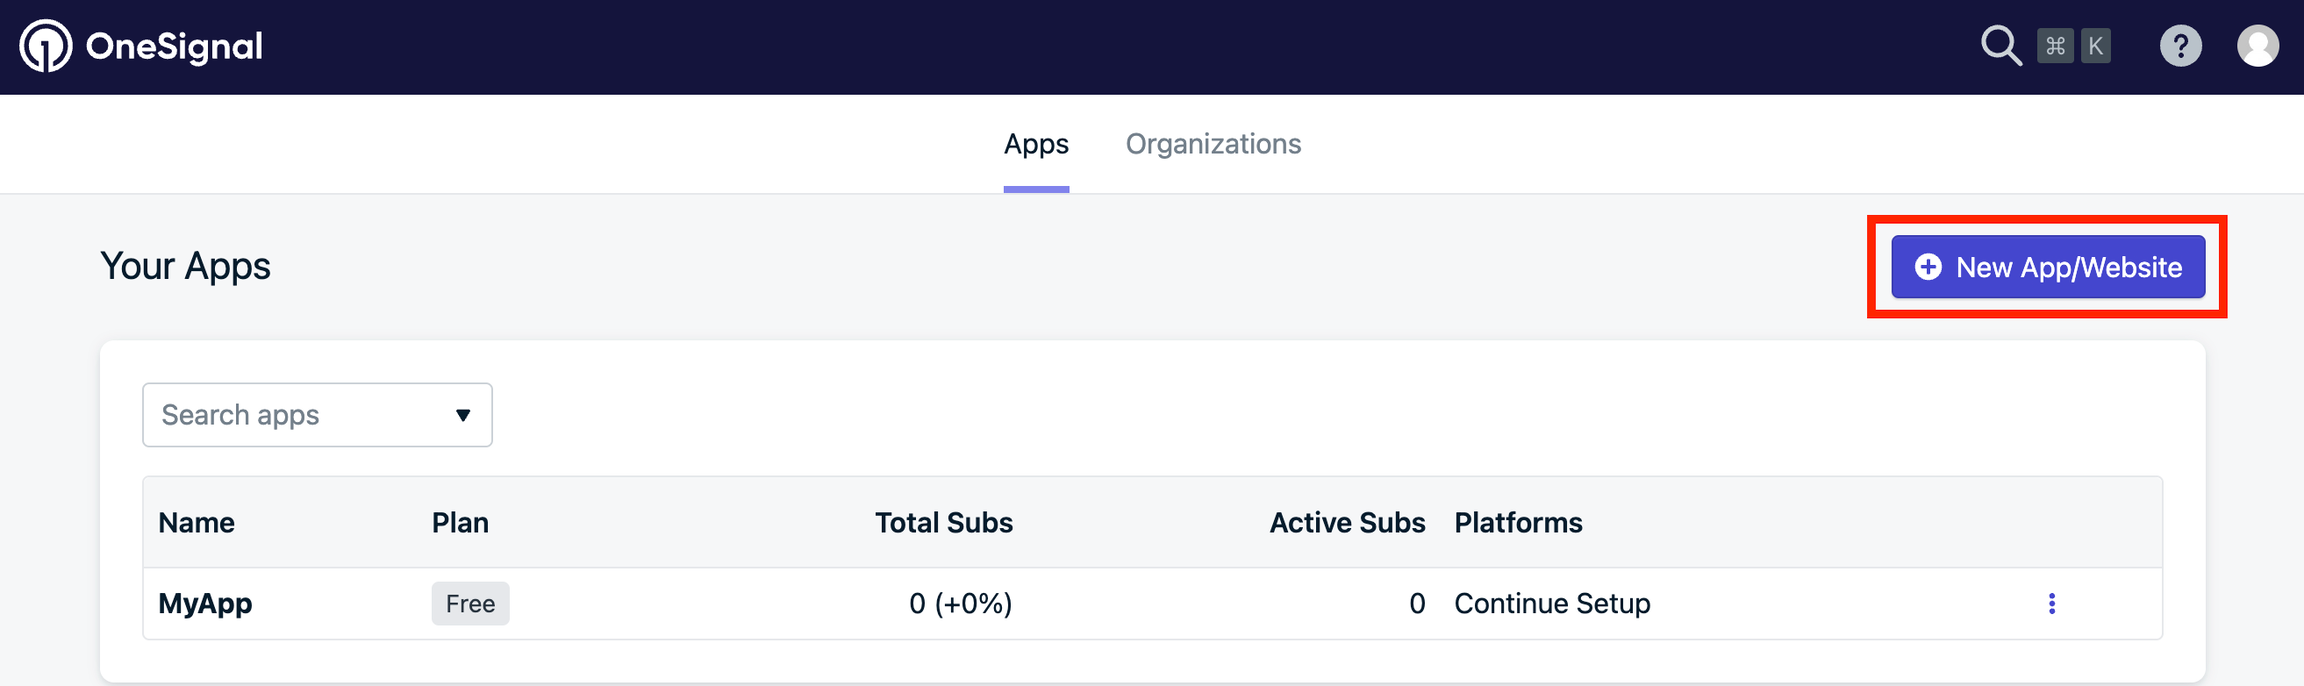
- To get started, you need an app created on OneSignal. You can create one from the dashboard.
-
After creating your app, activate the services you need, like SMS and Email. Go to your app settings by clicking App > Settings > Platforms and then select Activate for the services you want to use.
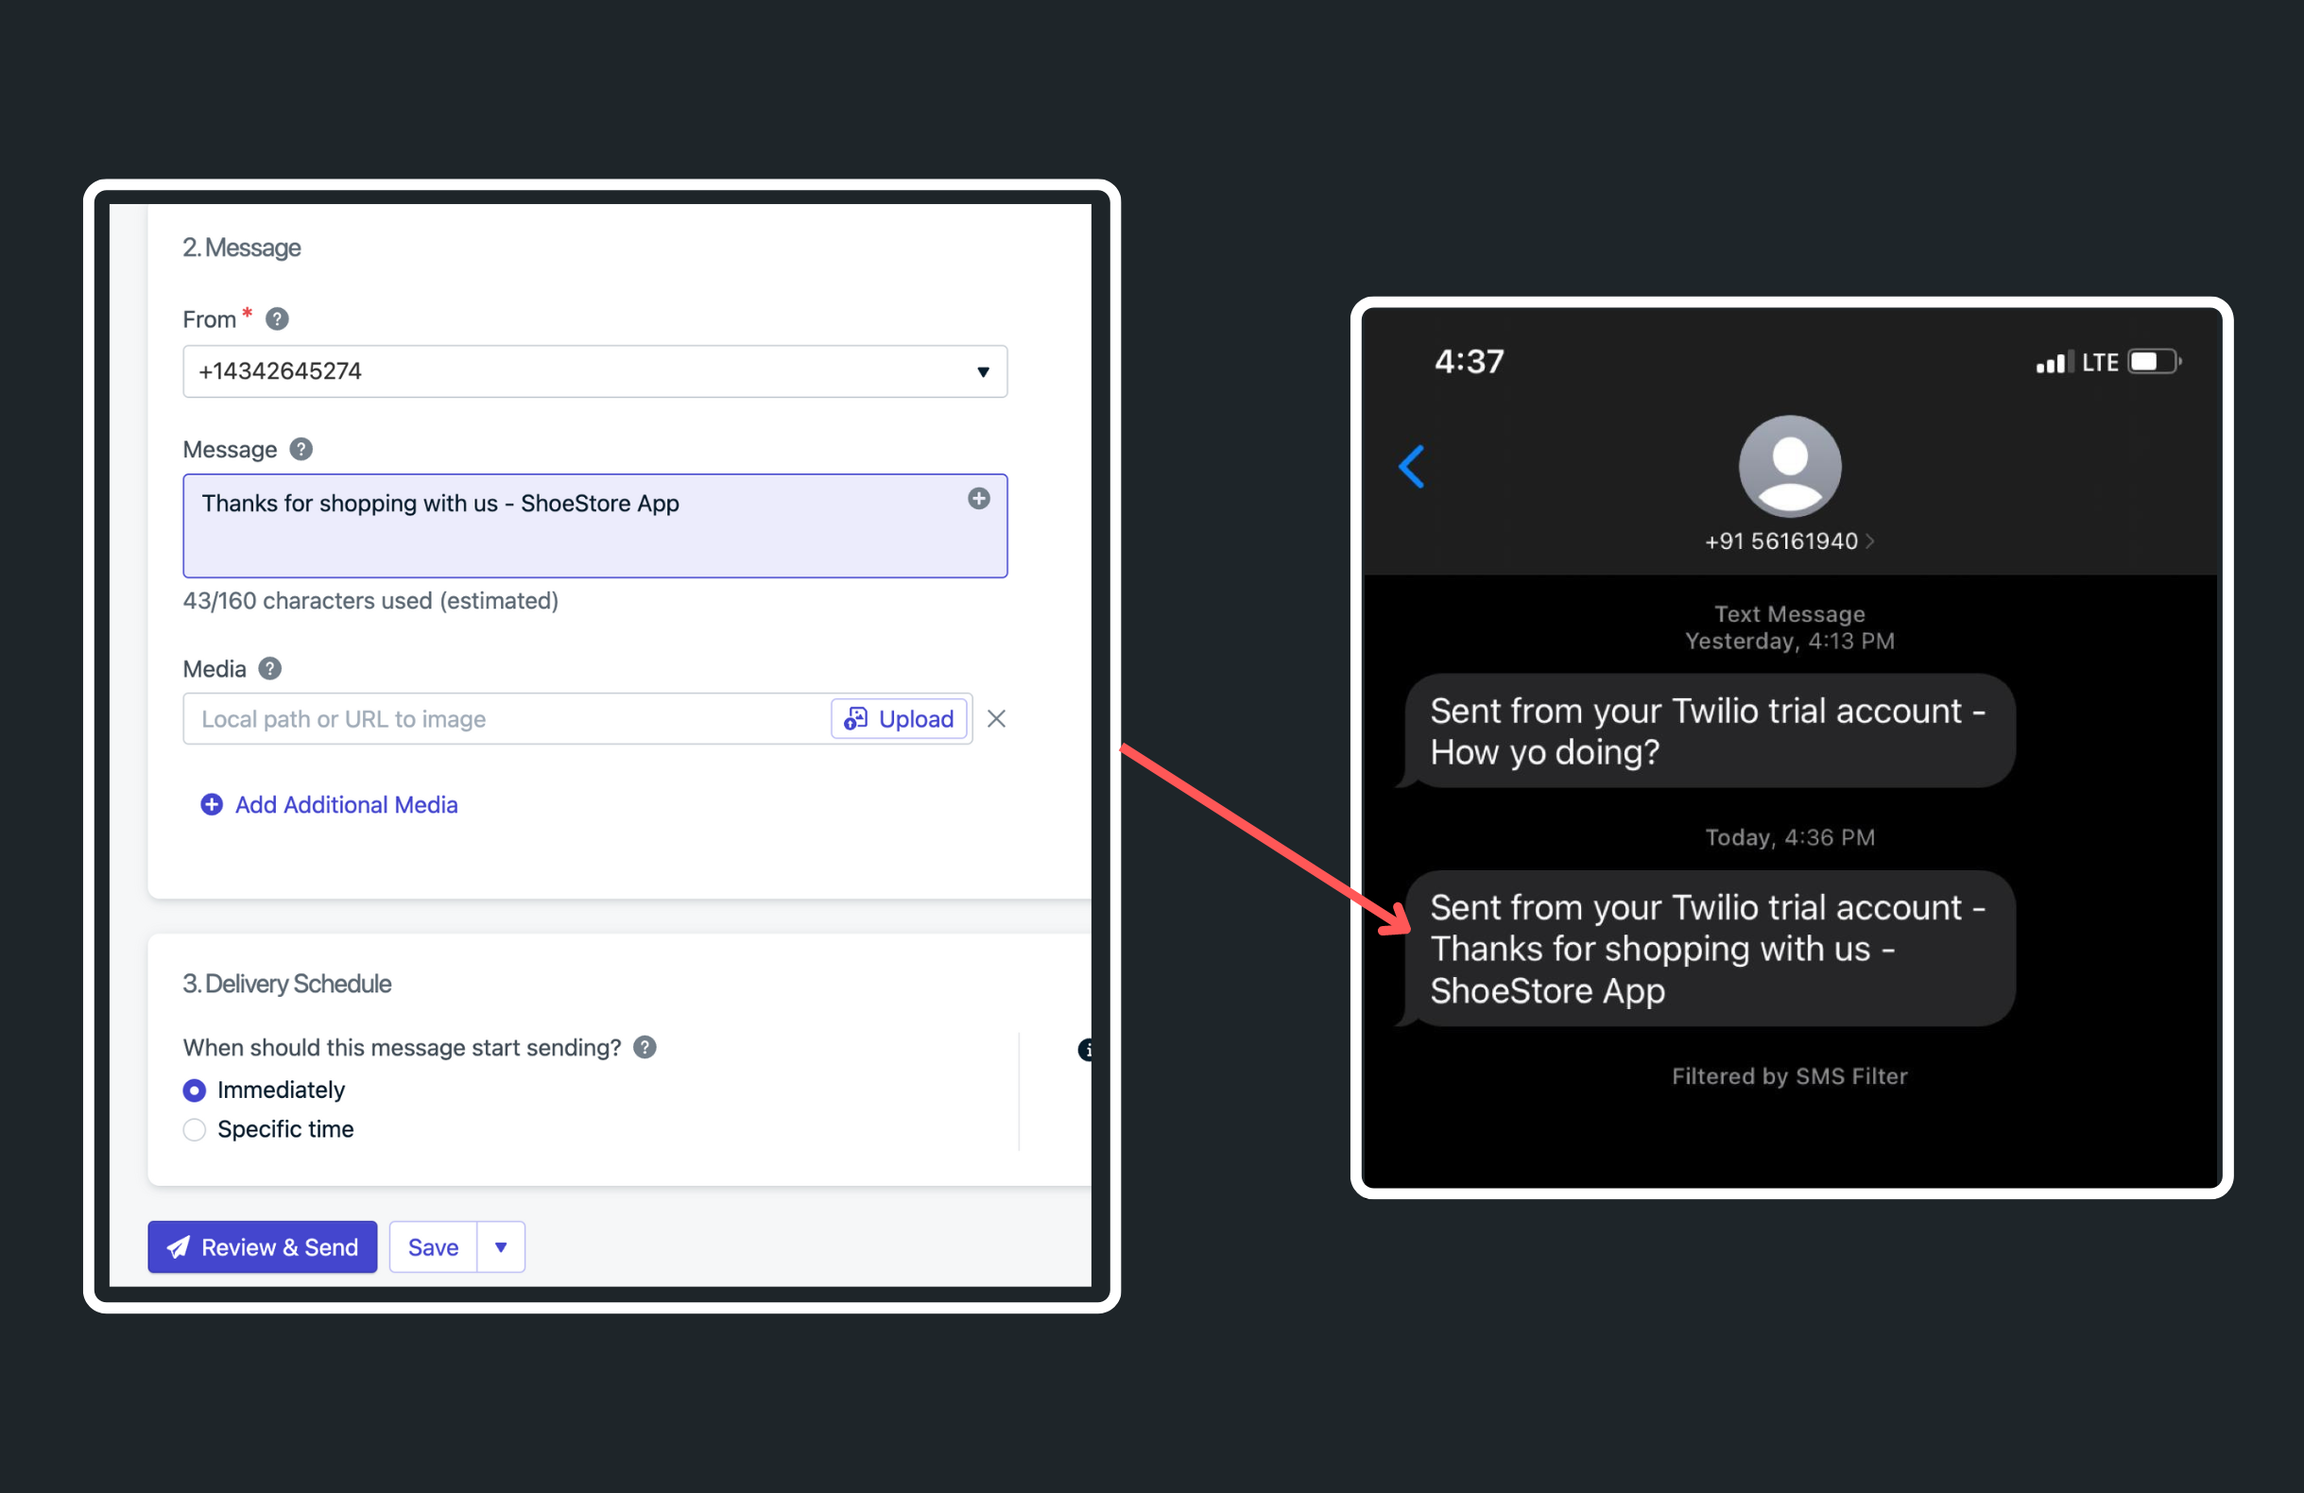
- If you're planning to use SMS, you'll need a Twilio account and then follow the steps from the official SMS Quickstart documentation.
SMS Configuration - For sending emails, configure your settings as per the guidelines provided in the OneSignal documentation.
Setup in FlutterFlow
To enable OneSignal in FlutterFlow:
-
Navigate to Settings and Integrations > Integrations > OneSignal.
-
Switch on the Enable OneSignal toggle.
-
Gather your credentials:
- App ID: Find this in your OneSignal dashboard under Settings > Keys & IDs > OneSignal App ID.
- API Key: Located in the same section as the App ID, under Rest API Key.
- User Key: Go to your user profile icon, then Account & API Keys > User Auth Key.
- Click Deploy.
-
Now, at appropriate event in your app, you can add an action that adds the user to the OneSignal's subscription.
-
To test SMS functionality, follow the continuation of the instructions in the SMS documentation.
-
To try out sending Emails, continue with instructions from here.
Types of OneSignal action
There are two main actions you can utilize in OneSignal:
- Add: This lets you add users with their details like Email Address, Phone Number, and Tags.
- Dismiss: Use this to remove a user from the subscription list.
Adding OneSignal action
To add a OneSignal action, such as adding a user, follow these steps:
-
Select the Widget (e.g., Button, etc.) on which you want to add the action.
-
Select Actions from the Properties Panel (the right menu).
-
Search and select the OneSignal (under Integration) action.
-
Select the Type of the action.
-
To add a user, enable the subscription options you want. You can set the value directly or use a variable. Remember, phone numbers should be in the E.164 format.
-
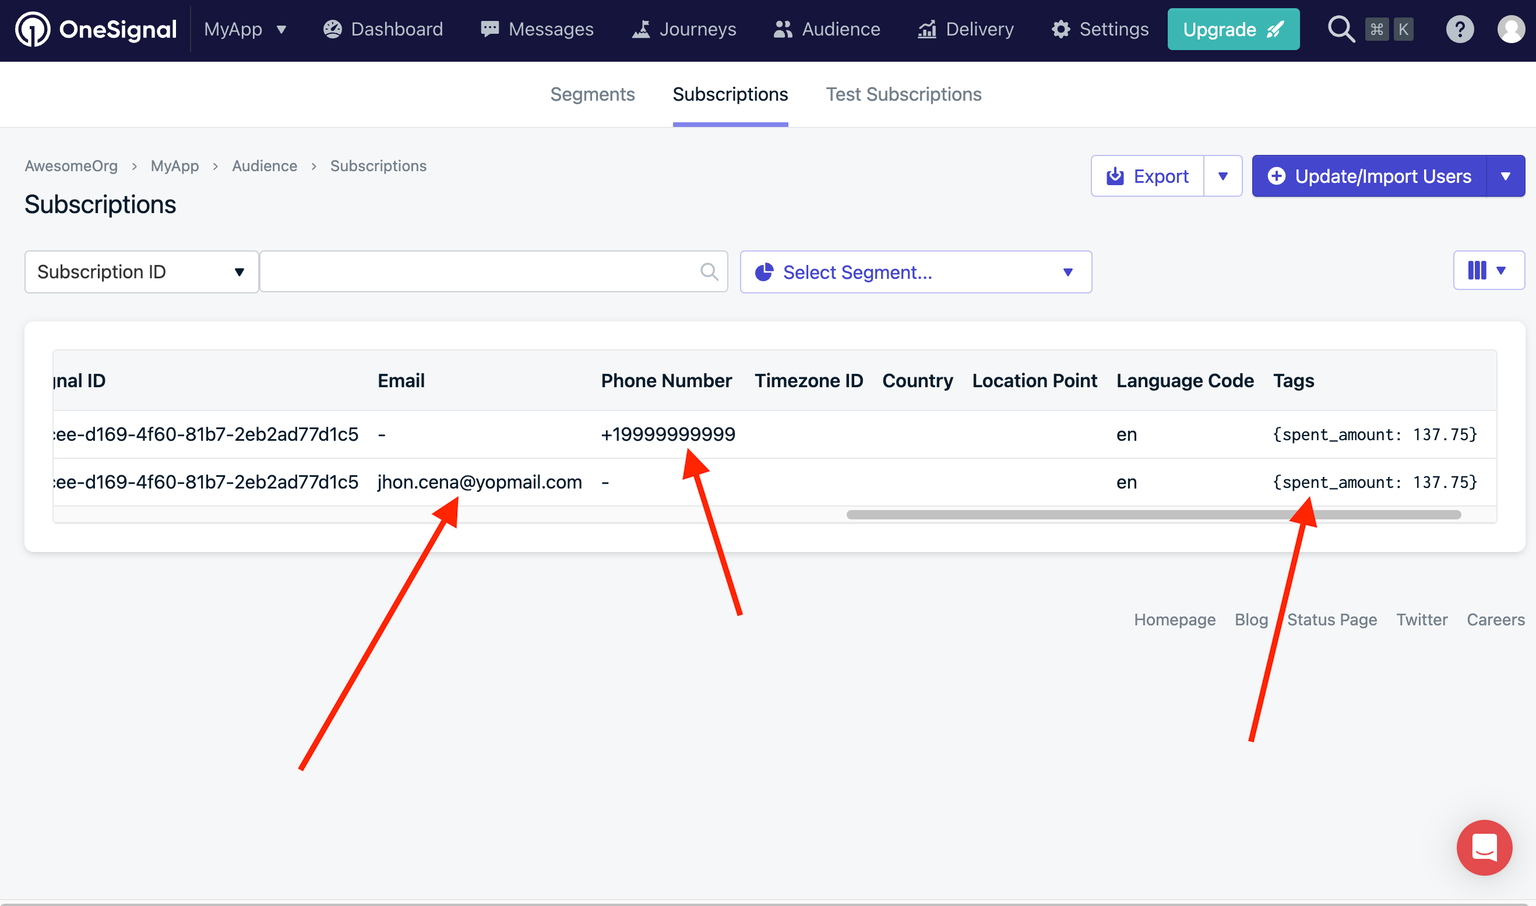
Optionally, add Tags for more personalized messaging. For example, you could tag users based on their spending amount to target them with specific emails or SMS messages about their purchases.
You can find out if the user was successfuly added to the subscription by navigating to OneSignal dashboard > App > Audience > Subscriptions.
Currently, our OneSignal integration supports only Firebase authentication. If you want to use Supabase authentication, you may need to use custom code to notify your users.