Toolbar
The Toolbar, located at the top of the app builder, provides easy access to numerous tools and features. It includes options for project configuration, saving your app version, accessing help, reporting or debugging issues, viewing project comments, downloading your app code, and running your app directly in FlutterFlow.
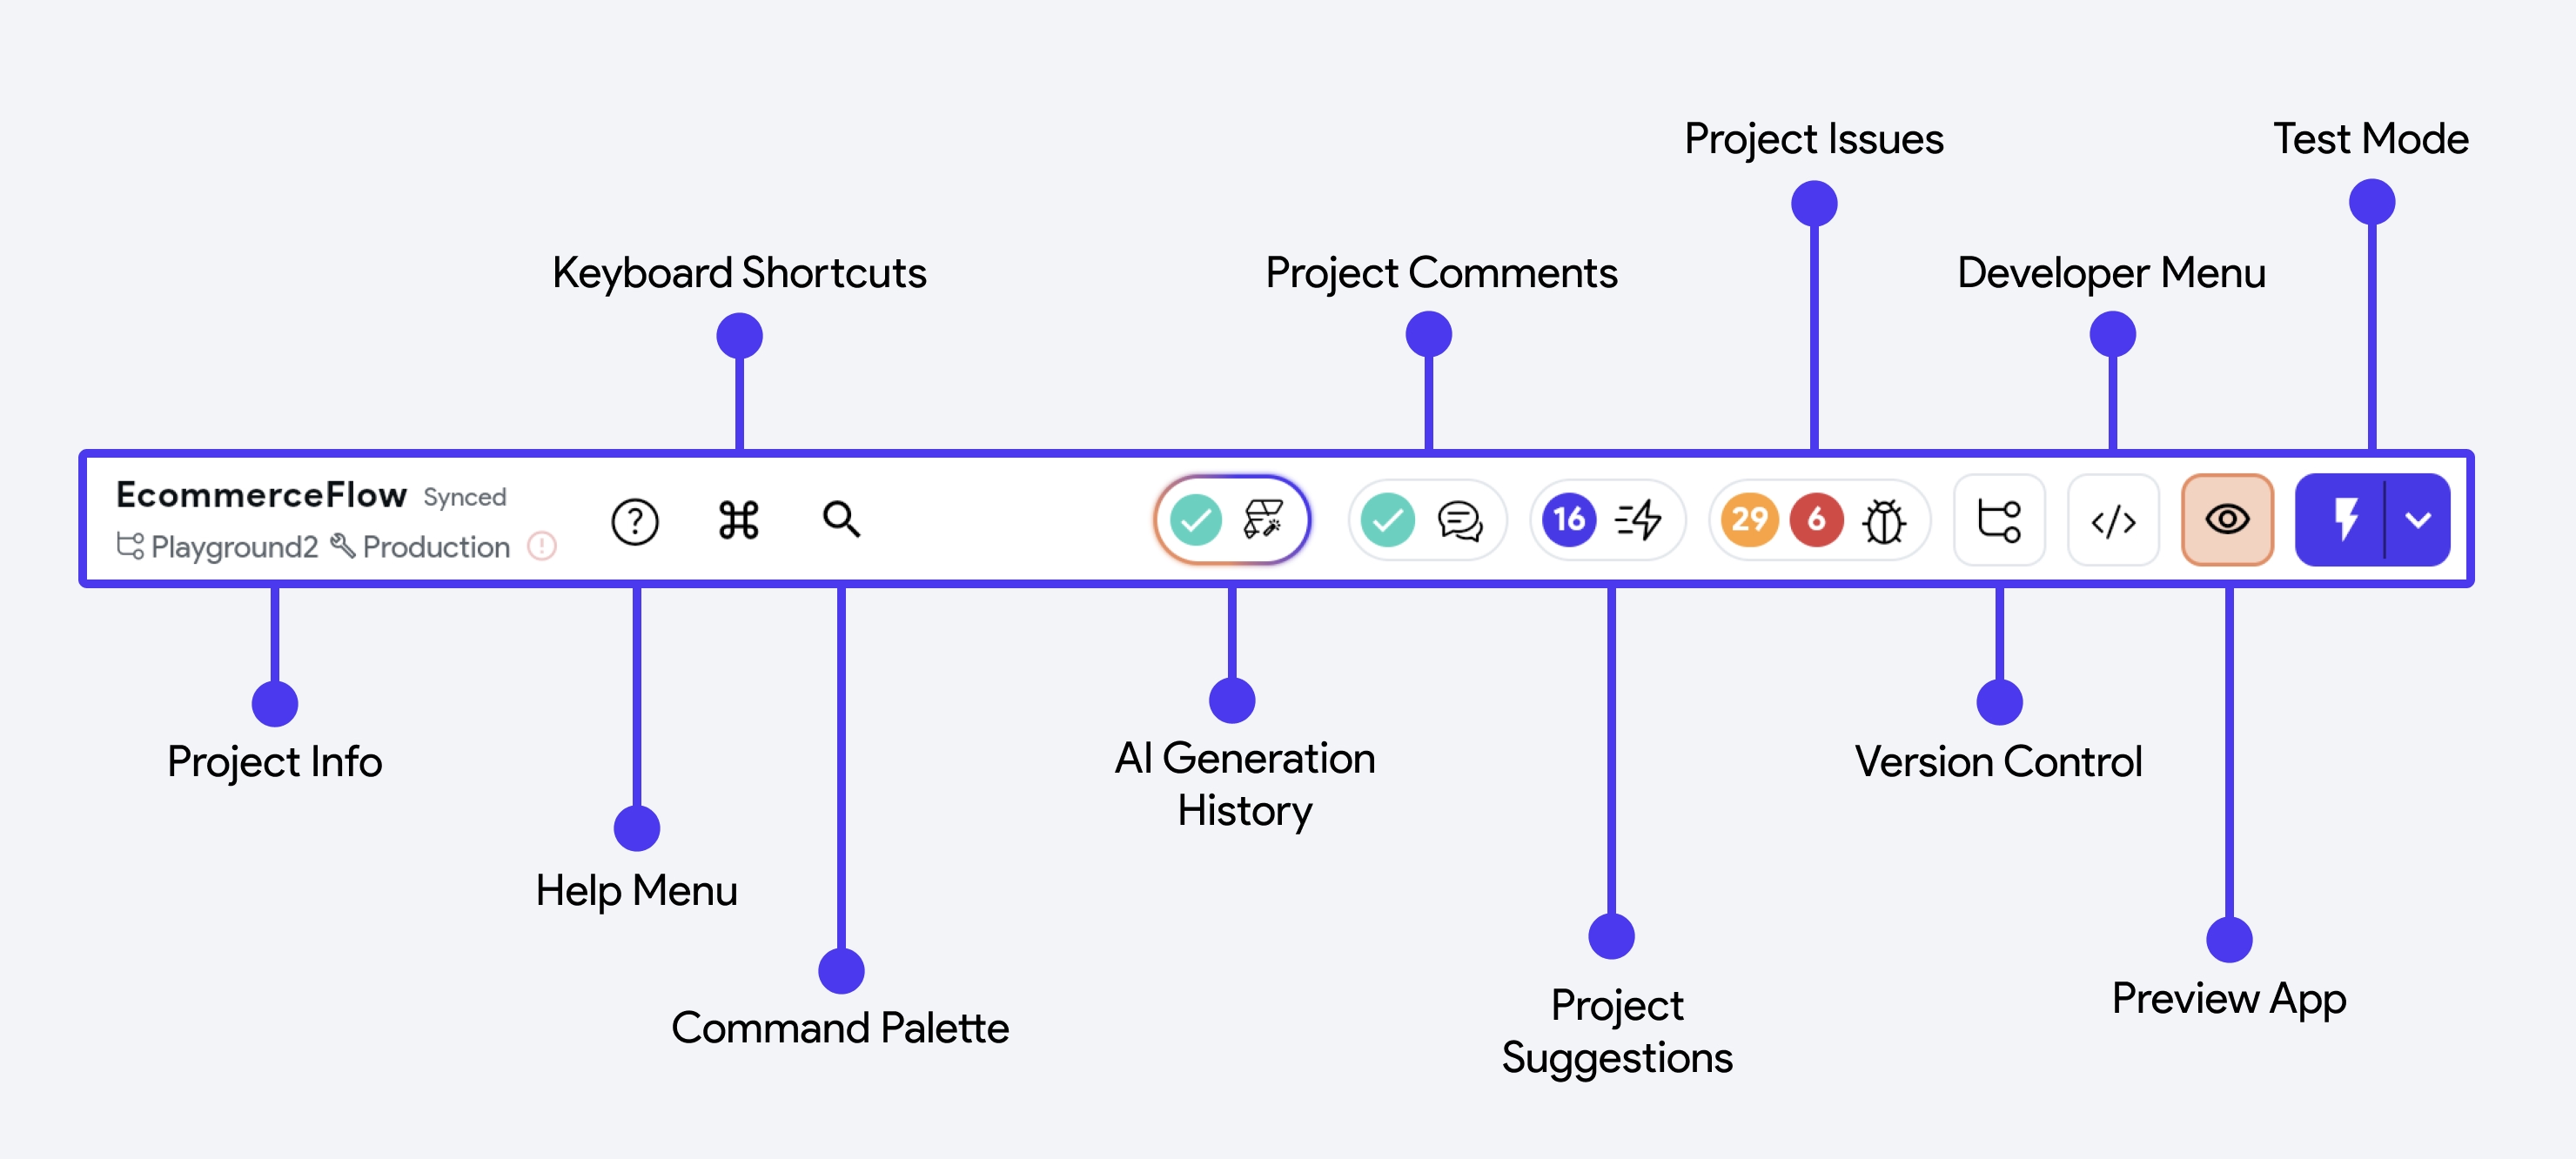
Project Info
Hovering over this section reveals the essential information about your project. Here, you can easily check the project name, branch name, environment name and the current version of FlutterFlow that you're using, along with its release date. Additionally, it shows the Flutter version that your project is currently running on.
Help Menu
From here, you will get access to essential resource links that will come in handy while building your apps.
- Search Docs: If you are a paid user, we allow you to conduct a direct search from our documentation.
- Community Forum: We have a vibrant community of users comprising individuals who share a mutual interest in FlutterFlow. This community actively engages in discussions, knowledge-sharing, and collaborative projects centered around FlutterFlow.
- Feedback: You can provide feedback and help us improve the product.
- Bug report: You can submit a bug report from here.
- Tutorials: You can start the tutorial for building your first app right inside FlutterFlow.
- FAQs and Docs: While building your app, you might need to consult our official documentation frequently. This option will redirect you to FlutterFlow documentation.
- What's New?: We want to keep you updated with all the latest features and changes that are being made in FlutterFlow. Using this option, you can directly access the updates regarding what's new in FlutterFlow.
- Current Status/Known Issues: We want to keep you informed about the current status of FlutterFlow and provide updates regarding any known issues. We aim to ensure transparency and keep you in the loop about the platform's performance and potential issues.
- Show/Hide Chat: You can use this option to show or hide the chat button at the bottom right of the app builder.
Keyboard Shortcuts
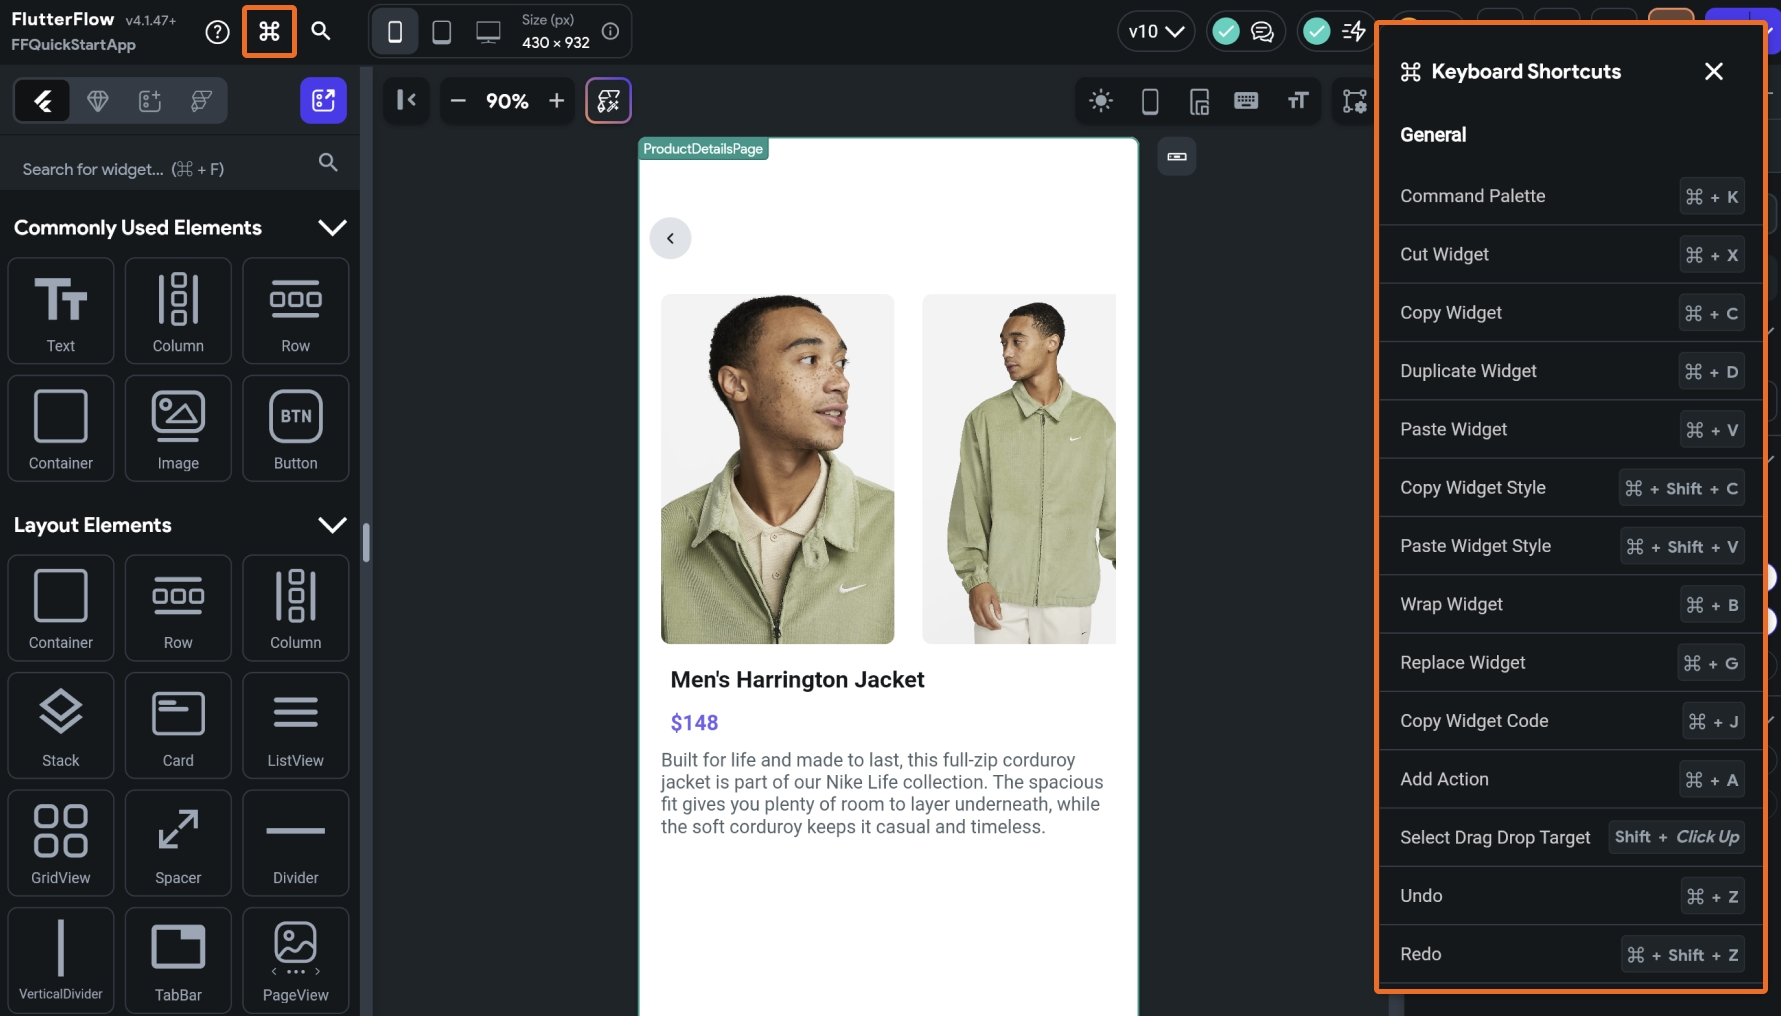
With keyboard shortcuts, you can perform common actions related to widgets and run your project in Test or Run mode with just a few keystrokes, saving you time and effort. Select this option to see all the shortcuts.
Command Palette
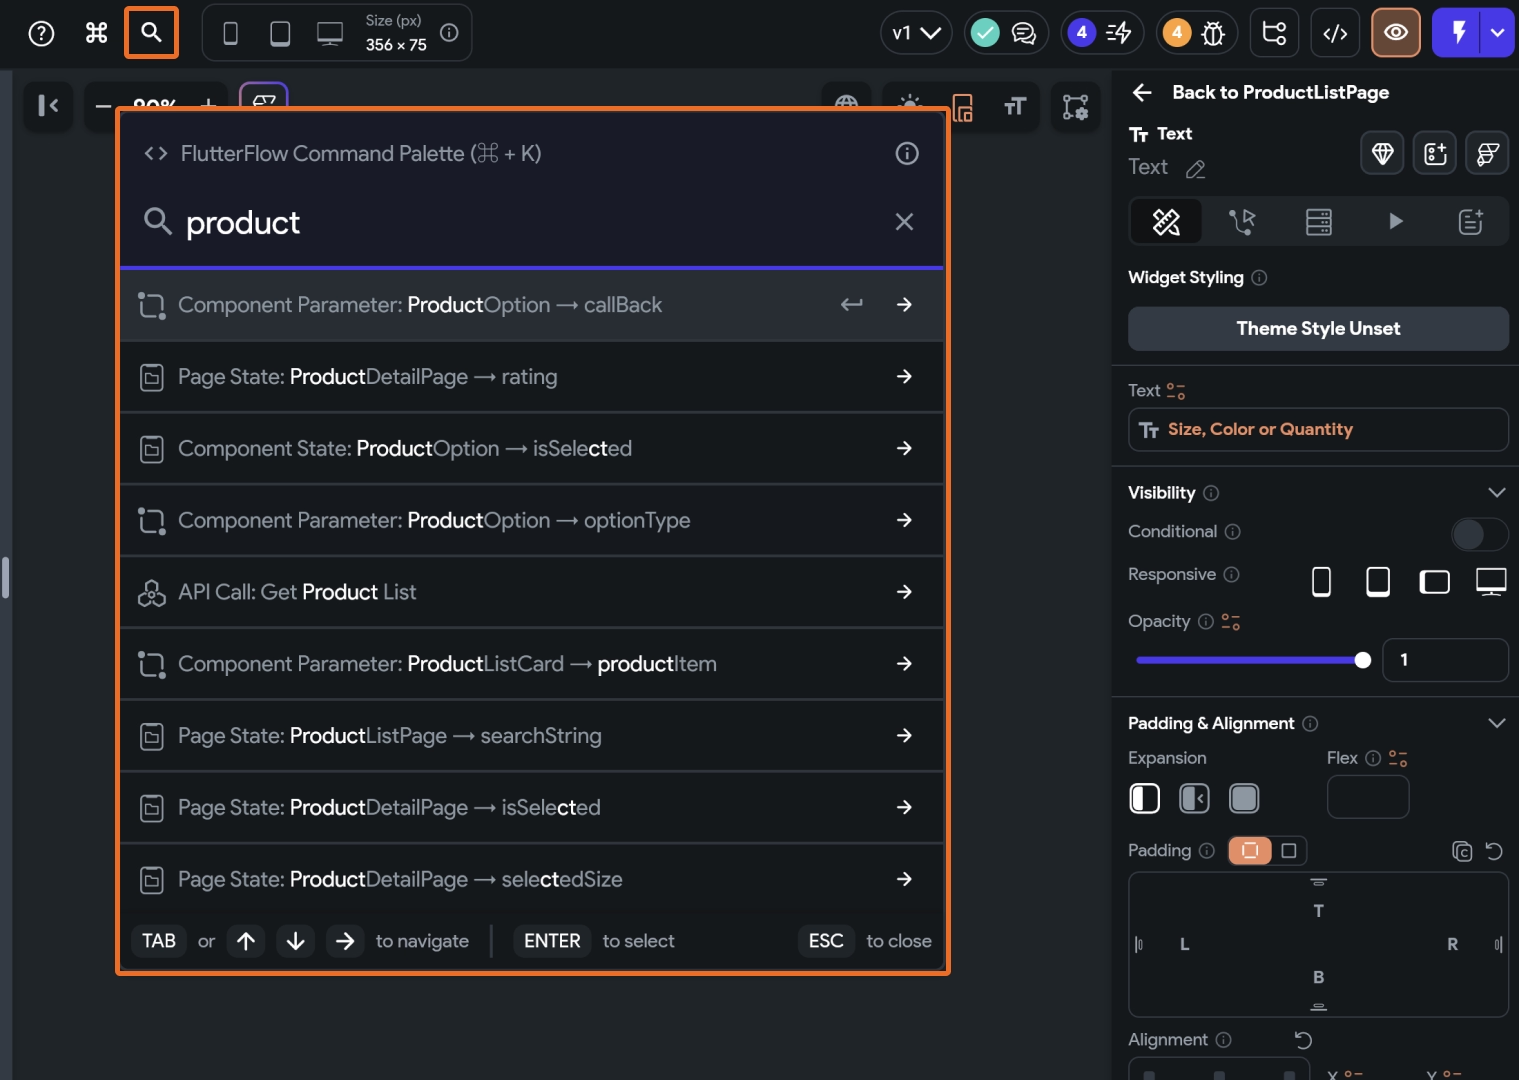
The Command Palette makes it easy to find and use things in the App Builder. Open the Command Palette by clicking the search button or pressing Cmd/Ctrl + K. Search for anything, and to find out where it's used, click the right arrow – we'll show you every place. To directly access the item, just click on it.
AI Generation History
The AI Generation History panel lets you track the status of your AI-generated items. It provides a list of all previously generated pages and components, and you can easily preview them from here.
Project Comments
This helps you leave your thoughts, opinions, questions, or feedback on a specific widget with your project team or a client. While adding a comment, you can tag users, and they will be able to respond, creating a thread of conversation.
To tag users, select the @ symbol and choose the project team member(s).
Project Suggestions
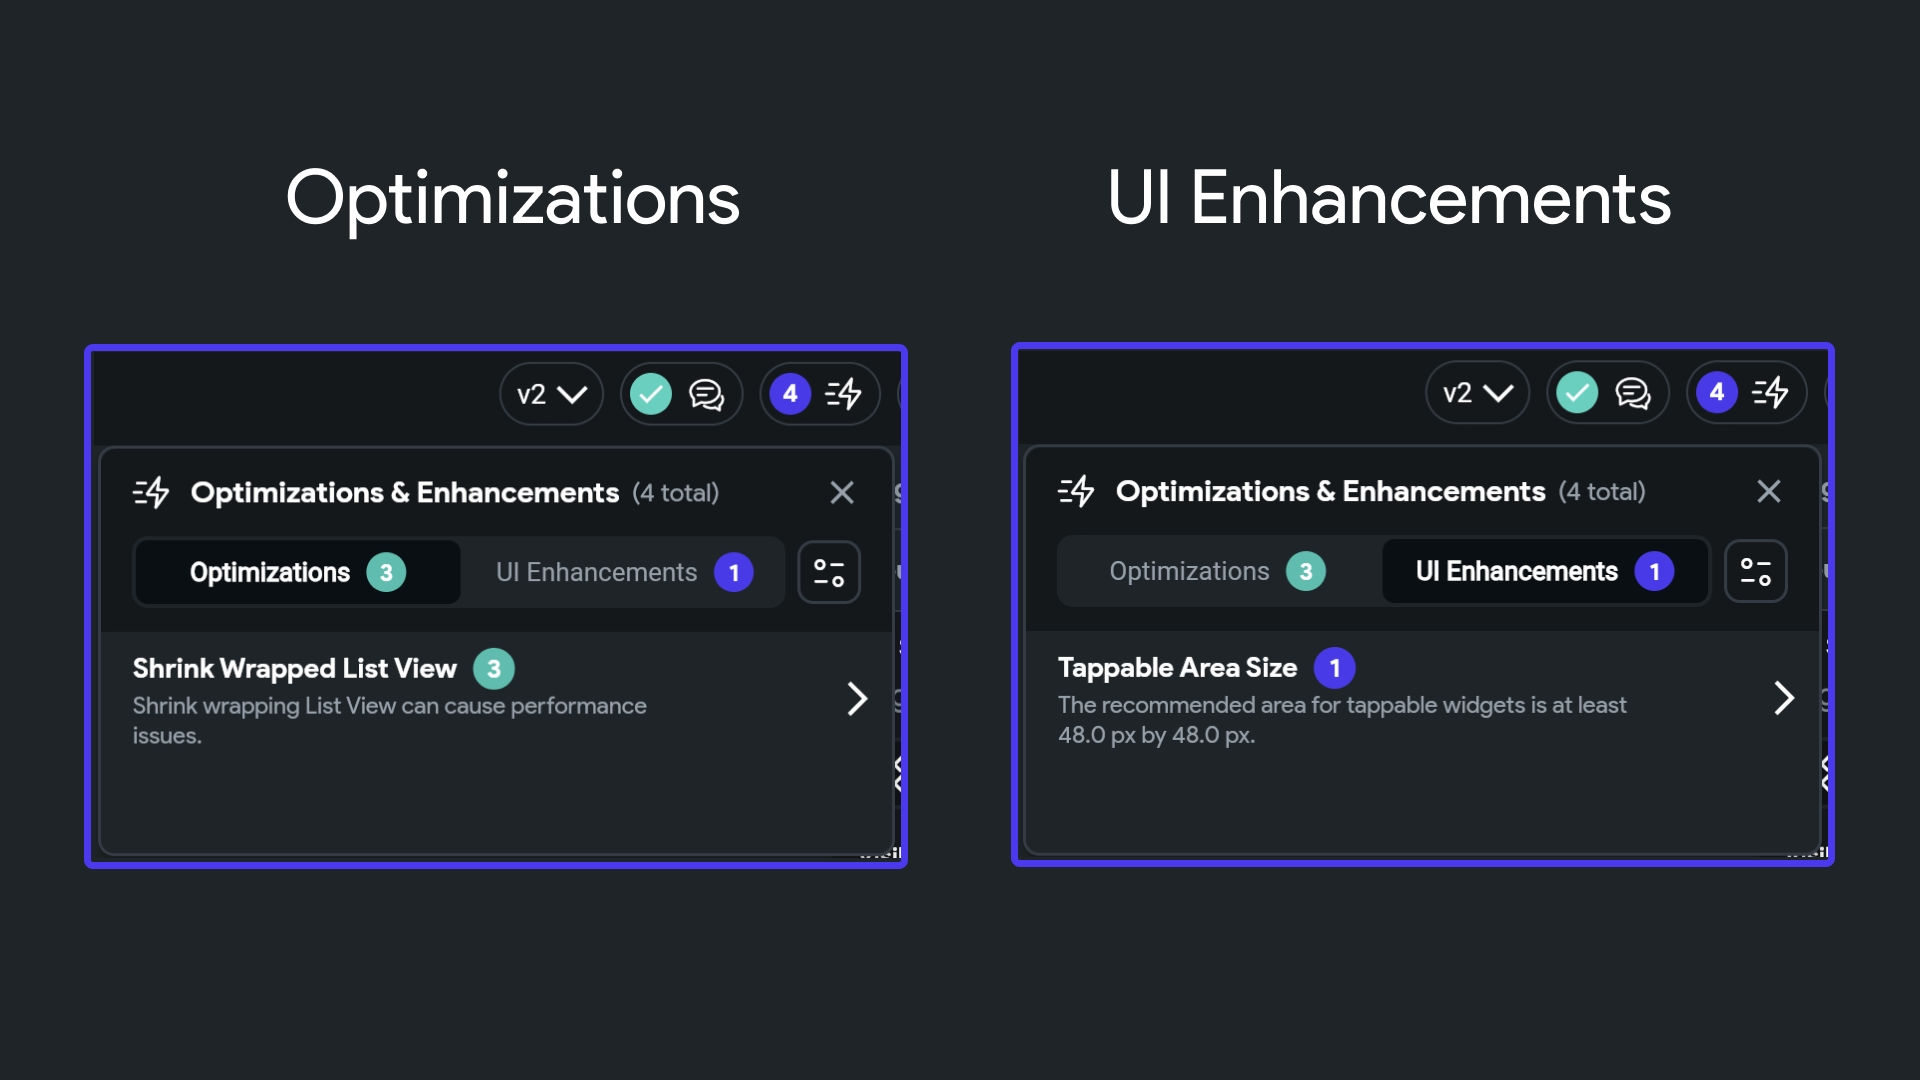
We scan and suggest enhancements to elevate your app's design and speed. Imagine having a personal consultant for design and performance dedicated to improving the user experience of your app.
Optimizations: We spotlight elements that may slow down your app. For example, a query on a column, unused and duplicate backend query, a widget with unbounded size, etc.
UI Enhancements: We offer tips for a more visually appealing and user-friendly design, like resizing a small tap target of any widget.
You can control what kind of suggestions you would like to receive by clicking on the settings icon on the right.
Project Issues
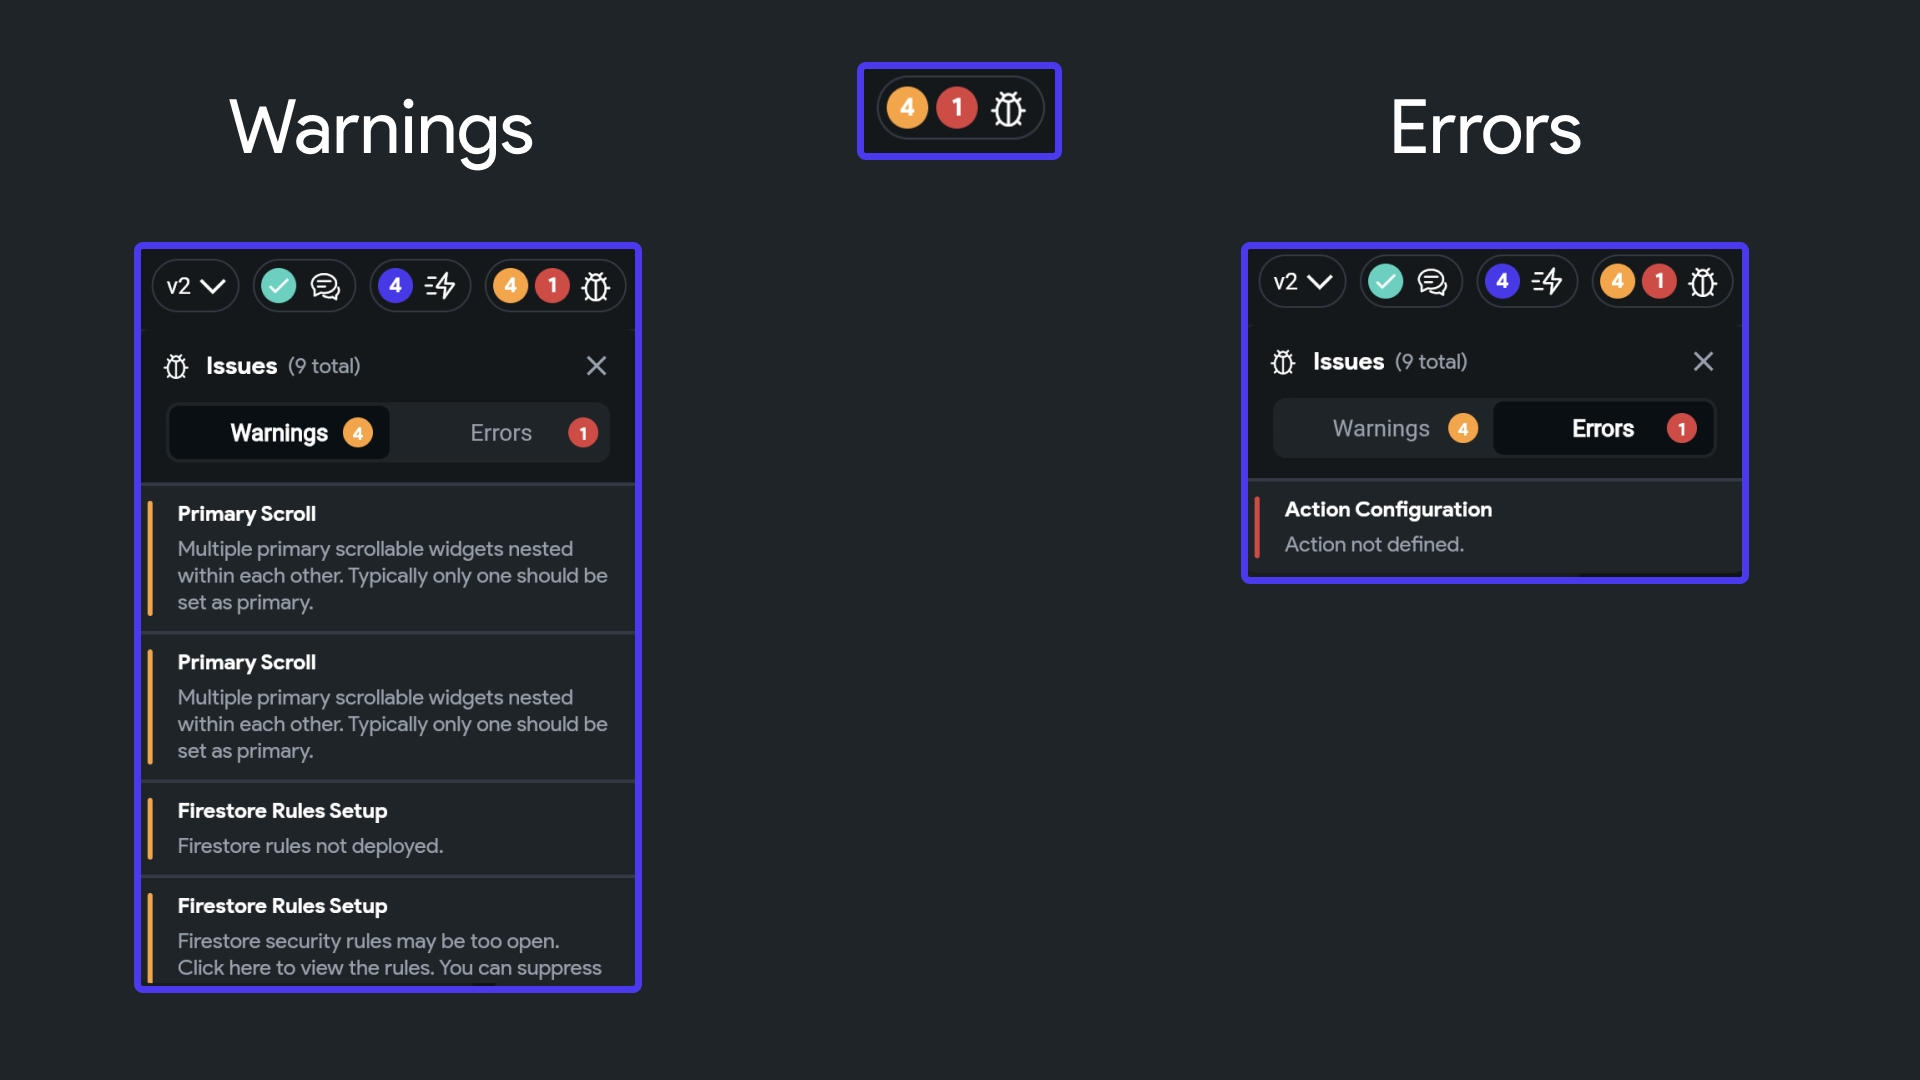
If there are any issues or warnings present in your current project that might result in a build failure or app crash, they will be displayed in this section. You can click this option to view a short description of each issue and navigate to the place where you can fix the issue by clicking on the respective issue.
Errors prevent your app from compiling and running. These must be resolved in order to run the app. They can be due to missing actions, errors in custom code, incorrect data types, and so on.
Warnings while not preventing compilation, indicate potential issues such as incorrect rules setup or performance problems. Although it's possible to ignore warnings, addressing them can enhance the quality of your app and prevent future issues.
Version Control
Version Control is a system that tracks changes to your project's files over time, allowing you to revert to previous states if needed. In FlutterFlow, you can utilize Branching to create a separate copy of your project to build or test features without affecting the main version.
Developer Menu
The Developer Menu provides developers with access to tools such as code viewing, GitHub integration, and source code download capabilities.
-
View Code: This option lets you display the Dart code for all the pages of your FlutterFlow project. You can also take a look at the dependencies being used by the app here.
-
Connect GitHub Repo: You can use this option to connect and upload your project to GitHub repository. See the step-by-step guide here.
-
Download Code: You can download the entire codebase of the app generated by FlutterFlow using this option.
-
Download APK: Use this to generate a release build of your Android app. It will automatically download the
.apkfile after the building process is complete. -
FlutterFlow CLI: You can also download the code using FlutterFlow CLI. See instructions here.
Connect GitHub Repo, Download Code, and Download APK features requires a paid plan.
-
Open in VSCode: This option lets you open your entire FlutterFlow project in a VS Code environment, offering a richer development experience. You’ll have real-time autocomplete and error detection, easier access to existing Flutter & Dart tooling, and the ability to leverage the AI ecosystem.
-
Refactor Project: This option opens your FlutterFlow project in a YAML-based file editor, allowing you to perform bulk edits more efficiently. You can search, edit, and replace values across multiple files—useful for renaming keys, updating data types, or migrating resources to a Library. Check out the Refactor Project documentation for more details.
Share Project
You can make a project public so that others can view and clone your project. Before you share your project, make sure to remove any sensitive information.
- You can only share projects where you are the owner.
- The share feature can be used to create Marketplace items. You can learn more about this here.
Preview App
You can use this option to run your app in Preview mode.