Page Navigation
Page Navigation in FlutterFlow is handled through routing, where each page is identified by a unique route. Navigation can be programmed to happen on events like button clicks, leading to actions such as pushing a new route (opening a new page) or popping a route (returning to a previous page). FlutterFlow simplifies the routing process, allowing you to visually design the navigation flow of your app.
Let's see how to do that in FlutterFlow:
Navigate To [Action]
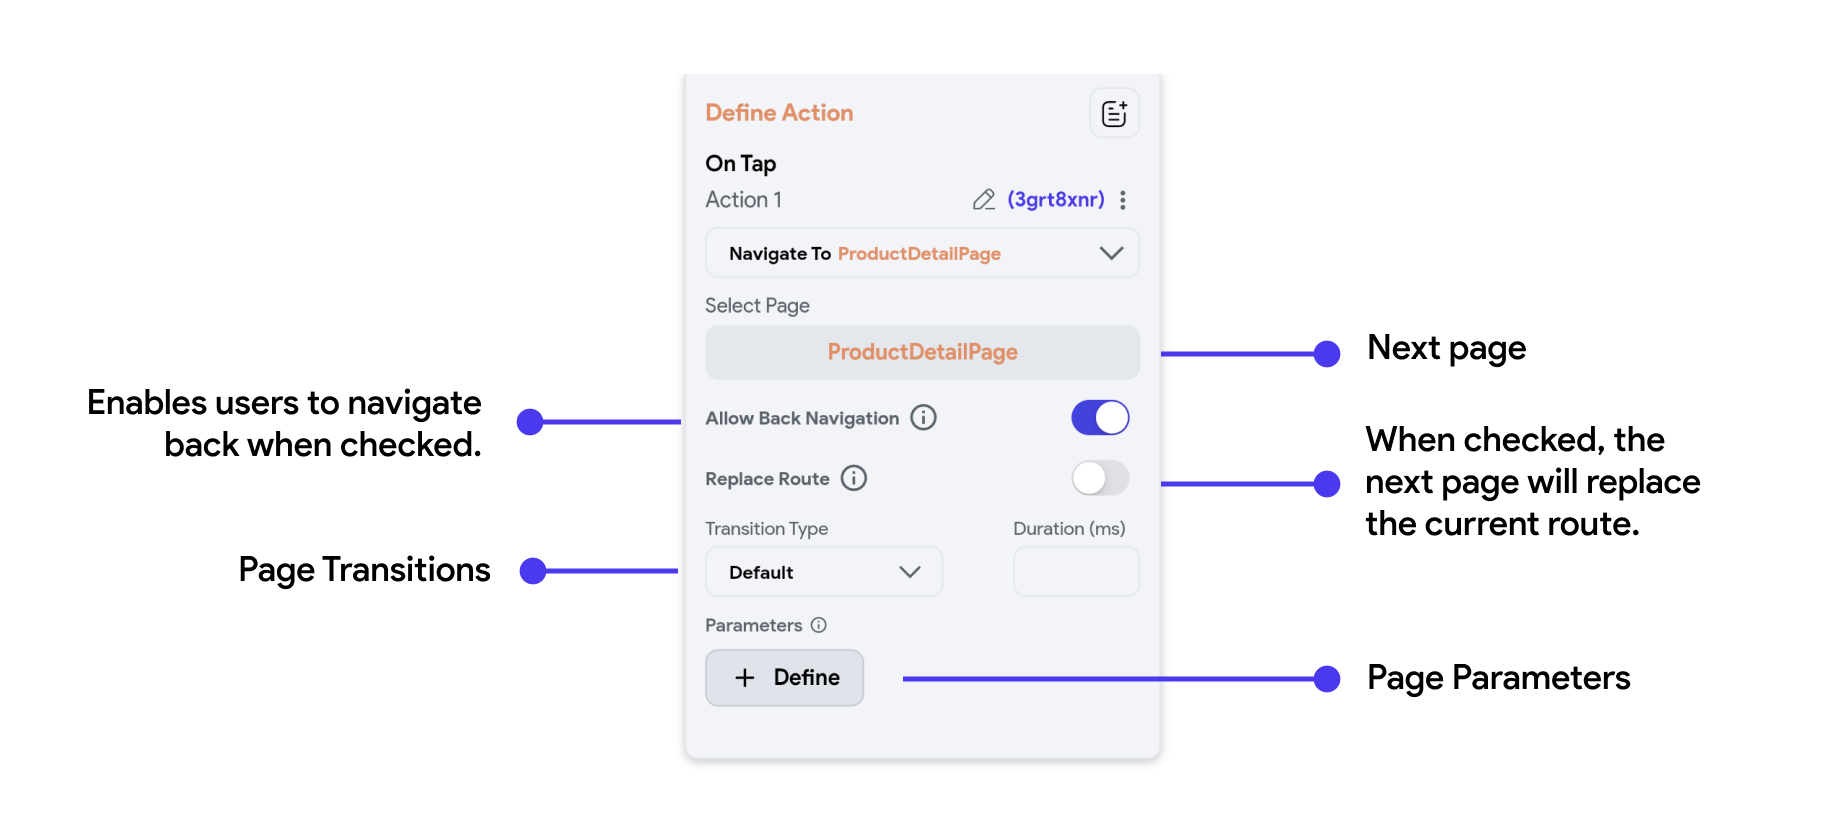
The Navigate To Action allows you to set the next page and modify other navigation-related properties:
| Action Property Name | Type | Description |
|---|---|---|
| Allow Back Navigation | Toggle | Toggle this to prevent the user from navigating back to this page after moving to the next page |
| Replace Route | Toggle | Use this option to replace the current page in the navigation stack. For example, if a user navigates from Page A to Page B and then to Page C, pressing the back button on Page C would normally return to Page B. However, if Replace Route is enabled on Page B, the route changes to Page A -> Page C; therefore, pressing the back button on Page C will take the user back to Page A. |
| Transition Type | Drop Down | This allows you to specify an animation that will be applied while navigating away from a screen. Options include Default, Instant, Fade In, Slide Up, Slide Down, Slide Left, Slide Right, and Scale. |
| Transition Duration | Double | Set the duration of the transition animation in milliseconds |
| Page Parameters | Use this to send data to the next page during navigation. |
Allow Back Navigation does not affect the Android back button. To disable the Android back button, set Disable Android Back Button property on the destination page.

Navigate Back [Action]
In the next page you are navigating to, ensure that you add a 'Navigate Back' action to the AppBar or wherever you want users to navigate from. Let's add a ' Navigate Back' action to our subsequent page, from which we navigated in the previous section: