Google Play Store Deployment
FlutterFlow allows you to seamlessly deploy your apps directly to the Google Play Store, all from within the builder. This guide provides comprehensive instructions on prerequisites, step-by-step process for deployment, advanced settings, and troubleshooting common issues.
- Register for a Google Play Developer account.
- Test your application on a real device.
- Confirm the app details. Especially the package name, which can't be changed after your app is deployed.
- Set an App Launcher Icon. The App Launcher icon can't be transparent or contain an alpha channel.
Deploy to Google Play Store
Deploying to Google Play Store comprises of the following steps:
- Creating an app on Google Play Store
- Set up your app
- Adding service account credentials
- Deploy to Google Play Store
1. Creating an app on Google Play Store
Follow the steps below to create an app on Google Play Store:
- Open the Google Play Console.
- Click on the Create app button at the top right side of your screen.
- Enter the App name, select the app type, and choose whether the app is Free or Paid.
- Accept the Declarations.
- Click Create app at the bottom.
2. Set up your app
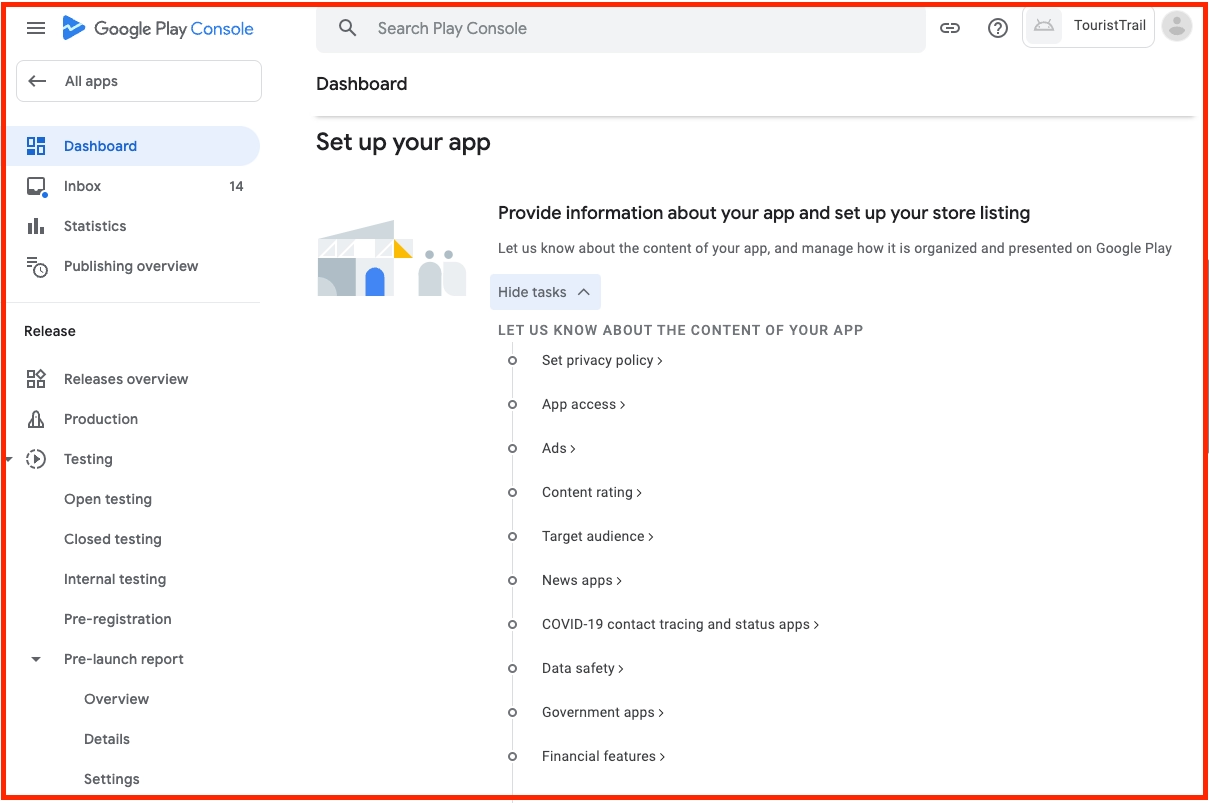
To successfully deploy the app, you must fill in all the app details required by the Google Play Store.
To proceed, navigate to the Set up your app section within the newly created app. Expand the View tasks section. Then, click on each task and fill in the necessary app information.

3. Adding service account credentials
Adding Service Account Credentials to FlutterFlow helps you publish your apps on Google Play.
3.1 Creating a Service Account
To create the Service Account, you can follow the instructions from here. To help you get started quickly, here are the exact steps you need to follow:
-
If you haven't set up Firebase in your app, you'll need to create a Google Cloud Project.
-
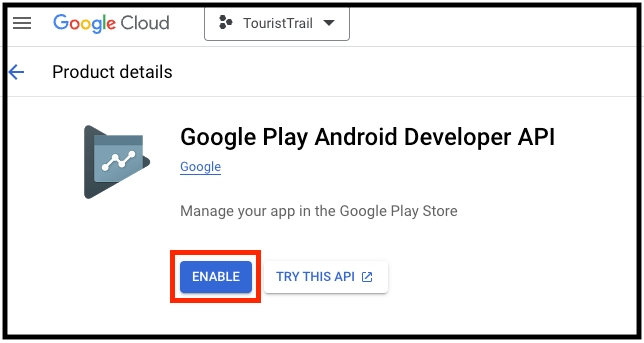
Then, head over to the Google Play Developer API page in Google Cloud Console and click Enable.

-
In Google Cloud Console, go to Service Accounts, click + CREATE SERVICE ACCOUNT, and follow the steps as per in the visual below.
-
On the right side of the newly created service account, click the action menu (three dots) icon and select Manage keys. Then, click ADD Key > Create new key > select JSON > CREATE. Keep the downloaded file at a safe place.
- Now, return to the Google Play Console and follow the steps below:
- Go to the Users & Permissions page.
- Click Invite new users.
- Put the email address for your service account in the email address field and grant the necessary rights to perform actions:
- "Edit and delete draft apps"
- "Release to production..."
- "Release apps to testing tracks"
- "Manage testing tracks and edit tester lists"
- Click Invite user.
3.2 Uploading service account credentials to FlutterFlow
To upload the service account credentials on FlutterFlow:
- Return to FlutterFlow, navigate to Settings & Integrations > App Settings > Mobile Deployment, and scroll down to the Google Play Store section.
- Under the Service Account Credentials, Click on Upload Credentials and select the downloaded credential, i.e., the
.jsonfile in the previous step no.4.
4. Deploy to Google Play Store
To enable FlutterFlow to deploy your app to the Google Play Store on your behalf for the first time, you have to download the .AAB file from FlutterFlow and upload it to the Internal Testing Track on the Google Play Store.
Once the Internal Testing track is ready (with .AAB file), FlutterFlow can handle the subsequent releases.
4.1 Getting the AAB (App Bundle) file
To get the AAB file:
- Set the Google Play Track to Internal and hit Deloy to Play Store.
- Wait for a couple of minutes and then click Check Build Status. If you don't see the AAB APK options yet, wait for some time.
- Click on the AAB to download the
.aabfile.
You need to perform this step only for fresh deployment (i.e., first-time setup).
4.2 Creating a testing track
While you can certainly release your app directly to the Production Track, it's advisable to first release it within your team using the Internal Testing Track.
Inside the Google Play Console, create a testing track as per in the steps below:
4.3 Deploy
You can now deploy directly from FlutterFlow or from your GitHub repository.
- Every time you deploy, we'll auto increment the Build Number (i.e., version code in Android) to ensure that each release is identifiable. If needed, you can update the App Version and Build Number yourself.
- We'll auto-generate and sign your app for the release with the Keystore (i.e., upload key). If you wish to download the keystore, click the orange key button.
Ensure the Google Play Track is set to Internal and hit the Deloy to Play Store again. On successful deployment, you will see the status as 'finished'.

If you prefer to manage your deployment process outside of FlutterFlow, such as integrating with your own CI/CD pipeline, or if you want more control over versioning and custom code management directly on GitHub. You also have the option to Deploy apps from your GitHub repository.
4.4 Verify deployment
To verify that the app is deployed to Play Console:
- Open the Internal testing in Google Play Console.
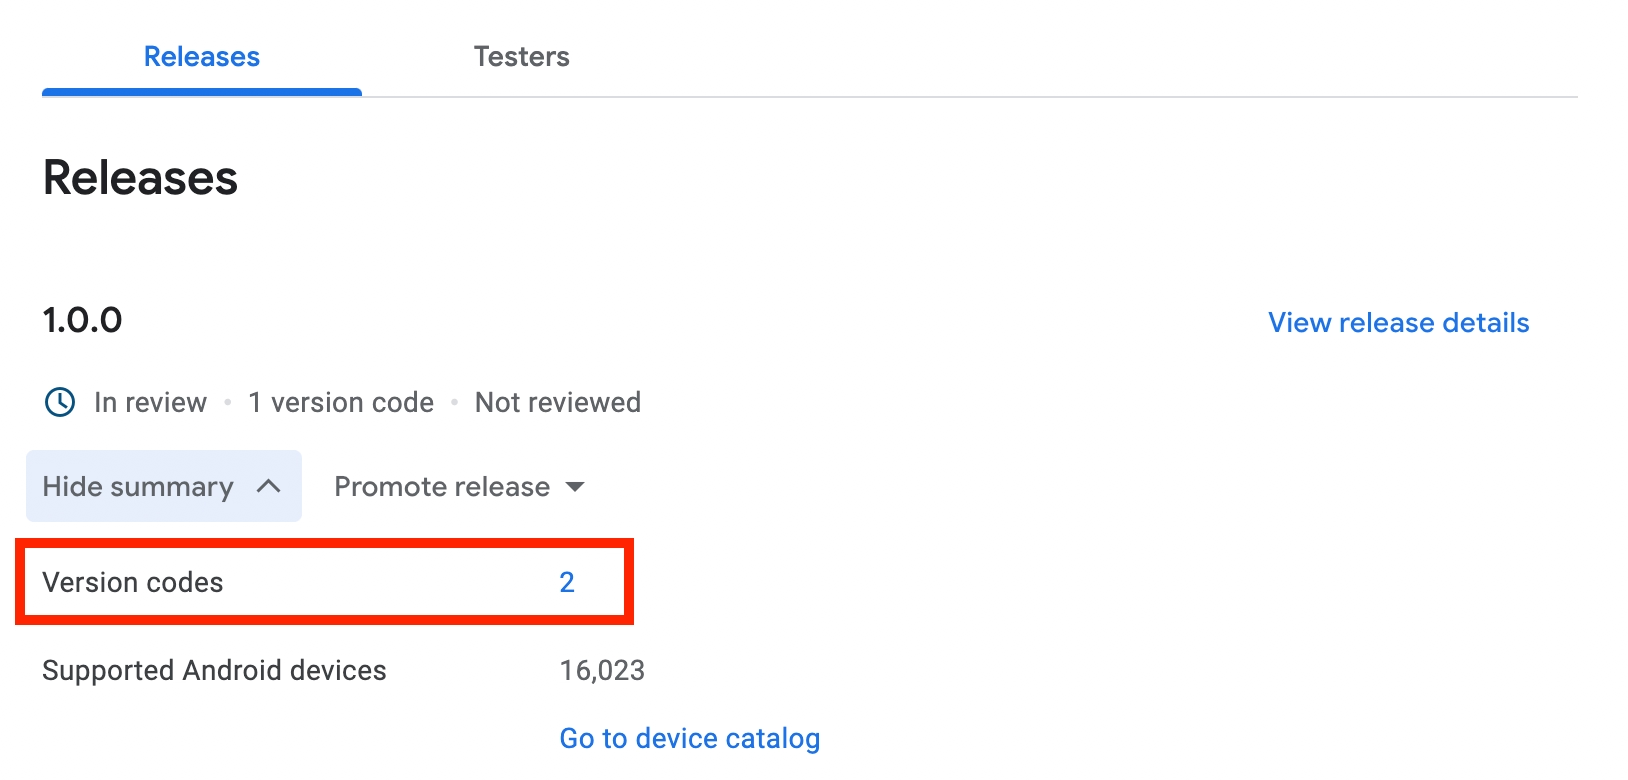
- Under the Releases section, find your release and click on the Show Summary button.
- See the Version Codes number is increased.

4.5 Deploy to production
To deploy your app to production:
- Inside the Internal testing in Google Play Console.
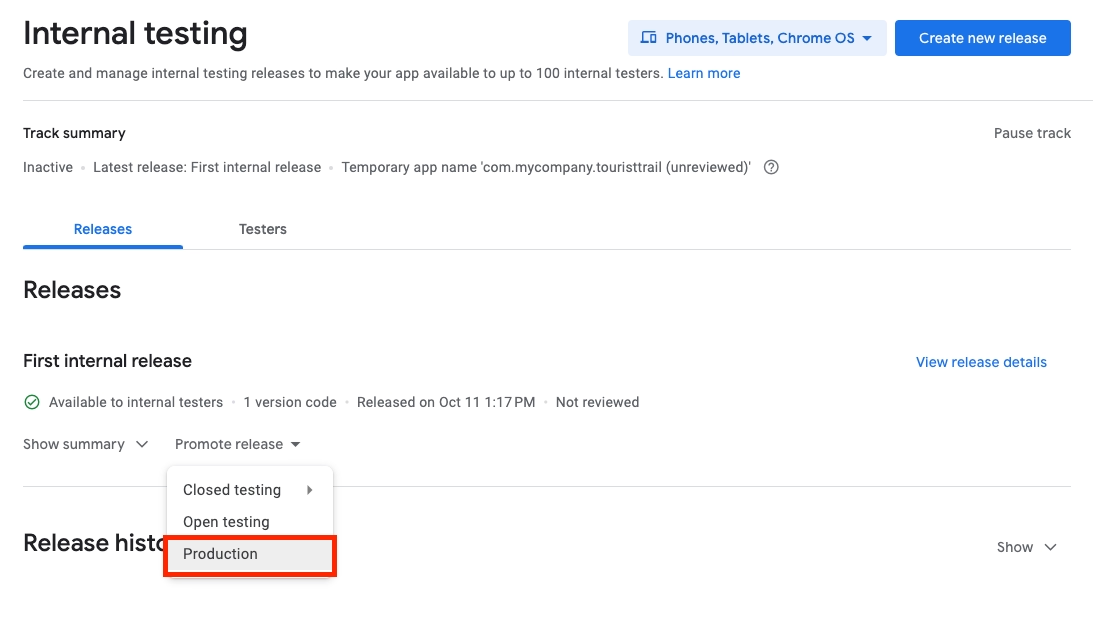
- Under the Releases section, find and click on the Promote Release dropdown.
- Select the Production. This will create the Production track and you can continue to release your app from there onwards.
- Next time onwards in FlutterFlow, you can publish directly to the Production track by setting the Google Play Track to Production.
- Google Play Console: Promote to production
- FlutterFlow: Set Google Play Track to Production


Advanced Settings
Upload Keystore
If you've previously deployed an app to the Play Store using your own keystore file, you must enable this option. Once enabled, proceed to Upload Keystore file and provide the Keystore Alias.
Changes not sent for review
If you face an error that says 'Changes cannot be sent for review automatically', enable this option and retry deployment.
Submit as draft
While deploying, if your app is still in draft mode, meaning it is not available on the Play Store yet, you may encounter an error message stating, 'Only releases with the status draft may be created on a draft app.'
To resolve this, enable this option, and you'll see that the release will be created as a draft. You'll then need to manually roll out the app.
Video guide
Watch this video if you prefer watching a video tutorial.