Page Lifecycle
In FlutterFlow and Flutter, understanding the page lifecycle or simply the stages a page goes through from creation to disposal is essential for managing resources and data effectively.
Let's delve into the key moments in the lifecycle of a Page:
- Initialization: This is the first phase where the page is set up. Here the initial data is loaded. This might involve setting up the necessary state or defaults for the page.
- Rendering: Here, the page is actually drawn or rendered on the screen. This includes setting up the layout, styles, and any interactive elements. The user can now see the page in its initial state.
- Updating: After rendering, the page becomes interactive and can respond to user inputs such as clicks, typing, or other gestures. It may re-render parts of the page or the entire page to reflect the changes due to interaction or new data.
- Disposal: When the page is no longer needed, or the user navigates away, this phase is triggered. This is where resources related to the page are released from memory and are no longer accessible.
In FlutterFlow, most of these lifecycle phases are handled internally by FlutterFlow's architecture. However, we expose some of the methods so that you, as a developer, can decide what additional configurations to load upon initialization and when to re-render the UI based on interactions.
Page-Level Action Triggers
There are several Action Triggers that are accessible at the root-level of a page.
Action Triggers serve as event listeners or handlers that respond to specific events or user interactions within an application. FlutterFlow provides developers with a way to define logic that responds to various events, such as button clicks, page loads, form submissions, or data changes. To learn more, head over to Action Flow Editor section.
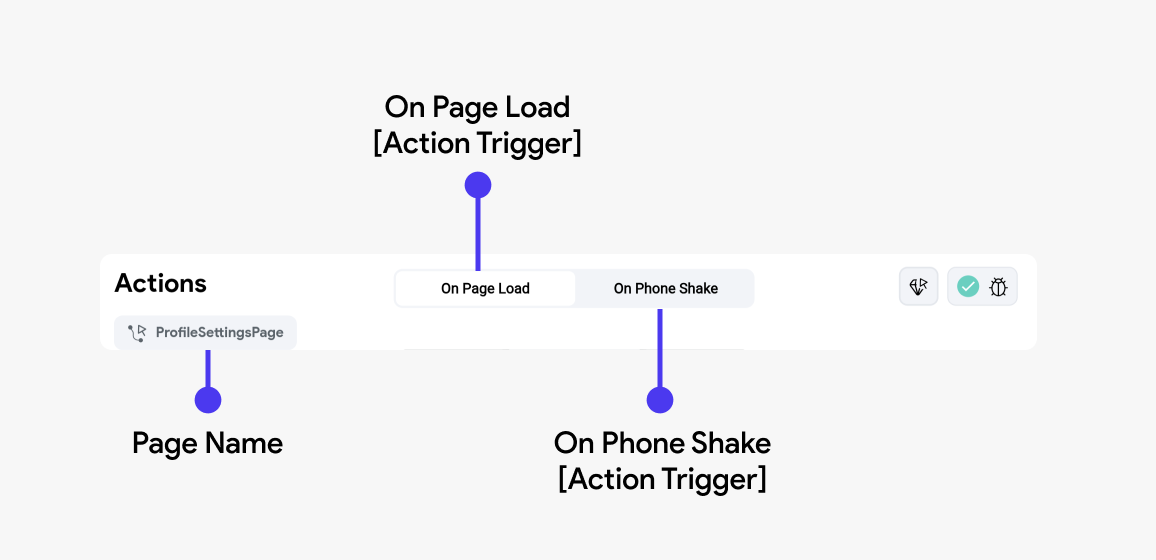
As you open the Action Flow Editor for your Page, you can see the following Action Triggers exposed for your Page.

On Page Load [Action Trigger]
This allows you to set actions when the page loads or initializes. It enables developers to perform tasks or execute logic at specific points in the page lifecycle, such as fetching data from an API, initializing variables or updating UI elements.
-
Initializing Data: You can use the On Page Load action trigger to initiate API calls, database queries, or read from local storage, setting up the data that the page needs to display. This ensures that all necessary data is ready and available by the time the user sees the page.
-
Setting State: If your page depends on certain state conditions (like toggles, selections, or input fields), you can set these states appropriately as the page loads.
-
Running Animations: Start animations that welcome users or draw attention to certain UI elements on the page.
To add an action to On Page Load action trigger, follow the steps:
When you add actions to the on Page Load action trigger, they are executed within a SchedulerBinding.instance.addPostFrameCallback((_) method. This ensures that the actions run after the widget tree is fully built. For more details, refer to the Page: Generated Code document.
On Phone Shake [Action Trigger]
Actions added under this trigger are triggered when the user shakes their phone. This is useful when you want to perform certain tasks or trigger specific actions in response to a phone shake gesture.
- Randomizing content: Shake the phone to generate a random number, display a random quote, or change the background image.
- Refreshing data: Shake the phone to trigger a data refresh, such as fetching the latest news articles or updating a live feed.
- Resetting the app state: Shake the phone to reset the app state, clear form fields, or return to the app's home screen.
On Shortcut Press [Action Trigger]
This action trigger allows you to bind keyboard shortcuts to actions. This is incredibly helpful for improving accessibility and enhancing user experience, especially in web and desktop apps.
- Create New Issues in Project Management Apps: In project management apps like Linear, users can press
Cto quickly open a form for creating a new issue or task. - Form Submission: Users can press a key combination (e.g.,
Ctrl + Enter) to submit a form. - Navigating Between Pages: Use shortcuts like
Ctrl + Right Arrowto navigate between pages without using the mouse.
- When a keyboard shortcut is created at the page level, it won't trigger if a TextField is in focus, and you also won't be able to type the shortcut key into the TextField.
- When a keyboard shortcut is created at the component level, it also won't trigger if a TextField is in focus, but you'll still be able to type the shortcut key into the TextField.
- To avoid conflicts, it's recommended to use shortcuts that users are unlikely to type, such as Command + S, instead of a single key like 'S'.
- There's currently a known issue with Flutter's autofocus functionality. If a TextField inside a component has autofocus enabled, and the component has a keyboard shortcut, the TextField will not autofocus as expected.
Implementing keyboard shortcuts is a straightforward process in FlutterFlow. You can define as many shortcuts as you want, each mapped to specific actions that will trigger when the corresponding key combination is pressed. Let's see an example of an eCommerce web app where users can quickly access the cart page by pressing the C key.
To create a shortcut, use the On Shortcut Press action trigger, then type the keys that you want your app to listen for.
When implementing keyboard shortcuts on a page or component with a text field, you may need to ensure the text field ignores those shortcuts.
For instance, if you have a shortcut assigned to the letter "C" and a user tries to type "C" in the text field, you likely want the input to capture the keypress without triggering the shortcut.
To handle this, you can enable the option on the TextField widget to bypass keyboard shortcuts. However, it's generally better to assign more unique combinations, like Cmd + C, which are less likely to conflict with normal typing in a text field.
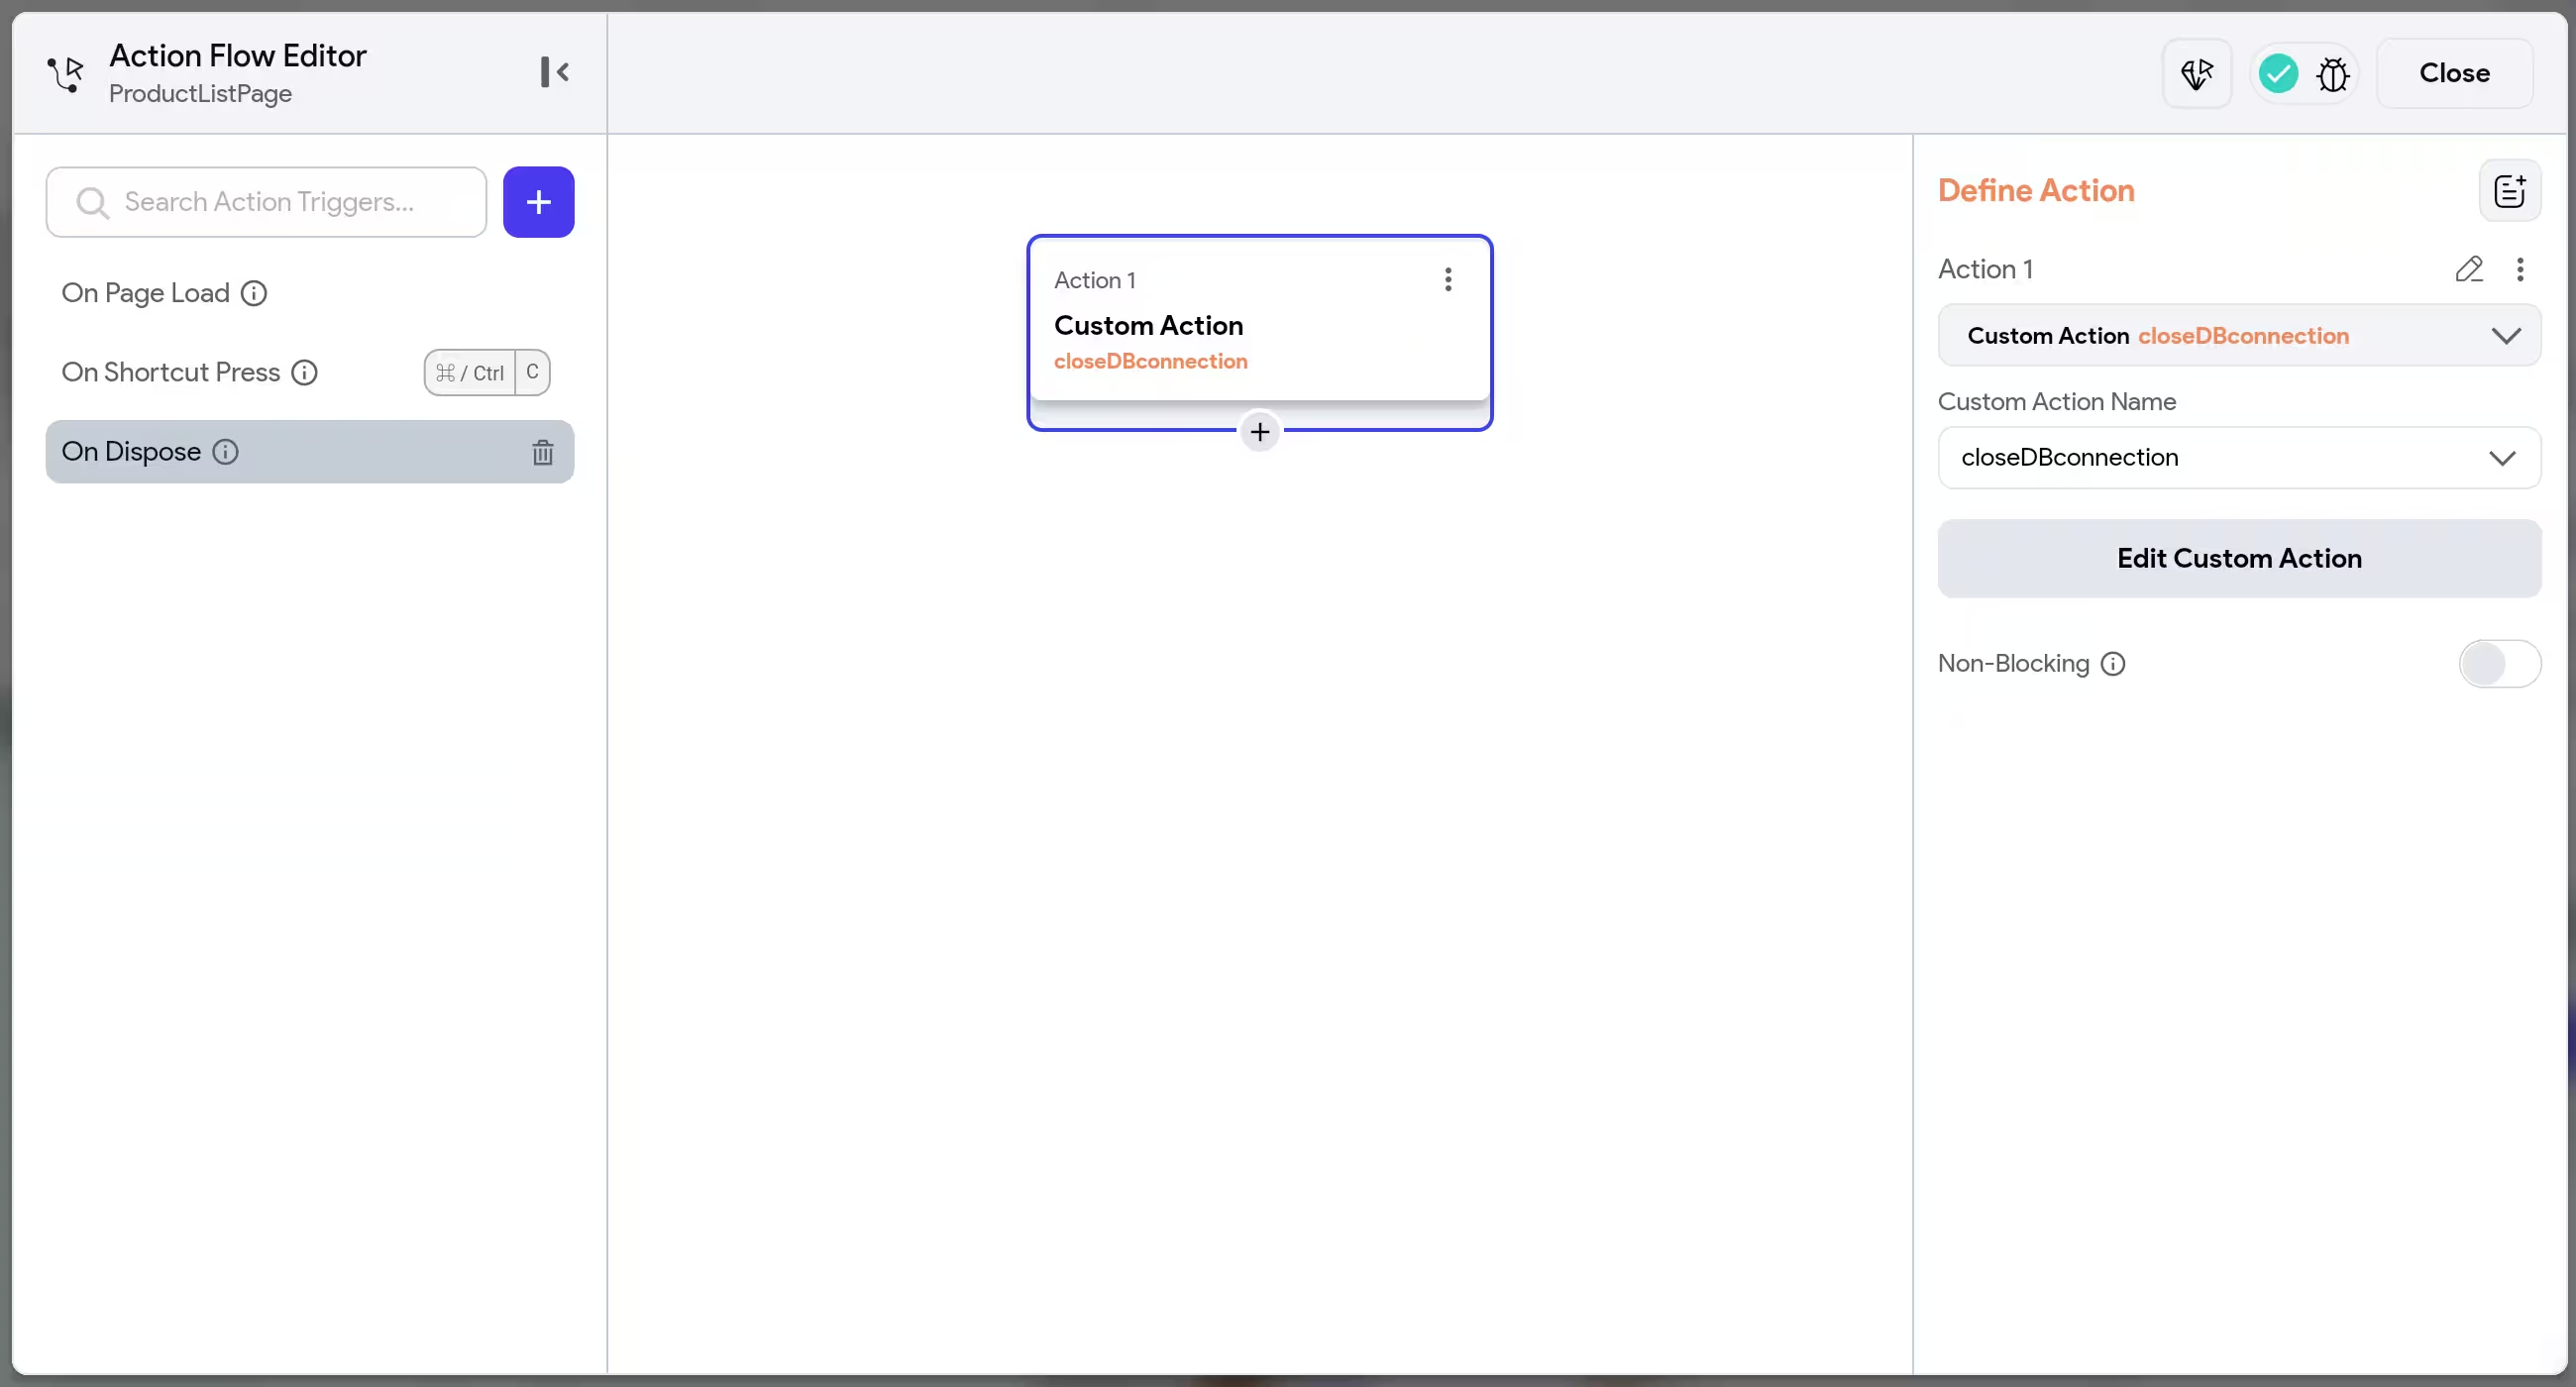
On Dispose [Action Trigger]
The On Dispose action trigger allows you to define actions that execute when a page is navigated away from or removed from memory. It is particularly useful for stopping ongoing operations.
Imagine a scenario where audio recording is started when the page loads using the On Page Load action trigger. The recording process runs as long as the user remains on the page. However, when the user navigates away, you need to stop the recording to save resources and ensure the recorded audio is finalized. By using the On Dispose action trigger, you can safely stop the recording and save the file.
Additionally, if you are using a third-party package that relies on persistent connections or listeners, you can leverage Custom Actions with the On Dispose action trigger to close streams or cancel subscriptions.
- Cleaning Up Resources: Use this action trigger to cancel timers, close database connections, or unsubscribe from streams to prevent memory leaks and unnecessary processing.
- For example, real-time applications, such as stock trading platforms, rely on WebSocket connections to fetch live updates. A homepage displaying a live ticker of stock prices would require opening the WebSocket connection on page load and closing it on On Dispose. Without an On Dispose trigger, the WebSocket connection could remain open unnecessarily, leading to wasted resources and app instability.
- Finalizing Database Transactions: Commit or roll back database transactions if the user leaves the page before completing the process.
- Logging or Analytics: Track user behavior or log events (e.g., page exit or time spent on a page) to monitor user engagement and improve the application experience.

Page state
A state variable holds information or data about your UI at any given moment. To learn more about states and state management, refer here
Page state refers to the information that a page tracks about its current condition or the data it displays. This can include things like which tabs are active, the contents of a form, or any user interactions. Managing state is crucial for dynamic pages that interact with user inputs or load varying data. Page State variables are only accessible within the given Page scope.
This type of variable can be useful for storing data that needs to be shared between different widgets on the page, such as saving form data, a search query, and filtering and sorting options.
For example,
- In a multistep form, you might use a Page State variable to store the current step number or the user's input for each step.
- Or, on a search results page, you could use a Page State variable to store the search query entered by the user and the current filtering and sorting options applied to the results.
This allows you to maintain the state of the page as the user interacts with different widgets and components.
When the value of a Page State variable is changed, you can choose to re-render the page with the updated values, and it will display a new version of the page with these updates.
Creating a Page State
To create a new Page State variable in your page, follow the steps:
While creating a Page State, the following properties are included:
-
Is List: This property determines whether the variable can hold multiple values of the same data type (like a list or array) or just a single value.
-
Initial Field Value: This property sets the default value for the variable when it is first created. It's like setting the starting point or the value that the variable begins with before anything else happens.
-
Nullable: This property determines whether the variable can have a null value. When "Nullable" is set to true, it means the variable can be empty or have a null value. This is useful when dealing with optional data or scenarios where the absence of a value is valid.
Now, let's apply these concepts to the searchString variable in the context of
the above example:
-
Since
searchStringis used to store a single search query entered by the user in the search bar, "Is List" is set to false, therefore it can hold only one value at a time. -
The default value for
searchStringis set to an empty string (""). This ensures that when the homepage loads, the search bar is initially empty, allowing users to enter their search query. -
Since entering a search query is optional and the search bar can be left empty, "Nullable" is set to true. This allows the
searchStringvariable to be null until the user enters a search query, indicating that no search has been performed yet.
You can set the Data Type of your Page State variable to any primitive data types such as String, Integer, Boolean, Double or to any other complex built-in data types such as Enum, Custom Data Type, Document, etc. To learn more about the available data types, refer the Data Representation Section.
Get Page State value
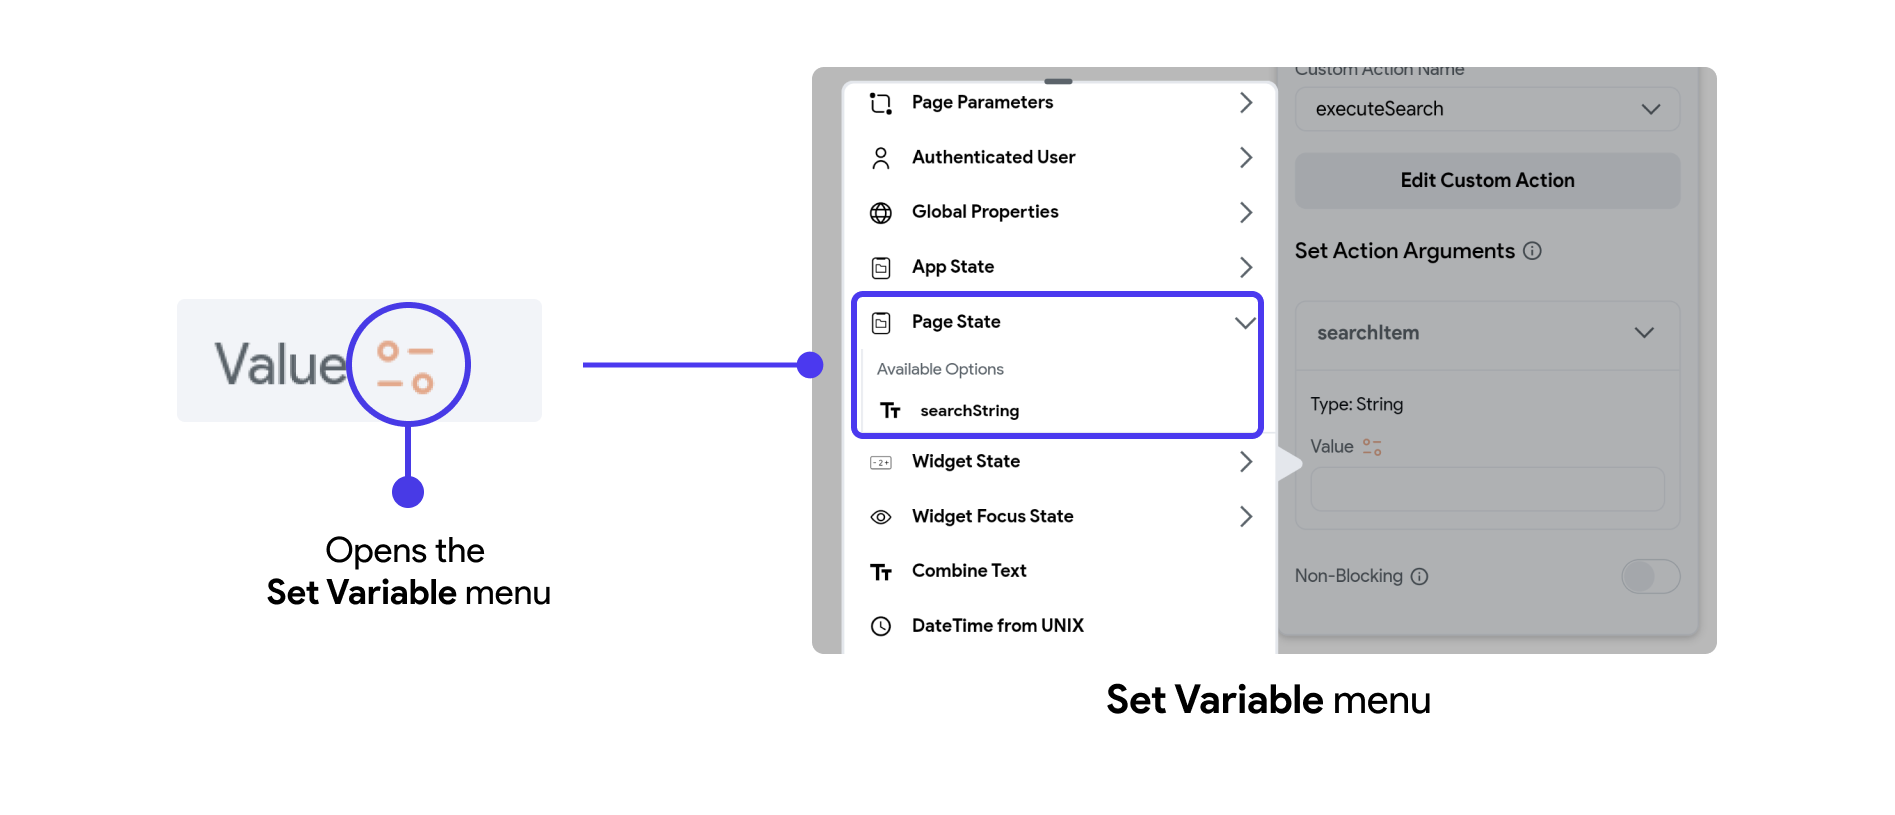
You can access the Page State value anywhere on the current page. Any widget can hold the current value of a given Page State variable, either for directly displaying it in the UI or for transactional logic.
You can set the source value of the widget wherever you see the following icon. This icon indicates that you can link the widget's value to a variable.

Update Page State [Action]
Page State values can only be updated via Actions. Whenever you want to update the page state, such as through a button click, user interaction, or form update, create a new Action called Update Page State.
Rebuild on Update
When updating your page state in Flutter, you'll often come across the Update Type property in your Action properties. Here's what it means:
Rebuild Current Page: This option triggers a re-rendering of the page, ensuring that any changes to the state are reflected in the user interface (UI).
No Rebuild: Choose this option when you need to update the state without immediately reflecting the changes in the UI.
If you want to rebuild a page without updating any state variables, use the Rebuild state action.
Too many rebuilds can impact performance because rebuilding the widget tree frequently consumes resources and may lead to decreased responsiveness and increased battery usage. Therefore, it's essential to consider the trade-offs and use rebuilds judiciously to maintain optimal app performance.
To learn more about what happens behind the scenes, refer to the [Generated Page] section.