Connect Google Play
Connect your Google Play account so FlutterFlow can upload your app and submit it for review. Connecting gives FlutterFlow a key for a service account in your Google Cloud project and grants that service account access to your Play Console account.
You need an approved Google Play developer account. See Developer accounts.
Open the connect step
- In your app, open Releases, and then open Google Play.
- Open the Connect FlutterFlow to Google Play step.
If you’ve already saved a Google Play account, the step lists it. Follow Choose a saved account. Otherwise, save a key with Google’s help or by hand under 1. Save a Google key, and then grant access.
Save a key with Google
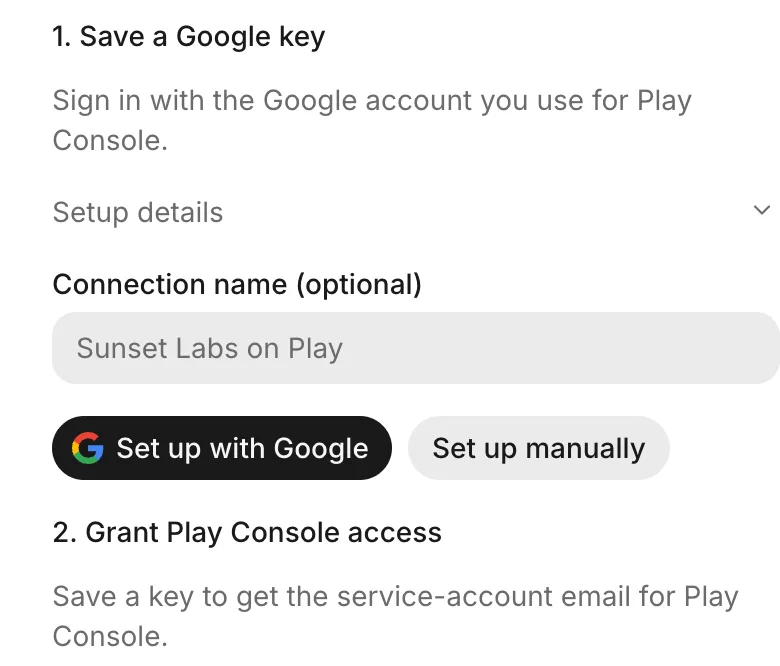
To let FlutterFlow create the key for you, follow these steps:
- Under 1. Save a Google key, in Connection name (optional), enter a name that you’ll recognize when you choose this account for another app.
- Select Set up with Google.
- Sign in with the Google account that you use for Play Console.
FlutterFlow creates or reuses a Google Cloud project named “FlutterFlow Play uploads”, enables the Play API, and creates a service account and a key. Its temporary sign-in access to your Google account ends after setup.
After FlutterFlow saves the key, it shows Google key saved. Next, grant the service account access.
If Google won’t create the project or the key, select an existing project in Choose a Google Cloud project, and then select Use selected project.
Save a key by hand
To make the key yourself in Google Cloud, select Set up manually under 1. Save a Google key. FlutterFlow lists the steps in Google Cloud’s order, with a link to Google Cloud for each step that happens there:
- Create a Google Cloud project. Use the Google account that you use for Play Console. You can select an existing project instead. To use FlutterFlow’s suggested name, select Copy next to Project name.
- Enable the Google Play Android Developer API. Select your Google Cloud project, and then select Enable.
- Create a service account. To use FlutterFlow’s suggested name, select Copy next to Service account name, and then paste it into Google Cloud. Select Create and continue. Skip Google Cloud roles, and then select Continue › Done.
- Download the service-account key. Open the service account, and then select Keys › Add key › Create new key › JSON. Keep the file private because the key grants access to your apps. If your organization disables key creation, ask your Google Cloud administrator to allow service-account keys.
- Upload the key. Select Choose file, and then choose the
.jsonfile. Optionally, enter a name in Connection name (optional). Then select Save key.
Only FlutterFlow’s connection to Google Play uses the key. The agent never reads it.
Grant Play Console access
Google Play accepts uploads from the service account only after you invite it in Play Console. FlutterFlow can’t send this invitation for you. The permissions apply to your whole Play Console account, so you grant them one time for all your apps.
After you save a key, follow these steps under 2. Grant Play Console access:
- Next to Email address, select Copy.
- Select Open Users and permissions. In Play Console, select Invite new users, and then paste the address into the email address field.
- Select these Account permissions:
- Release to production, exclude devices, and use Play App Signing
- Release apps to testing tracks
- Manage testing tracks and edit tester lists
- Manage store presence
- Select Invite user. The permissions can take some time to apply.
- In FlutterFlow, select Continue to app setup.
Key saved or Connected
After setup, the Google Play drawer shows one of these statuses for your Google Play account:
| Status | What it means |
|---|---|
| Key saved | FlutterFlow has your key, but it hasn’t reached your app in Play Console with it yet. |
| Connected | FlutterFlow found your app in Google Play with this key. |
| Needs attention | Play Console refused FlutterFlow’s last request with this key. |
When FlutterFlow can reach your app, the 2. Grant Play Console access part says FlutterFlow found your app in Google Play.
Choose a saved account
When you’ve already saved a Google Play account and your app doesn’t use one yet, the connect step lists your saved Google Play accounts, starting with the one that most of your apps use.
- Select the account that your app is on.
- Select Use followed by the account’s name.
To connect a different account instead, select Connect another account.
To change the account that your app uses, select Change next to the account’s name.
When the agent asks
If the agent needs a Google Play key while it works in a thread, it shows a card that does the same thing as the connect step in Releases:
- If your app already uses a Google Play account, the card names it. Select Continue, or select Change to choose another account.
- If you have saved Google Play accounts, select one, and then select Use followed by its name.
- Otherwise, the card offers Set up with Google. To upload a
.jsonkey that you made yourself, select Make it by hand instead, select Choose file, add the.jsonkey, and then select Connect.
The card doesn’t include the Play Console invitation. After you connect from a thread, grant the service account access from the connect step in Releases.
Troubleshooting
For a key that Play Console refuses or other release problems, see Troubleshoot phone builds and store releases.